Last updated: Nov 12, 2022
The WiFi is always active on your Apple TV. It functions in this way, keeping you entertained. When multiple WiFi options are available, the WiFi may occasionally flip back and forth. You need to take a certain set of actions in order to return your Apple TV to your favorite WiFi network. The full process is described below.
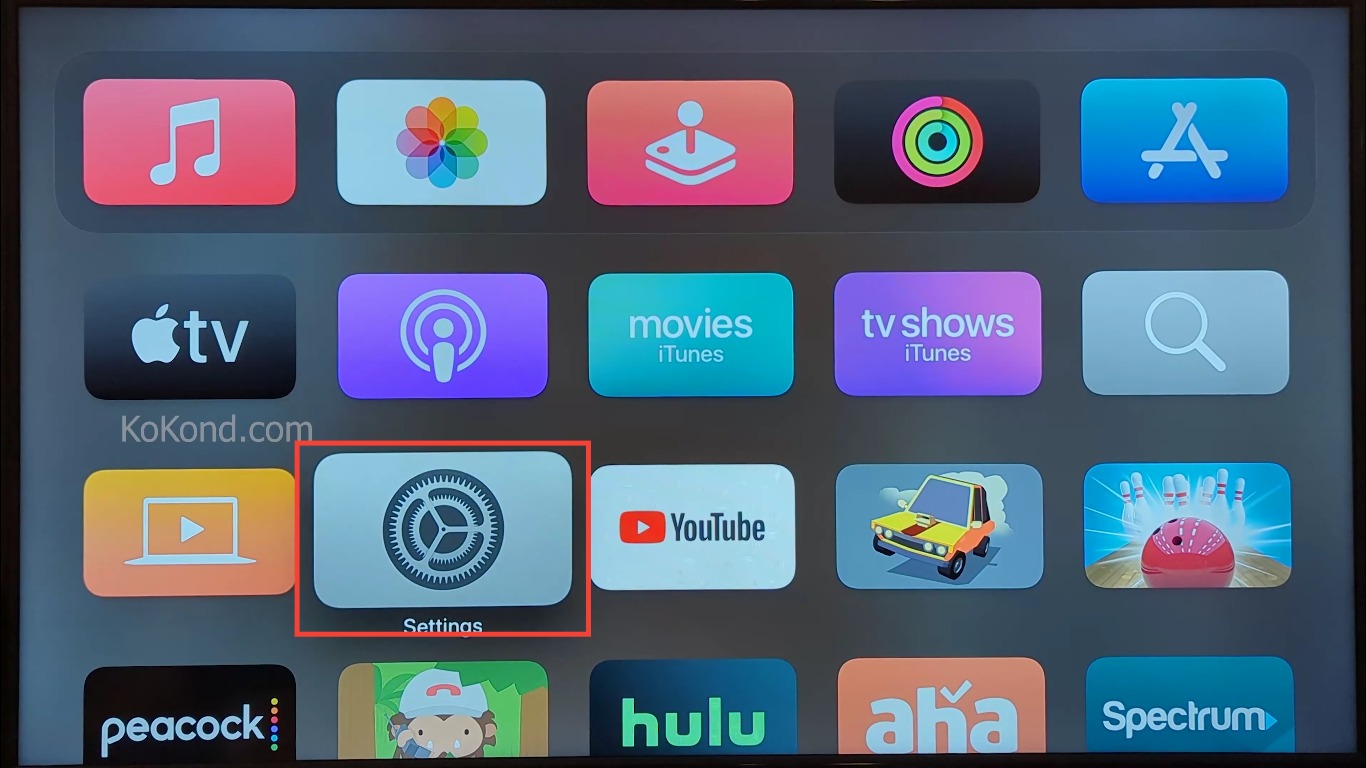
Step 1: Launch Settings on Your Apple TV
Launch Settings after turning on your Apple TV.
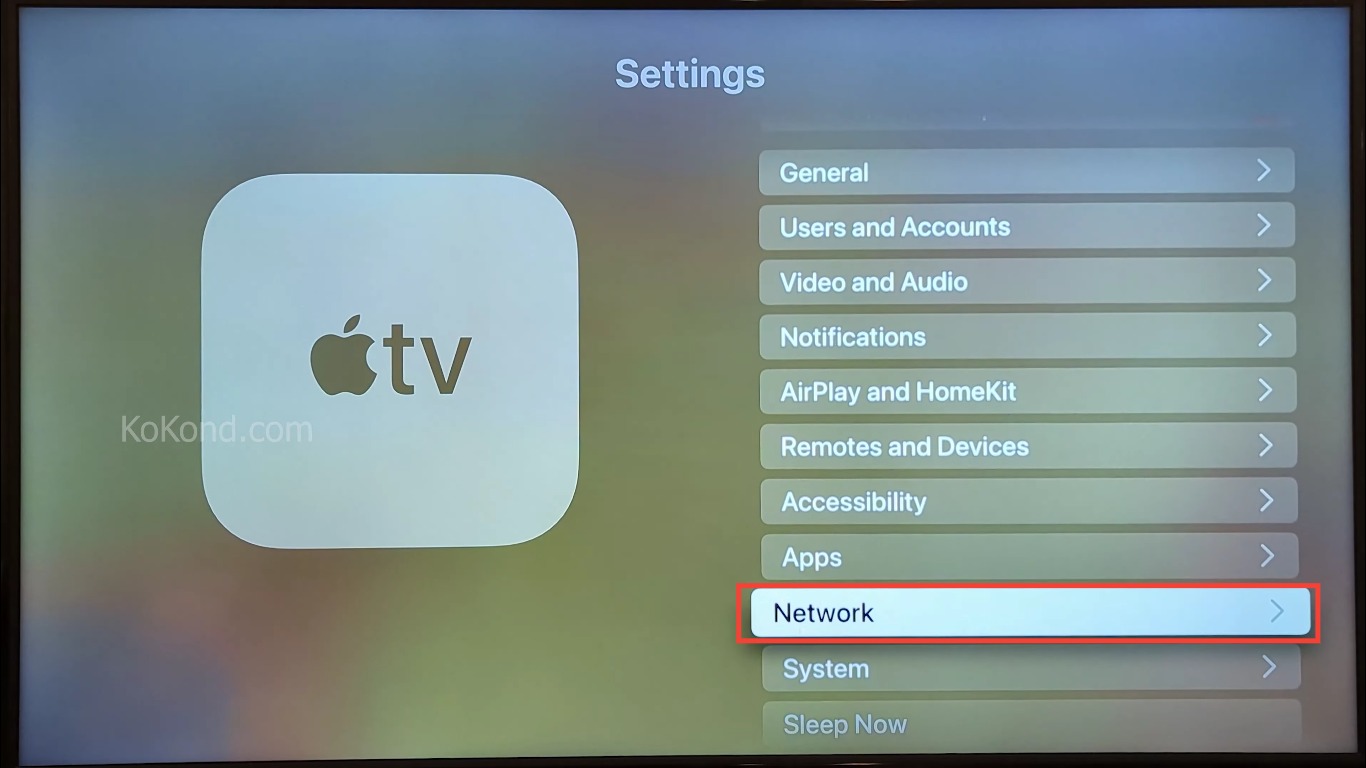
Step 2: Select Network
The Settings menu will appear on the following screen. Choose Network from the list of options.
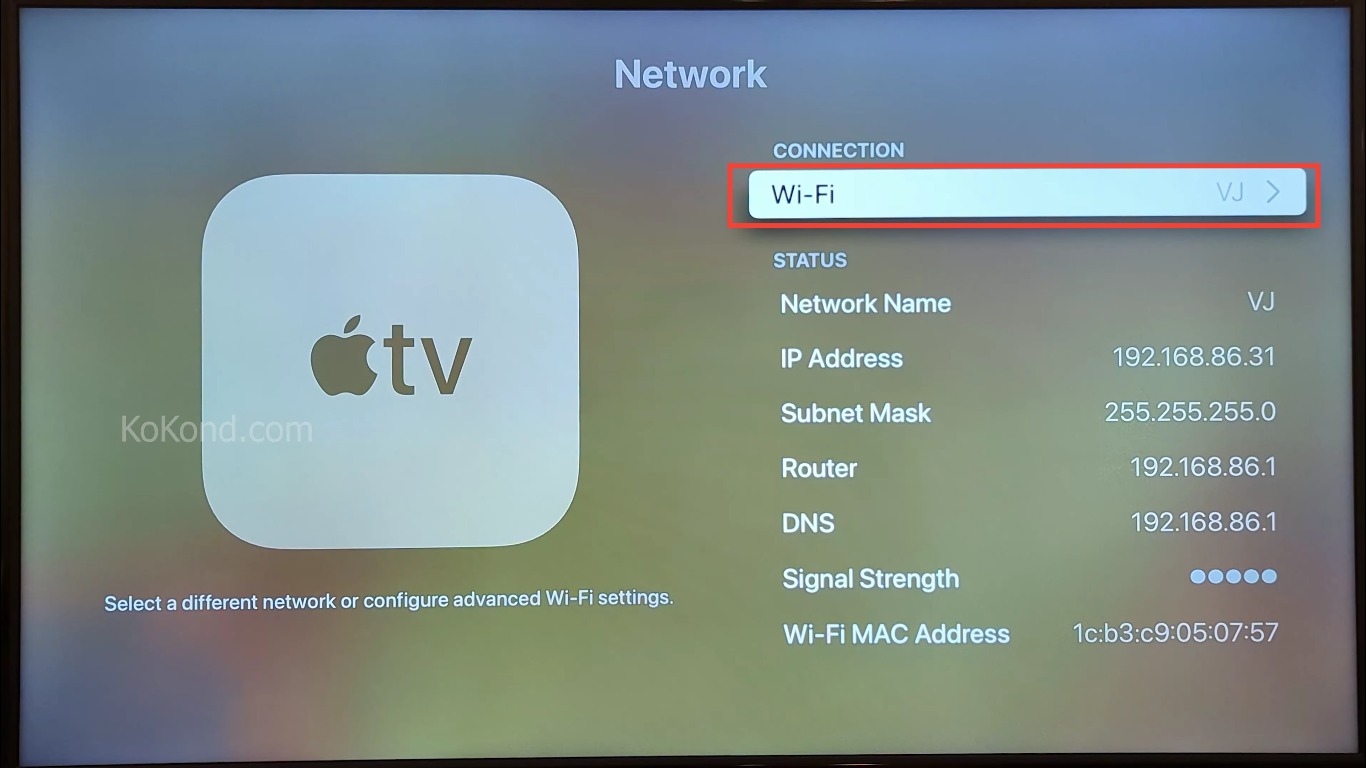
Step 3: Select WiFi
On the ensuing screen, you must select WiFi. The network you are presently connected to will be displayed here.
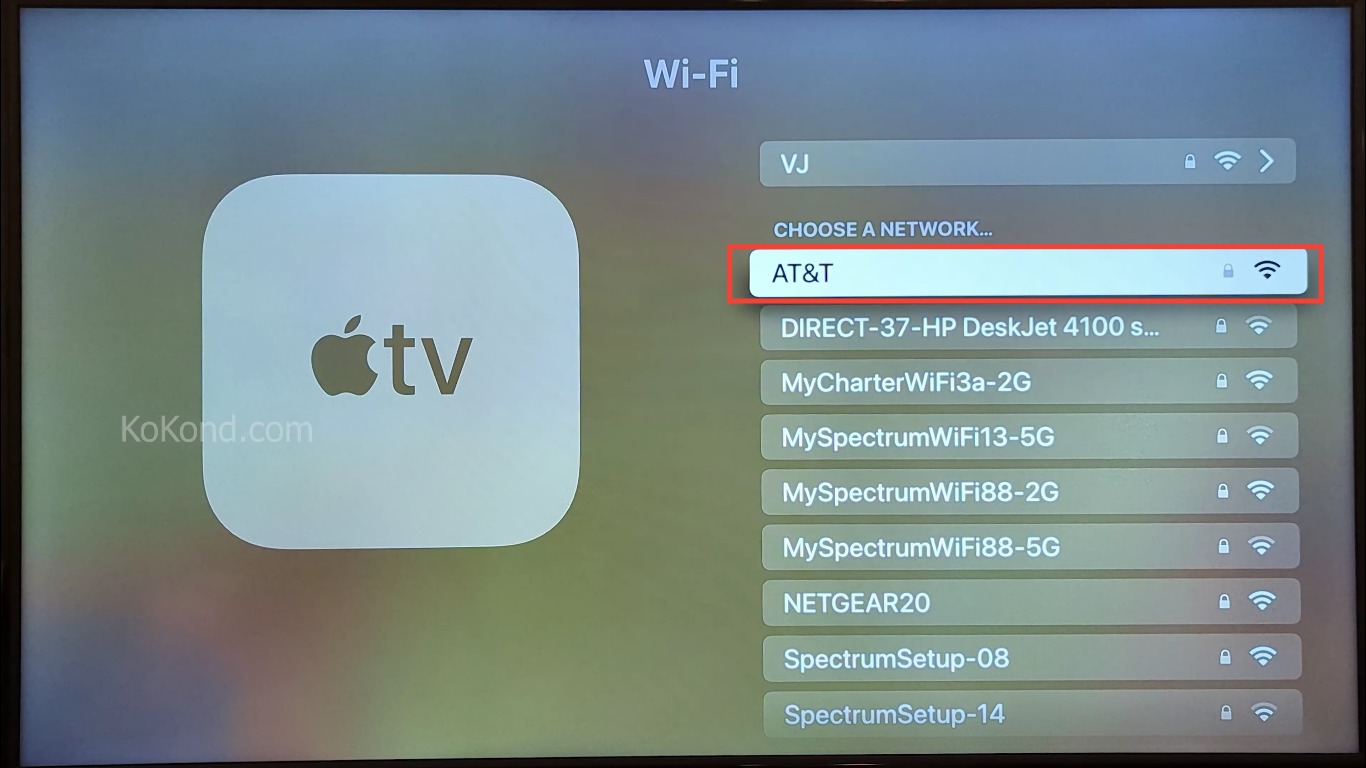
Step 4: Select Your Preferred Network
You will see a list of accessible WiFi networks on the following screen. Here, pick the one you prefer and tap on it.
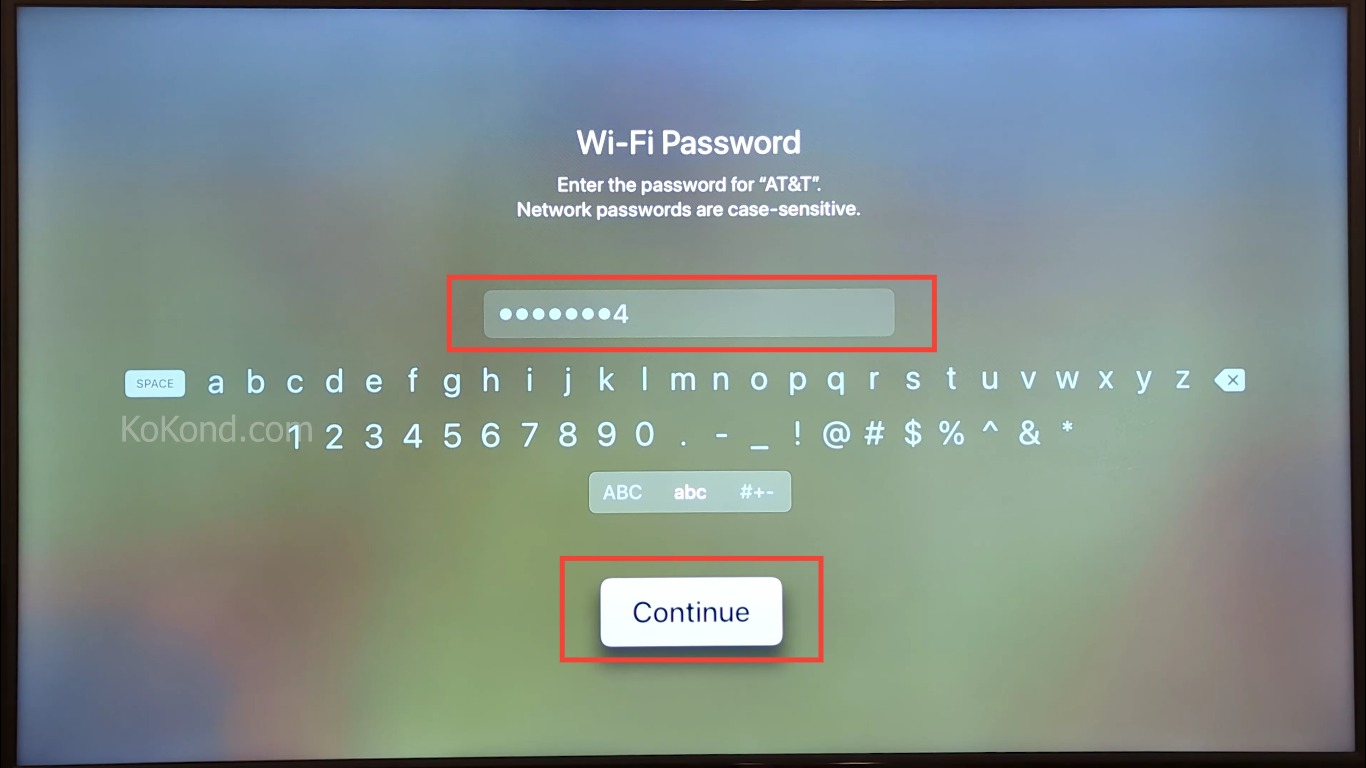
Step 5: Enter the WiFi Password and Select Continue
You’ll be prompted to enter the WiFi network password on the next screen. Type in the right password, then click Continue.
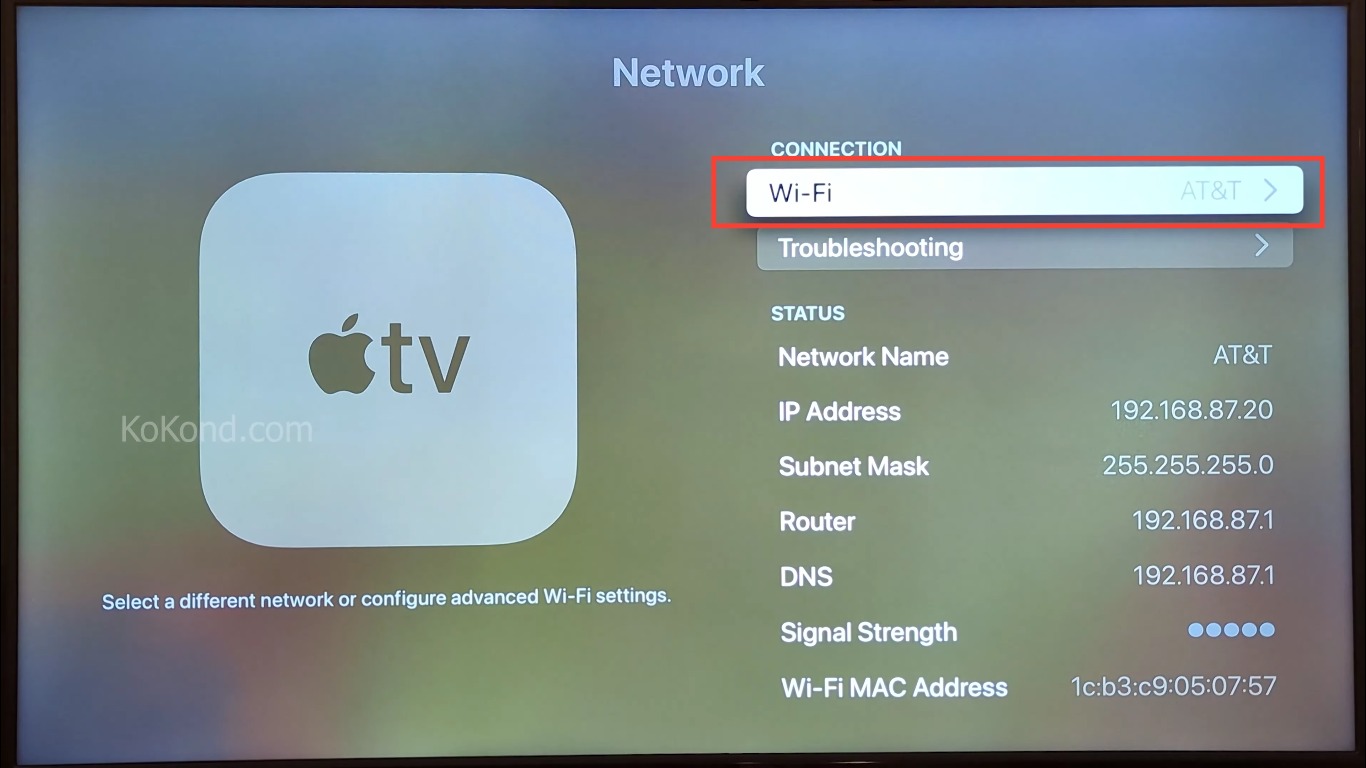
Step 6: Chosen Network Will Be Connected
The Apple TV will now connect to the selected network in 4-5 seconds. When finished, you will be directed to the Network Menu, where the chosen network name will be shown next to the WiFi option.
Conclusion
This post attempted to provide a thorough explanation of how to change the WiFi on your Apple TV. I hope the detailed method will be useful to you. Keep visiting us for additional information on how to use Apple TV. If you enjoyed the article, kindly forward it to your loved ones.
Video

Passionate about tech gadgets, I turned my love into a blogging journey. Specializing in how-to articles, I unravel the intricacies of gadgets, providing step-by-step guides. Join me in exploring the tech universe, where every device holds endless possibilities. Let’s simplify the complexities and enhance your tech experience together.