Unlock a vibrant visual experience by showcasing your Facebook photos on the Echo Show 5. In this guide, discover the seamless integration of Facebook with your Echo Show 5 display. Follow these steps to bring your cherished memories to life, creating a personalized and dynamic photo slideshow. Elevate your viewing experience with the simple connection of Facebook to your Echo Show 5. Let’s delve into the steps for an immersive photo-sharing experience.
Now let’s explore the procedure.
Part 1: Link Facebook Account with Alexa App
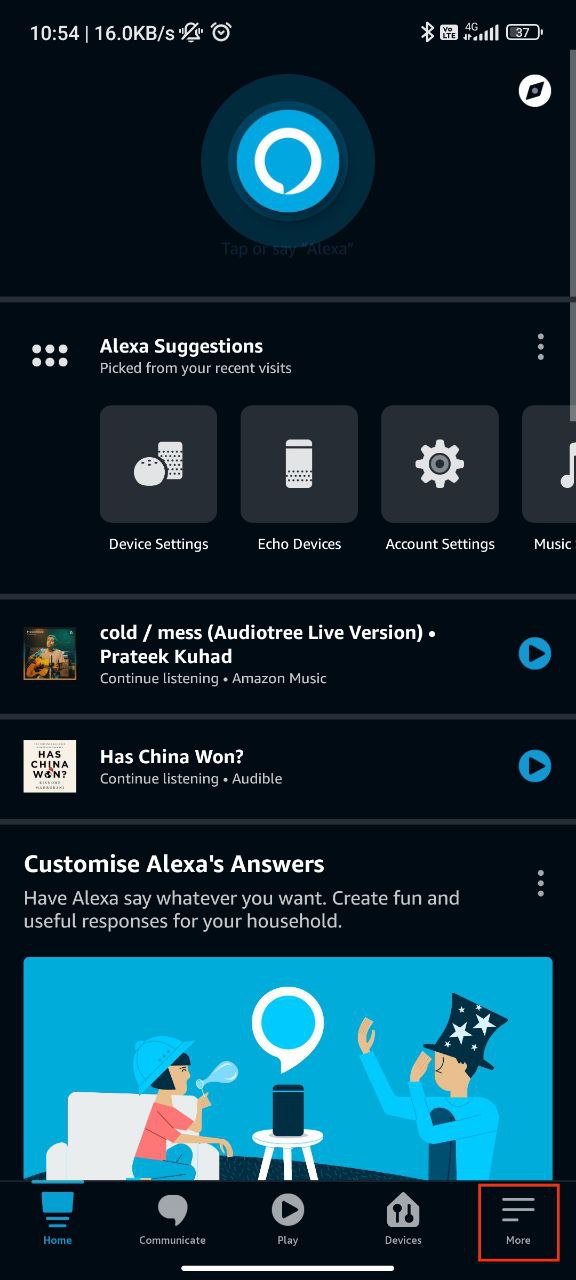
Step 1: Open the Alexa App and Tap on More
Get your phone’s Alexa app open. Locate the bottom-right corner of the screen that just appeared. There is a “More” option there. To continue, you must tap the same.
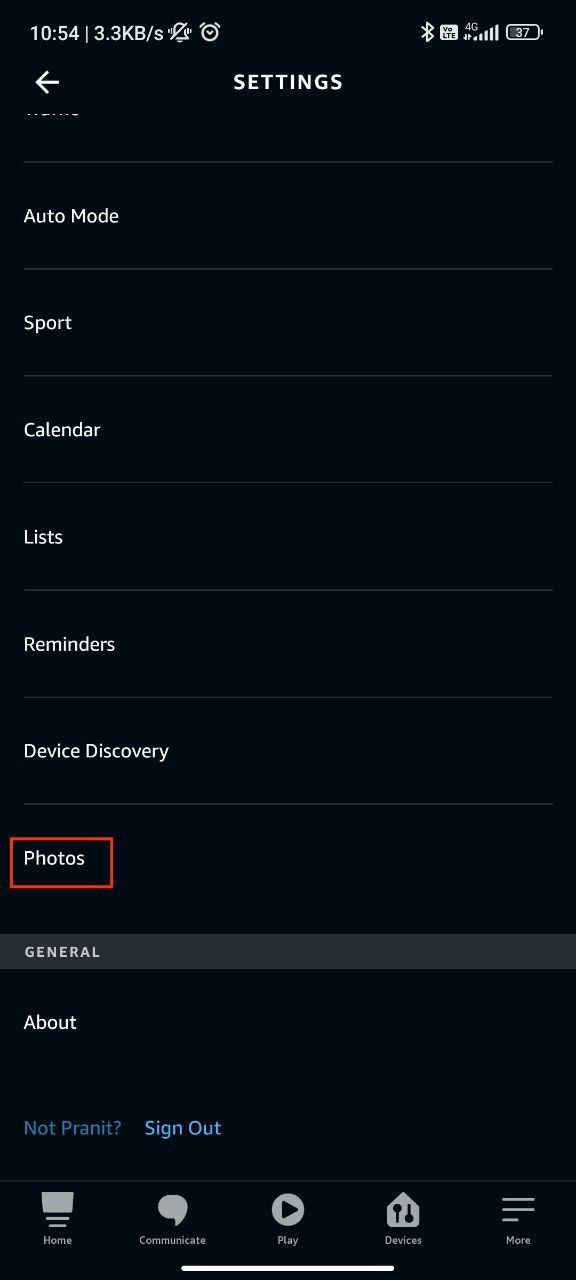
Step 2: Tap on Settings and Choose Photos
You must choose the Settings menu option on the screen that appears after that. And on the following screen, you must scroll down and select Photos.

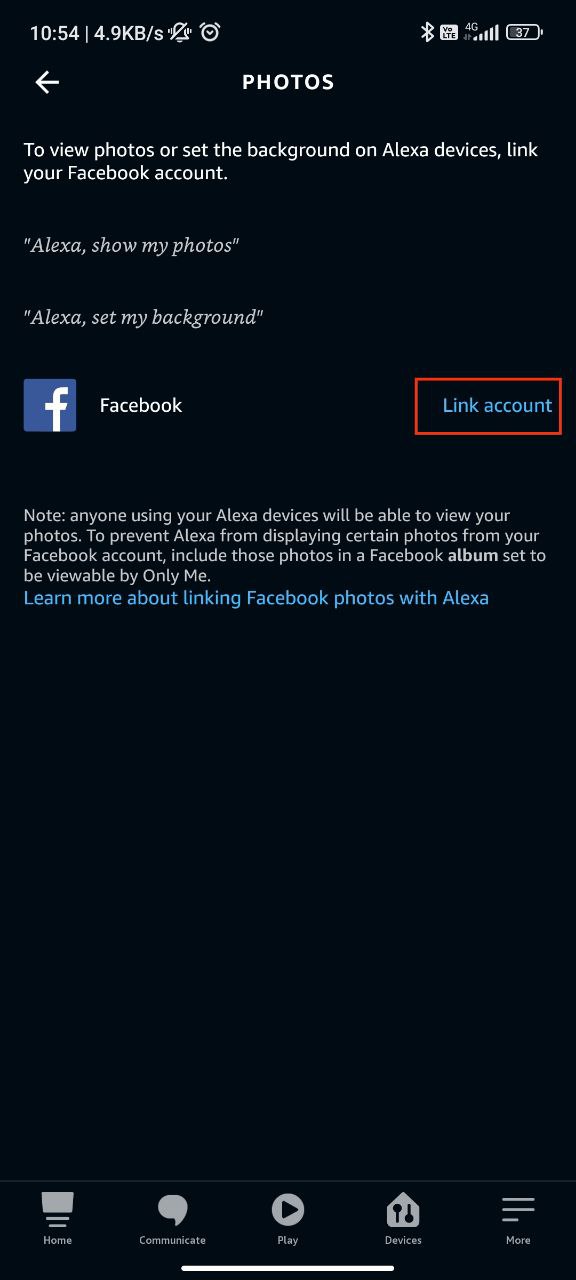
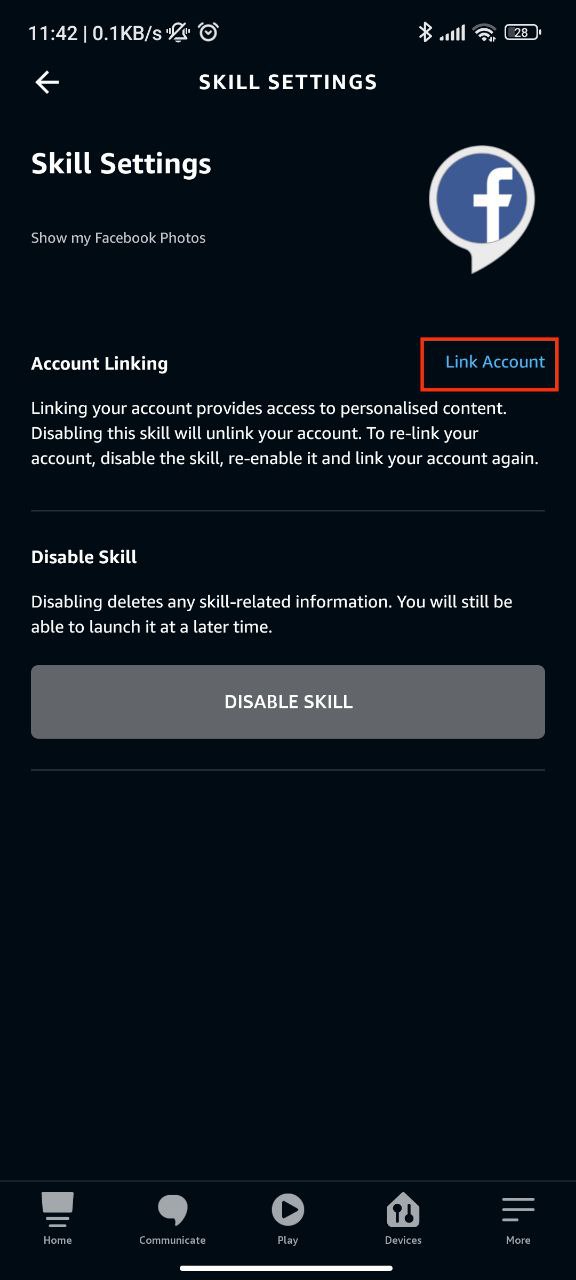
Step 3: Tap Link Account Adjacent to Facebook
You must tap the blue text that reads “Link Account” next to the Facebook icon. You can use this option to connect your Echo Show device to your Facebook account, from which you want to display images.
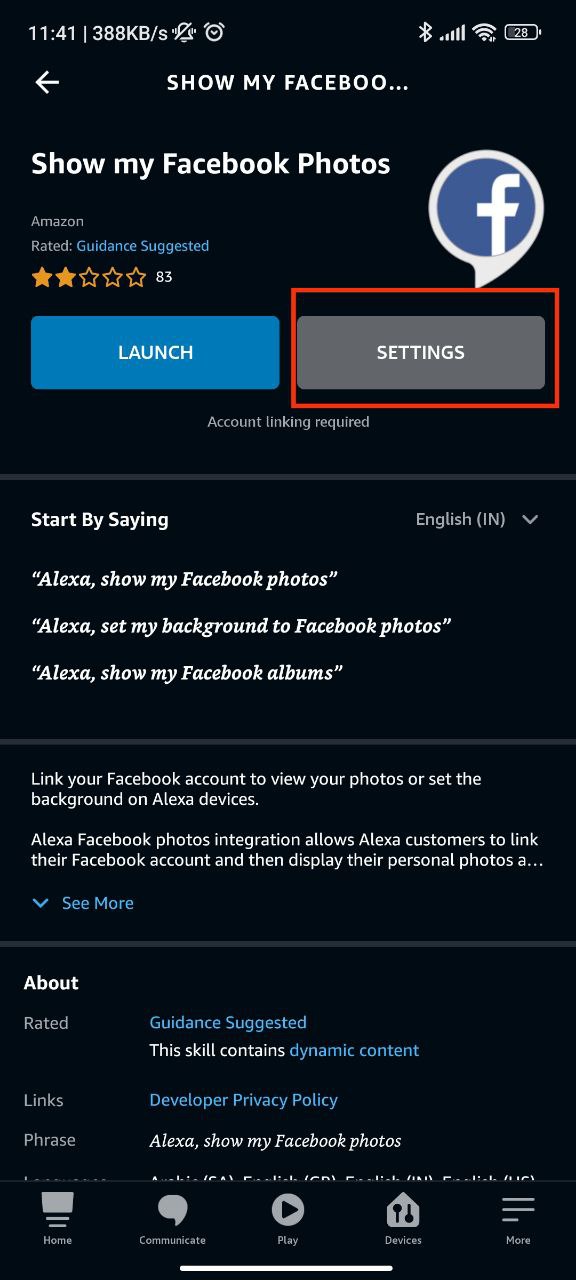
Step 4: Tap on Settings
You will be directed to a screen with the headline “Show my Facebook Photos”. This is a skill for Alexa. You must tap on the Settings button at the top of this screen.
Step 5: Tap on Link Account
You have the option to link your Facebook account on the screen that follows once it loads. You must tap the blue text that says “Link Account.”
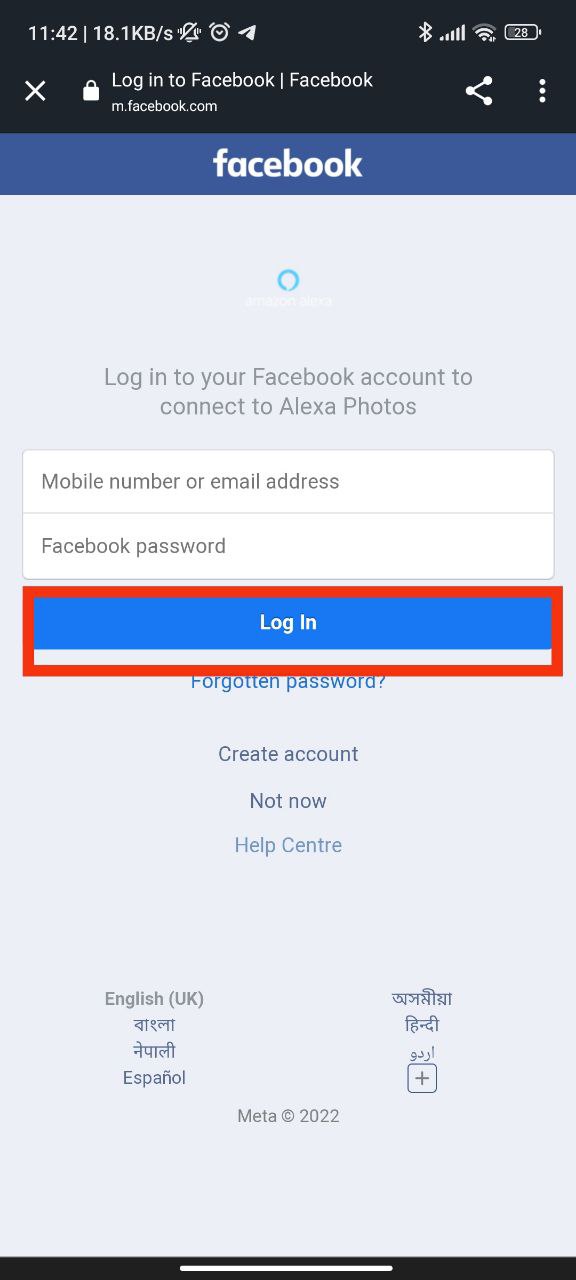
Step 6: Fill In Your Facebook Login Credentials
On the following screen, you will be prompted to input your Facebook login information. Make sure these are the login details for the account you want to link with your Facebook account.
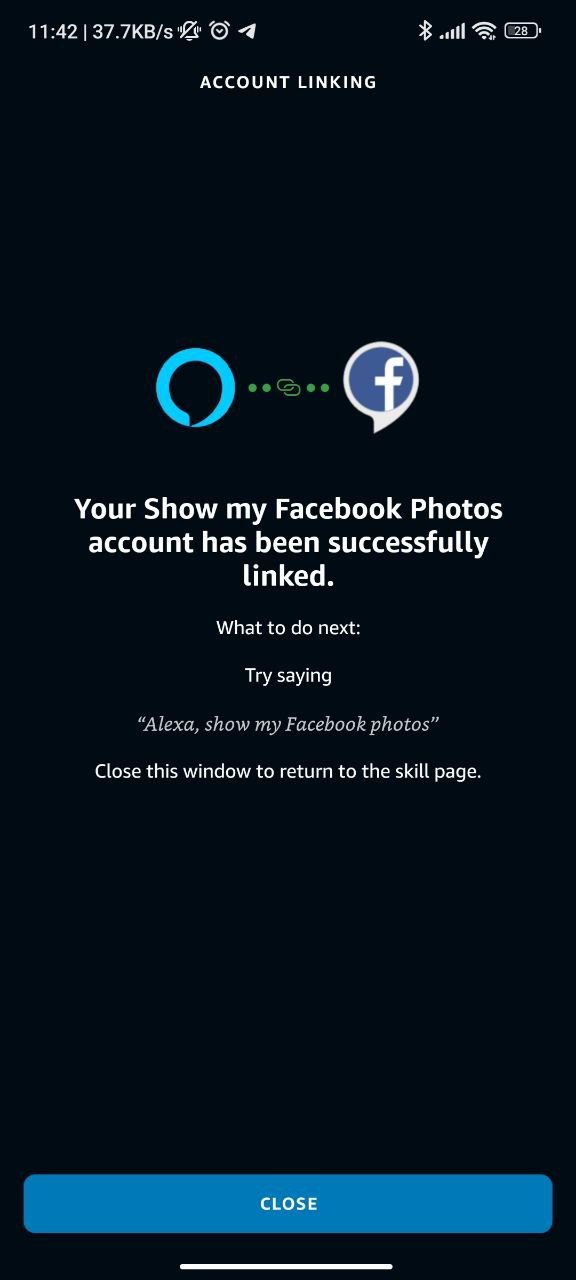
Step 7: Completion Message
A success message will appear on the following screen. The Show my Facebook photos account has been successfully linked, according to this notification.
Part 2: View the Photos on the Echo Show
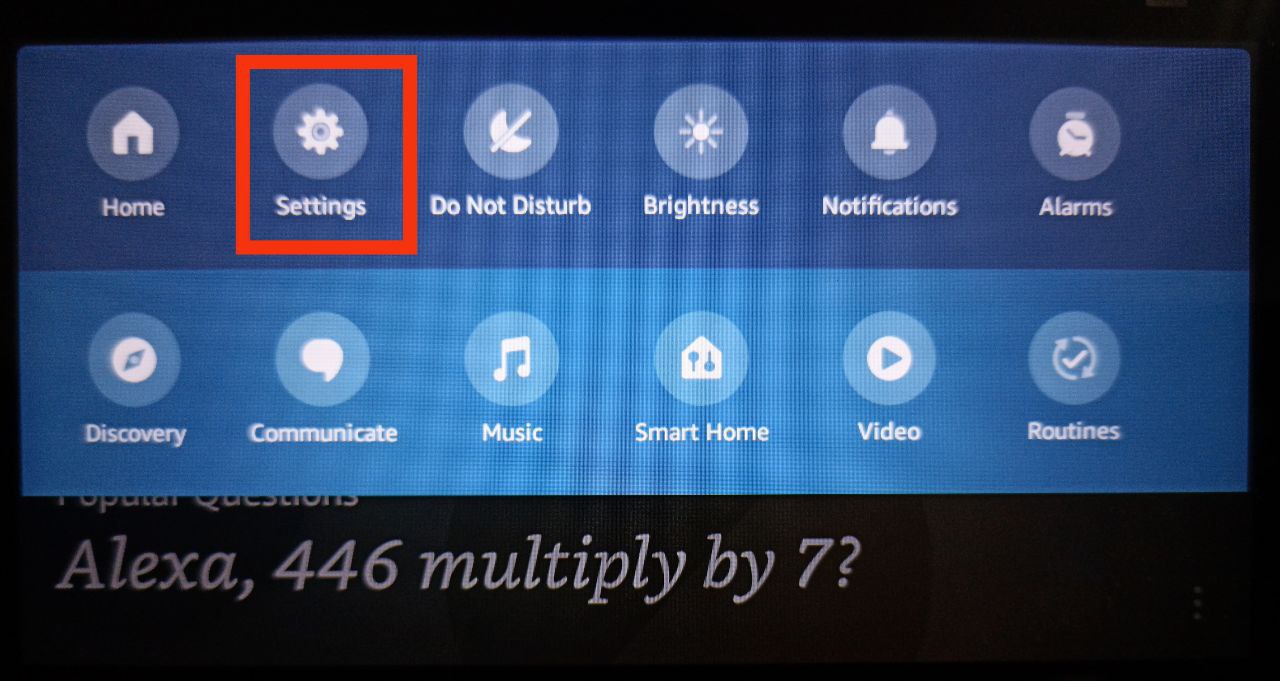
Step 1: Tap on Settings
To access a menu, swipe downward on the home screen. Tap Settings from the menu. Alternately, you might tell Alexa to go to the settings by saying, “Alexa, go to settings.”
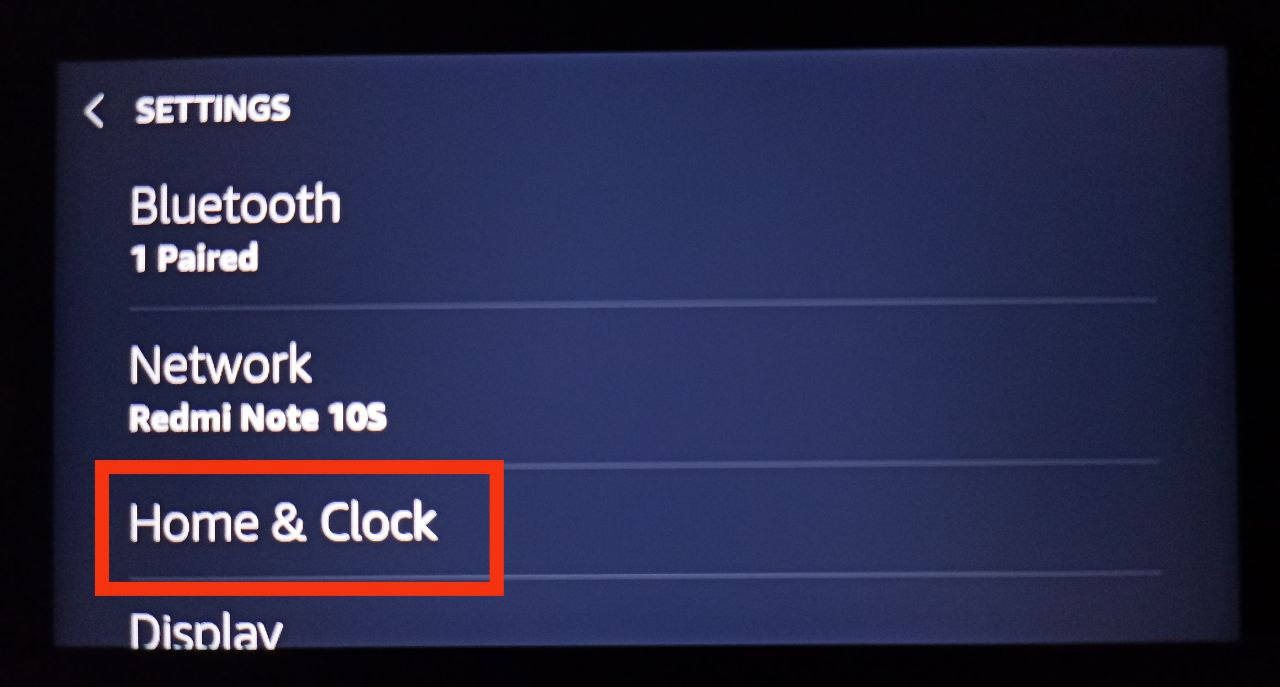
Step 2: Tap on Home & Clock
Simply tap on Home & Clock when the settings option appears on the following screen. The third choice from the top is it.
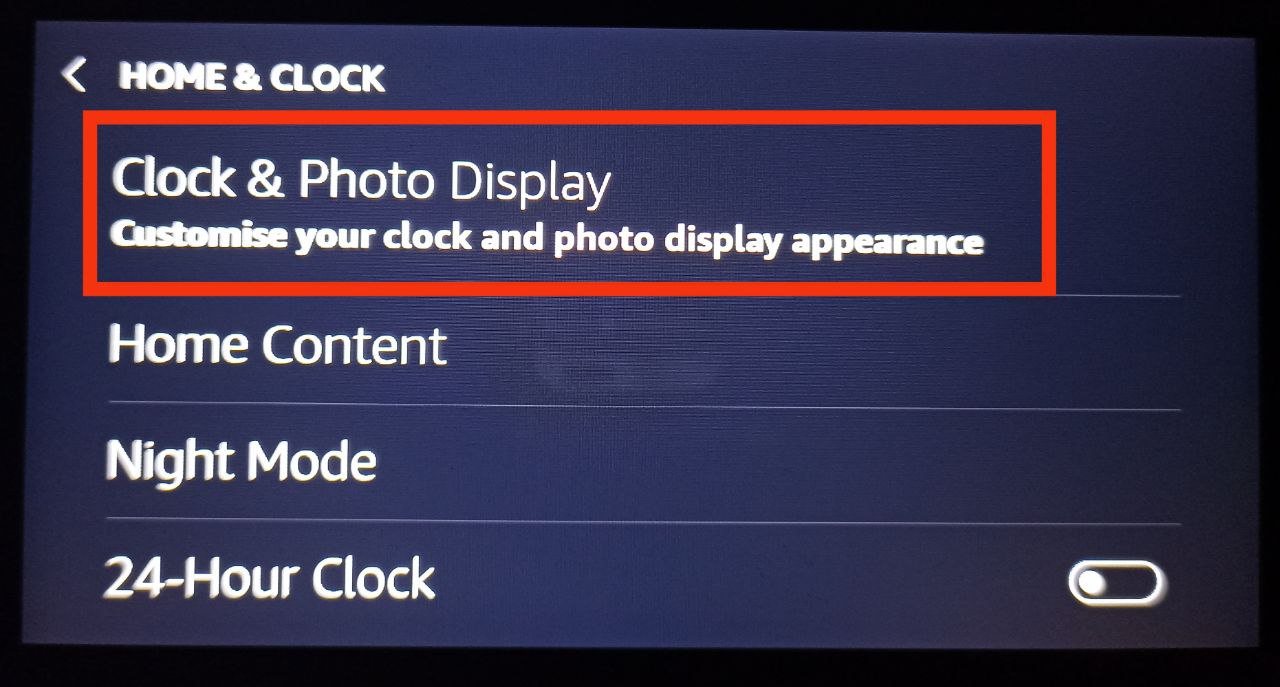
Step 3: Tap on Clock & Photo Display.
Tap on Clock & Photo Display, the first item on the next menu that opens. You can change the look of your clock and photo display here.
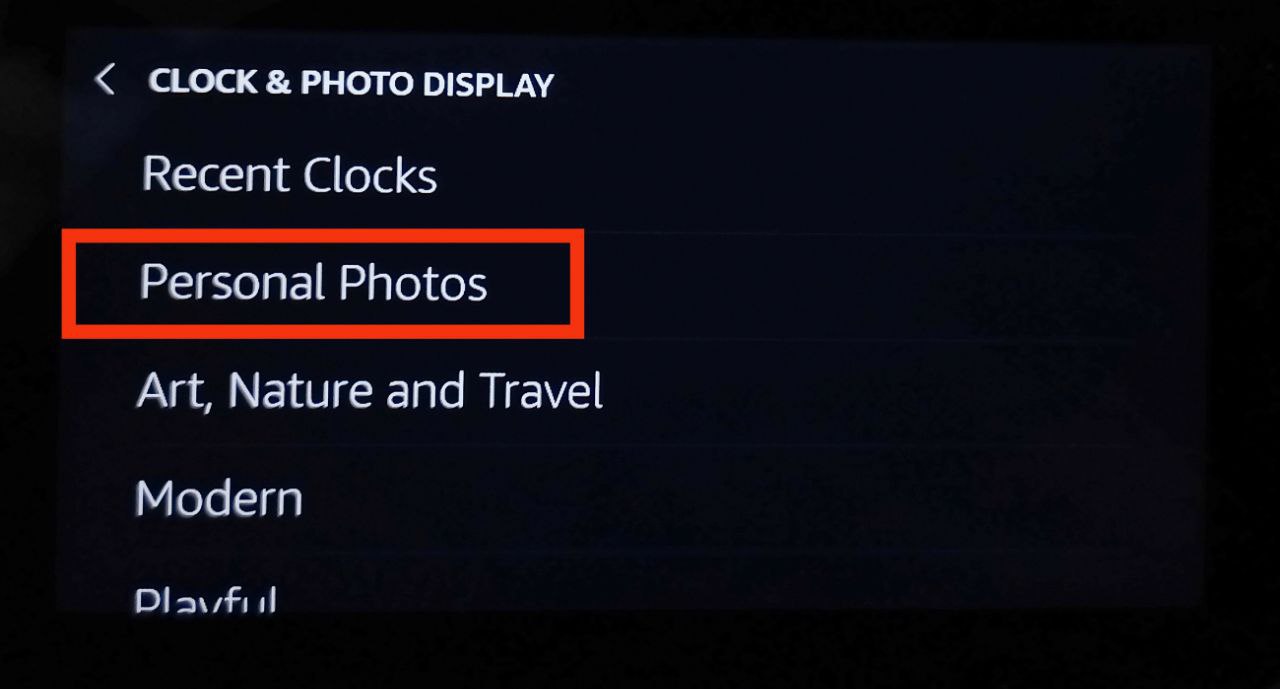
Step 4: Tap on Personal Photos & Choose Photo Display
You must select Personal Photos from the following menu that opens. This is the option for any personal photo display on your Echo Show device, whether it’s from your phone or Facebook. You can access a new menu by clicking on Personal Photos. There, you must tap on the Photo Display.

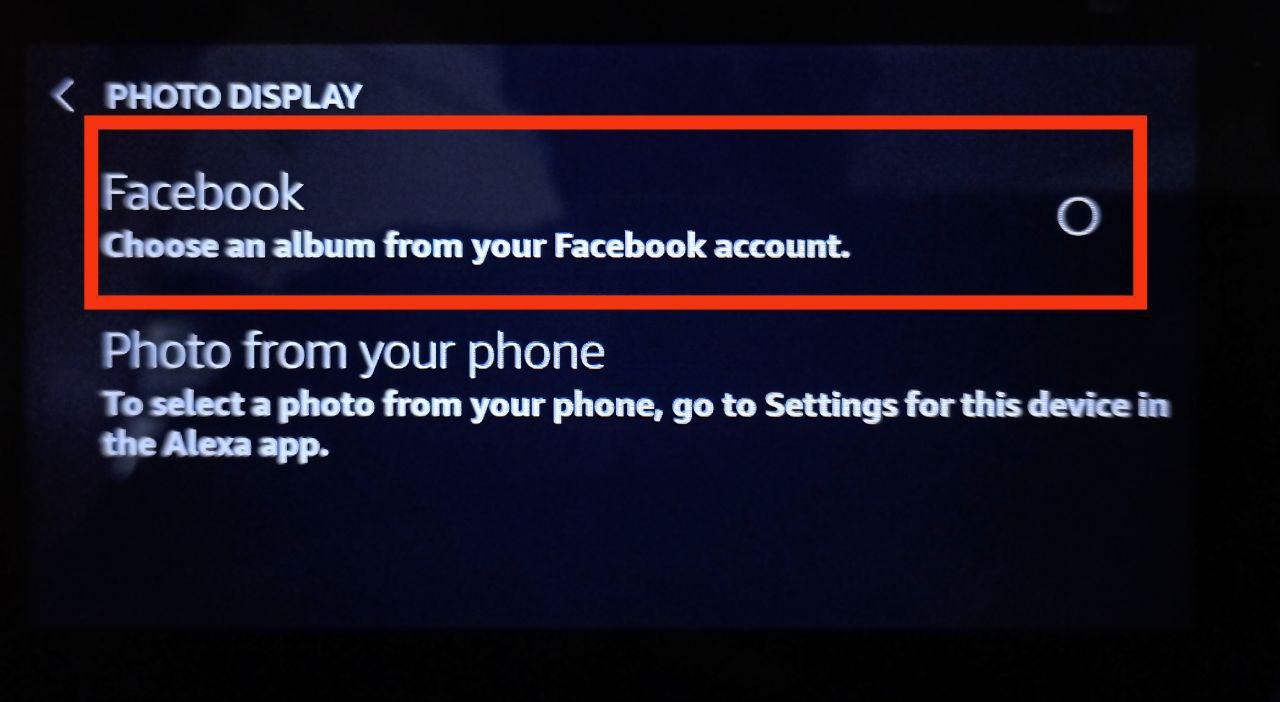
Step 5: Tap on Facebook
in the Photo Display menu. Select Facebook by tapping it. This will give you the option to display the images in a certain album from your associated Facebook account.
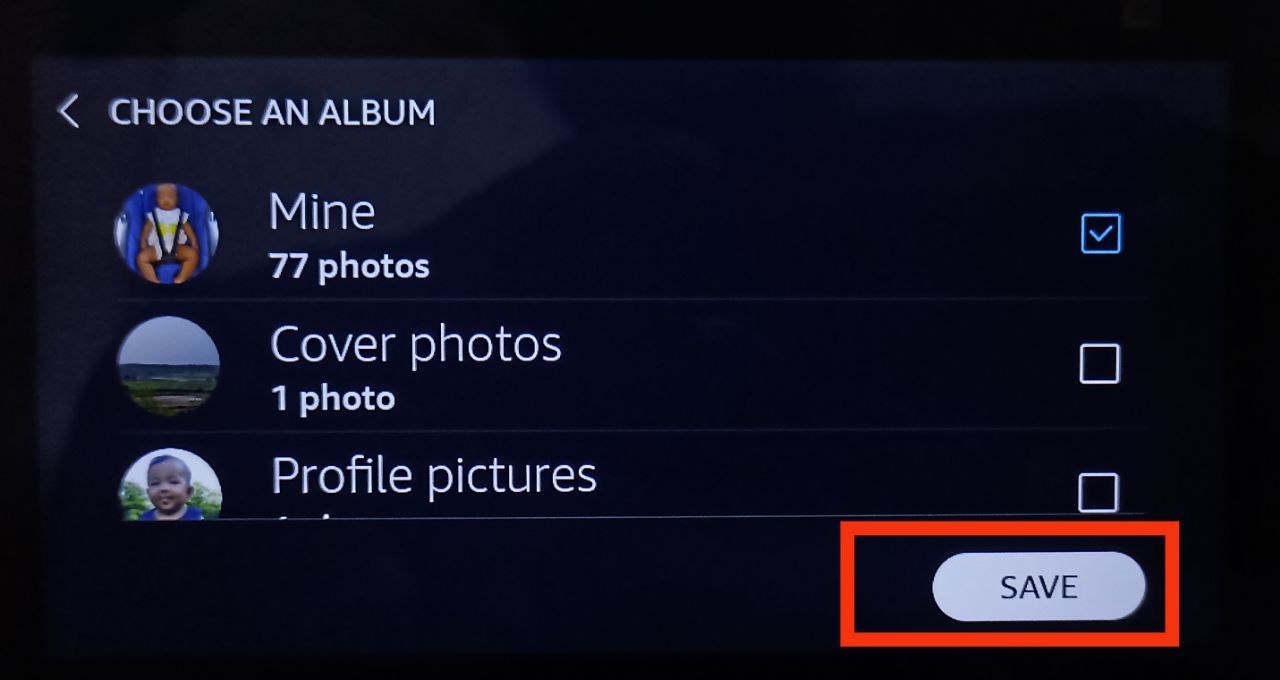
Step 6: Choose the Album
Your Facebook albums will be listed on the next screen. The Album from which you want to display images must be selected, and then you must hit the Save button.
Part 3: Commands to be Given to Alexa for Displaying the Pictures
After completing all of the aforementioned procedures, you must tell Alexa to show the photos by using one of the following commands:
- “Alexa, show my Facebook photos.”
- “Alexa, set my background to Facebook photos.”
- “Alexa, show my Facebook albums.”
Troubleshooting Tips for Displaying Facebook Photos on Echo Show 5
- Check Facebook Permissions: Make sure you have given away the necessary permissions for the Echo Show to access your Facebook photos. Go to your Facebook settings, locate the “Apps and Websites” section, and ensure that the Echo Show 5 or Amazon Alexa app has the appropriate permissions to access your photos.
- Link Amazon and Facebook Accounts: Link your Amazon and Facebook accounts by confirming their connection. Open the Alexa app on your smartphone, navigate to Settings > Account Settings > Amazon Alexa, and link your Facebook account if it’s not already linked.
- Enable Photo Sharing: On the Echo Show 5, say “Alexa, show my Facebook photos” to see if the device is able to access your photos. If it’s not working, try disabling and re-enabling the photo-sharing feature in the Alexa app. Go to Devices > Echo & Alexa > [Your Echo Show] > Photos > Facebook, and toggle the switch off and then on again.
- Check Your Internet Connection: Ensure that both your Echo Show 5 and the device you are using to access the Alexa app have a stable internet connection. Poor connectivity can lead to issues when fetching photos from Facebook.
- Update Alexa App and Firmware: Make sure your Alexa app and Echo Show 5 firmware are up-to-date. Outdated software can lead to compatibility issues. Check for updates in the respective app stores.
- Reauthorize Facebook Access: If the permissions or access have changed on your Facebook account, you might need to reauthorize the Echo Show’s access. Visit the Facebook settings for apps and revoke access to the Echo Show. Then, try linking the accounts and granting permissions again.
- Check Privacy Settings: Verify that you have set your Facebook photo albums to “Public” or at least made them accessible to the people or groups you want to share them with. If the albums are set to private, the Echo Show 5 may not be able to retrieve the photos.
- Try Different Voice Commands: Experiment with different voice commands, such as “Alexa, show my Facebook album named [Album Name],” or “Alexa, show photos from my Facebook account.” Sometimes using specific album names can help.
- Restart Echo Show: Sometimes a simple restart can resolve connectivity issues. Try restarting your Echo Show by unplugging it from the power source, waiting for a few seconds, and then plugging it back in.
Frequently Asked Questions
1. How can I show my Facebook photos on my Echo Show 5?
Ensure the linkage of your Amazon and Facebook accounts to display your Facebook photos on your Echo Show 5. Then, use voice commands like “Alexa, show my Facebook photos” to initiate the display. Make sure you’ve granted the necessary permissions and set your photo albums to a compatible privacy setting.
2. Why is my Echo Show 5 not showing my Facebook photos?
There could be several reasons for this issue. Check if you’ve granted the required permissions for the Echo Show in your Facebook settings. Make sure your Amazon and Facebook accounts are linked, your internet connection is stable, and your Echo Show’s software is up-to-date. Also, verify your album privacy settings on Facebook.
3. Can I display specific Facebook albums on the Echo Show 5?
Yes, you can display specific Facebook albums on your Echo Show 5. Use voice commands like “Alexa, show my Facebook album named [Album Name]” to display a particular album. Remember that the album name should match exactly.
4. How do I link my Facebook account with my Echo Show 5?
Open the Alexa app on your smartphone, go to Settings > Account Settings > Amazon Alexa, and link your Facebook account. Follow the prompts to log in and grant the necessary permissions for accessing photos.
5. What do I do if my Facebook albums are set to private?
If your Facebook albums are set to private, the Echo Show won’t be able to access them. Change the album’s privacy setting to “Friends” or “Public” to allow the Echo Show to retrieve and display the photos.
6. Why is Alexa not responding to my request to show Facebook photos?
Ensure your Echo Show 5 has a stable internet connection and that you’re using the correct voice command. Check if the Amazon Alexa app and Echo Show firmware are up-to-date. If the issue persists, try restarting the Echo Show or contacting Amazon customer support.
7. Do I need to keep my smartphone connected to the Echo Show 5 for this feature to work?
No, you don’t need to keep your smartphone connected once you’ve linked your Facebook account and granted the necessary permissions. The Echo Show 5 can independently access and display Facebook photos once set up.
8. Can I display photos from multiple Facebook accounts on one Echo Show 5?
No, typically, the Echo Show 5 links to a single Amazon and Facebook account. It is designed to display photos associated with the account to which it is connected.
Final Thought
Facebook image display will take place over the course of three steps. In this article, we have attempted to cover all of the elements and provide a detailed explanation of each part. Moreover, we hope you find, the “How to Show Facebook Photos on Echo Show 5” post helpful. Let us know if you like or dislike it! We value your feedback and would love to hear your thoughts on our article. We’ll keep bringing more since we know you’ll keep visiting! Thank you for your support!

Passionate about tech gadgets, I turned my love into a blogging journey. Specializing in how-to articles, I unravel the intricacies of gadgets, providing step-by-step guides. Join me in exploring the tech universe, where every device holds endless possibilities. Let’s simplify the complexities and enhance your tech experience together.