With the help of this article we will help you learn and understand how to change the theme on your Google Nest Hub in easy steps. This article will help you learn the steps through visual guidance with the help of pictures for each step. You will be done with the process in less than a minute and through this you will also learn to put pictures of your own choice as well. You can even choose to put your personal albums and pictures as your Google Nest Hub background as well. Read on to find out more.
Step 1: Swipe up to Open Menu
To get started, give your Google Nest Hub a light tap to wake it up. Next, just swipe your finger upwards on the screen. You’ll see a small menu with six options pop up. This straightforward action lets you open the menu effortlessly and pick from a range of things you can do with your device.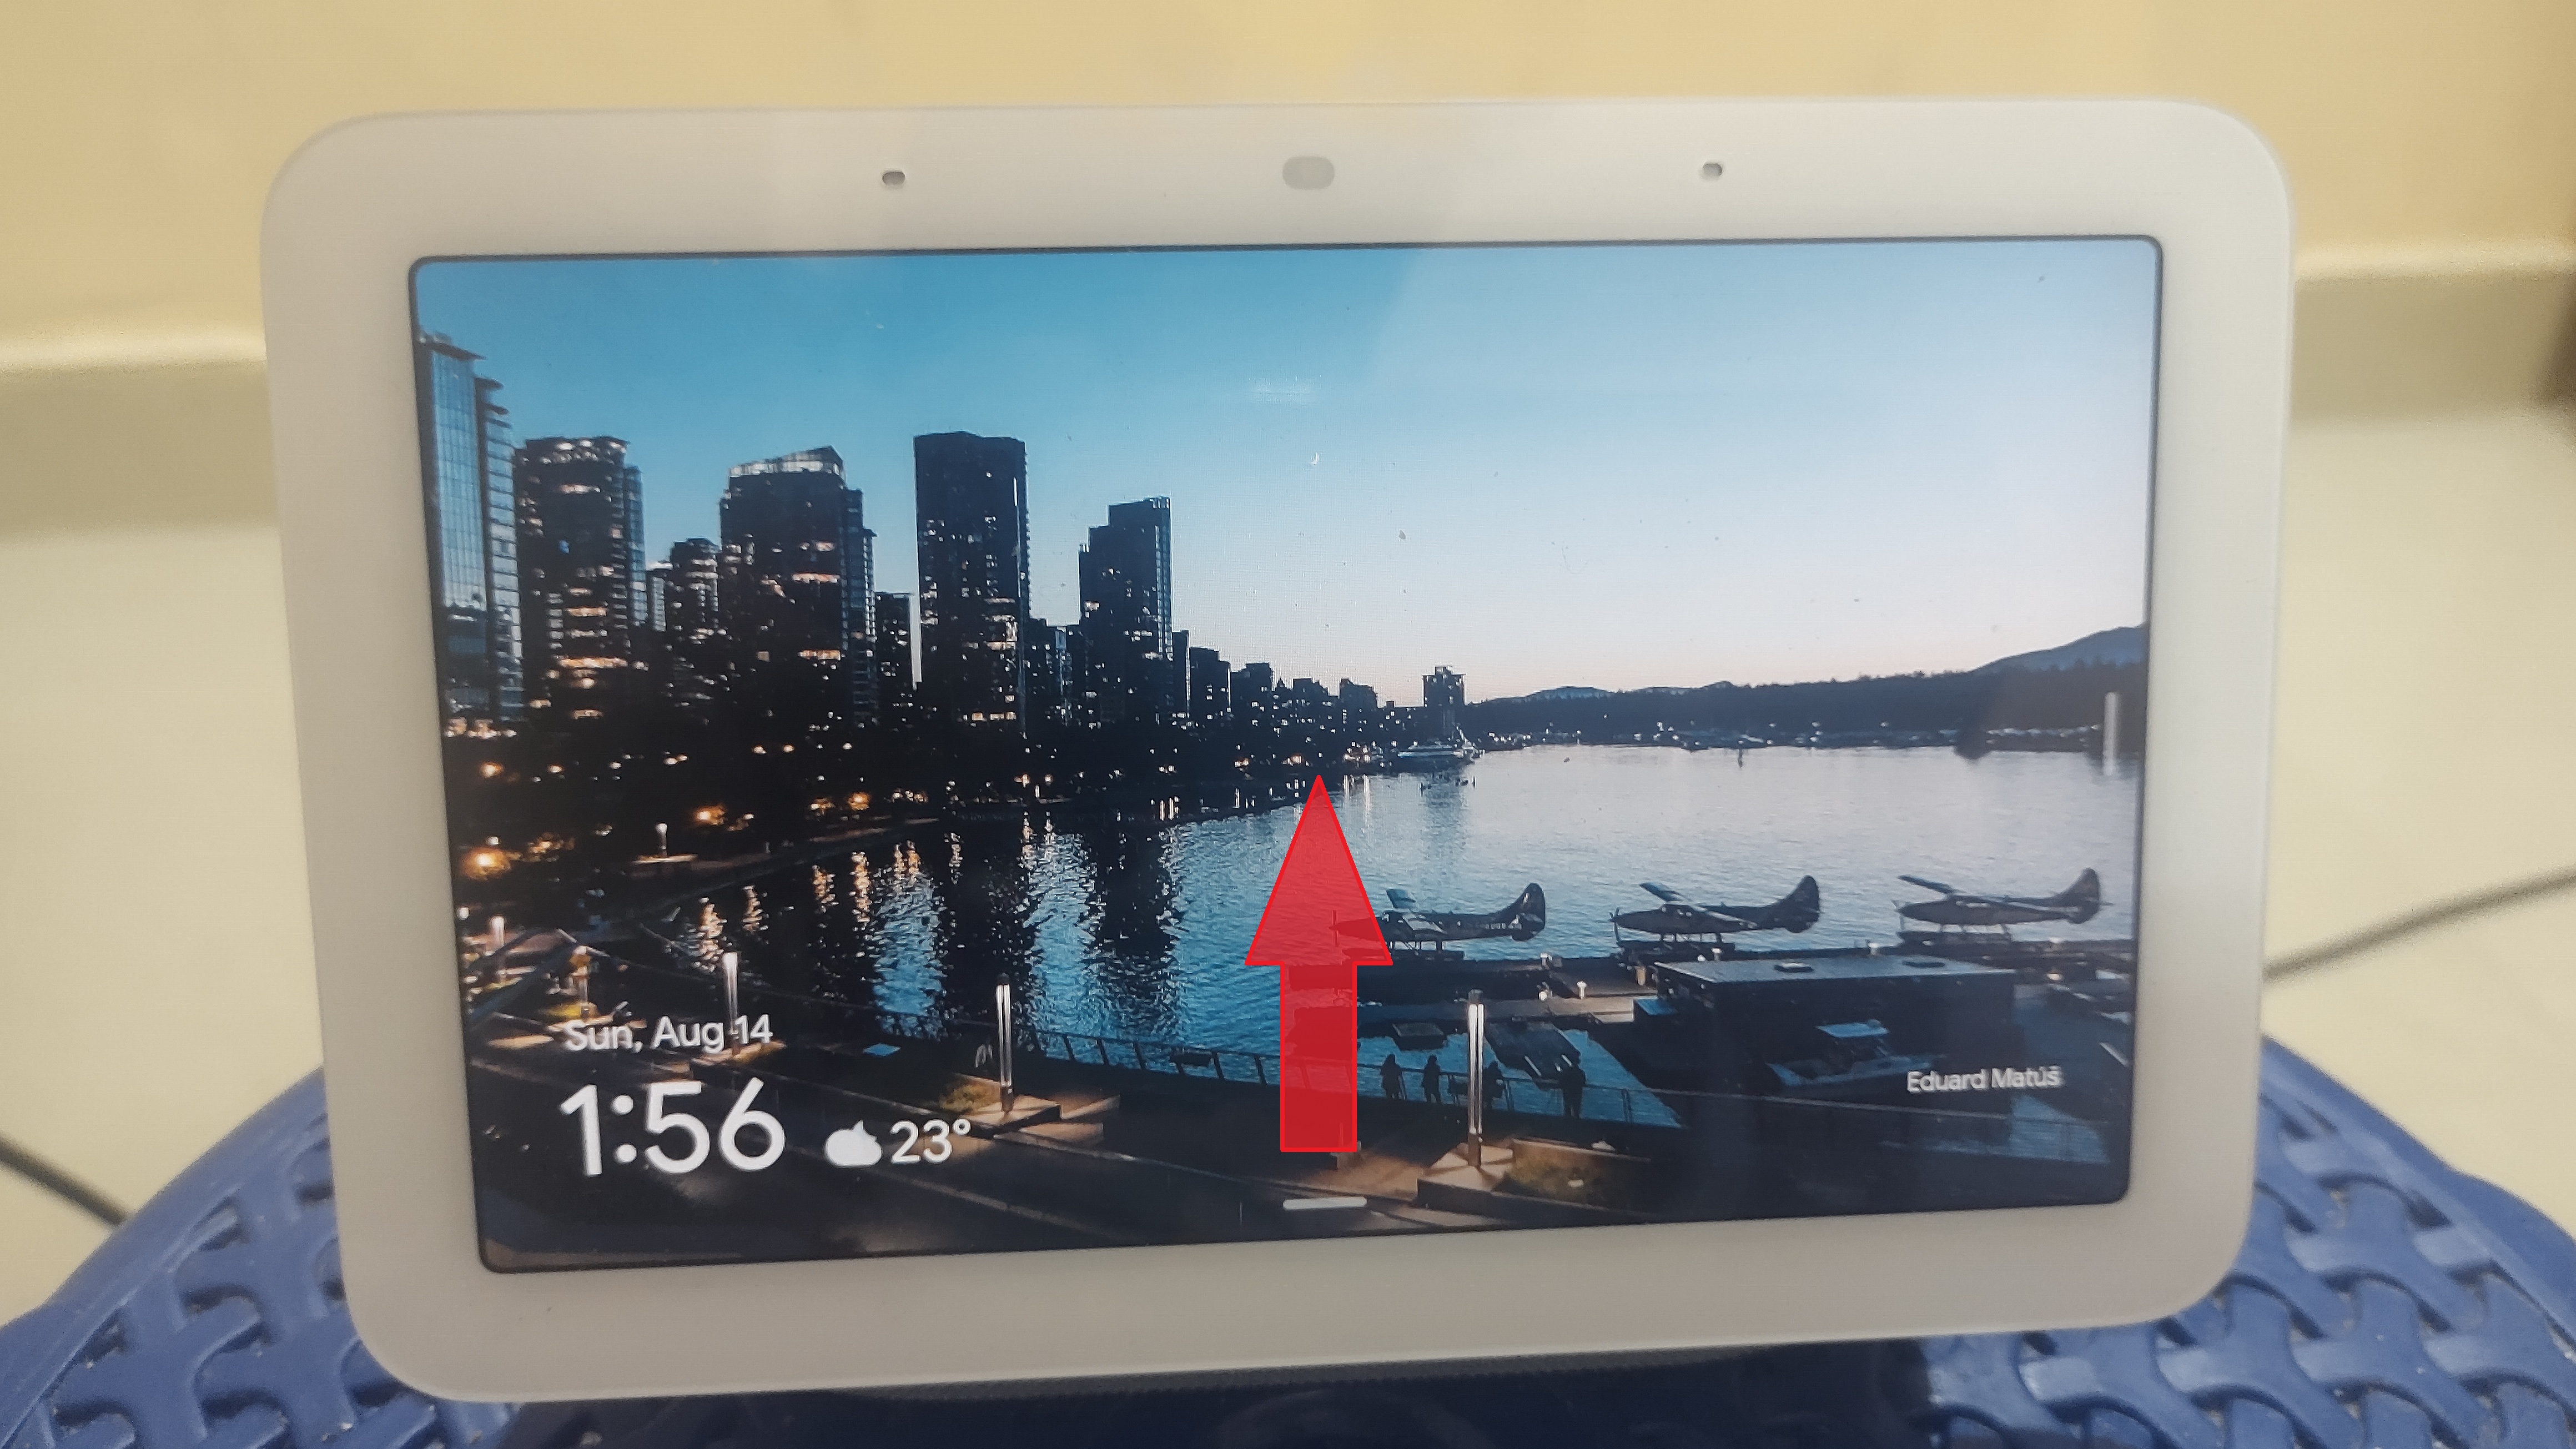
Step 2: Click on Settings Option
After swiping up to access the menu on your Google Nest Hub, proceed by clicking on the Settings option. This option is usually positioned as the last one on the right side of the menu tab, typically the sixth entry. In Settings, you can adjust various preferences and configurations to tailor your device’s functionality according to your preferences. This step allows you to customize your Google Nest Hub experience and optimize it for your specific needs.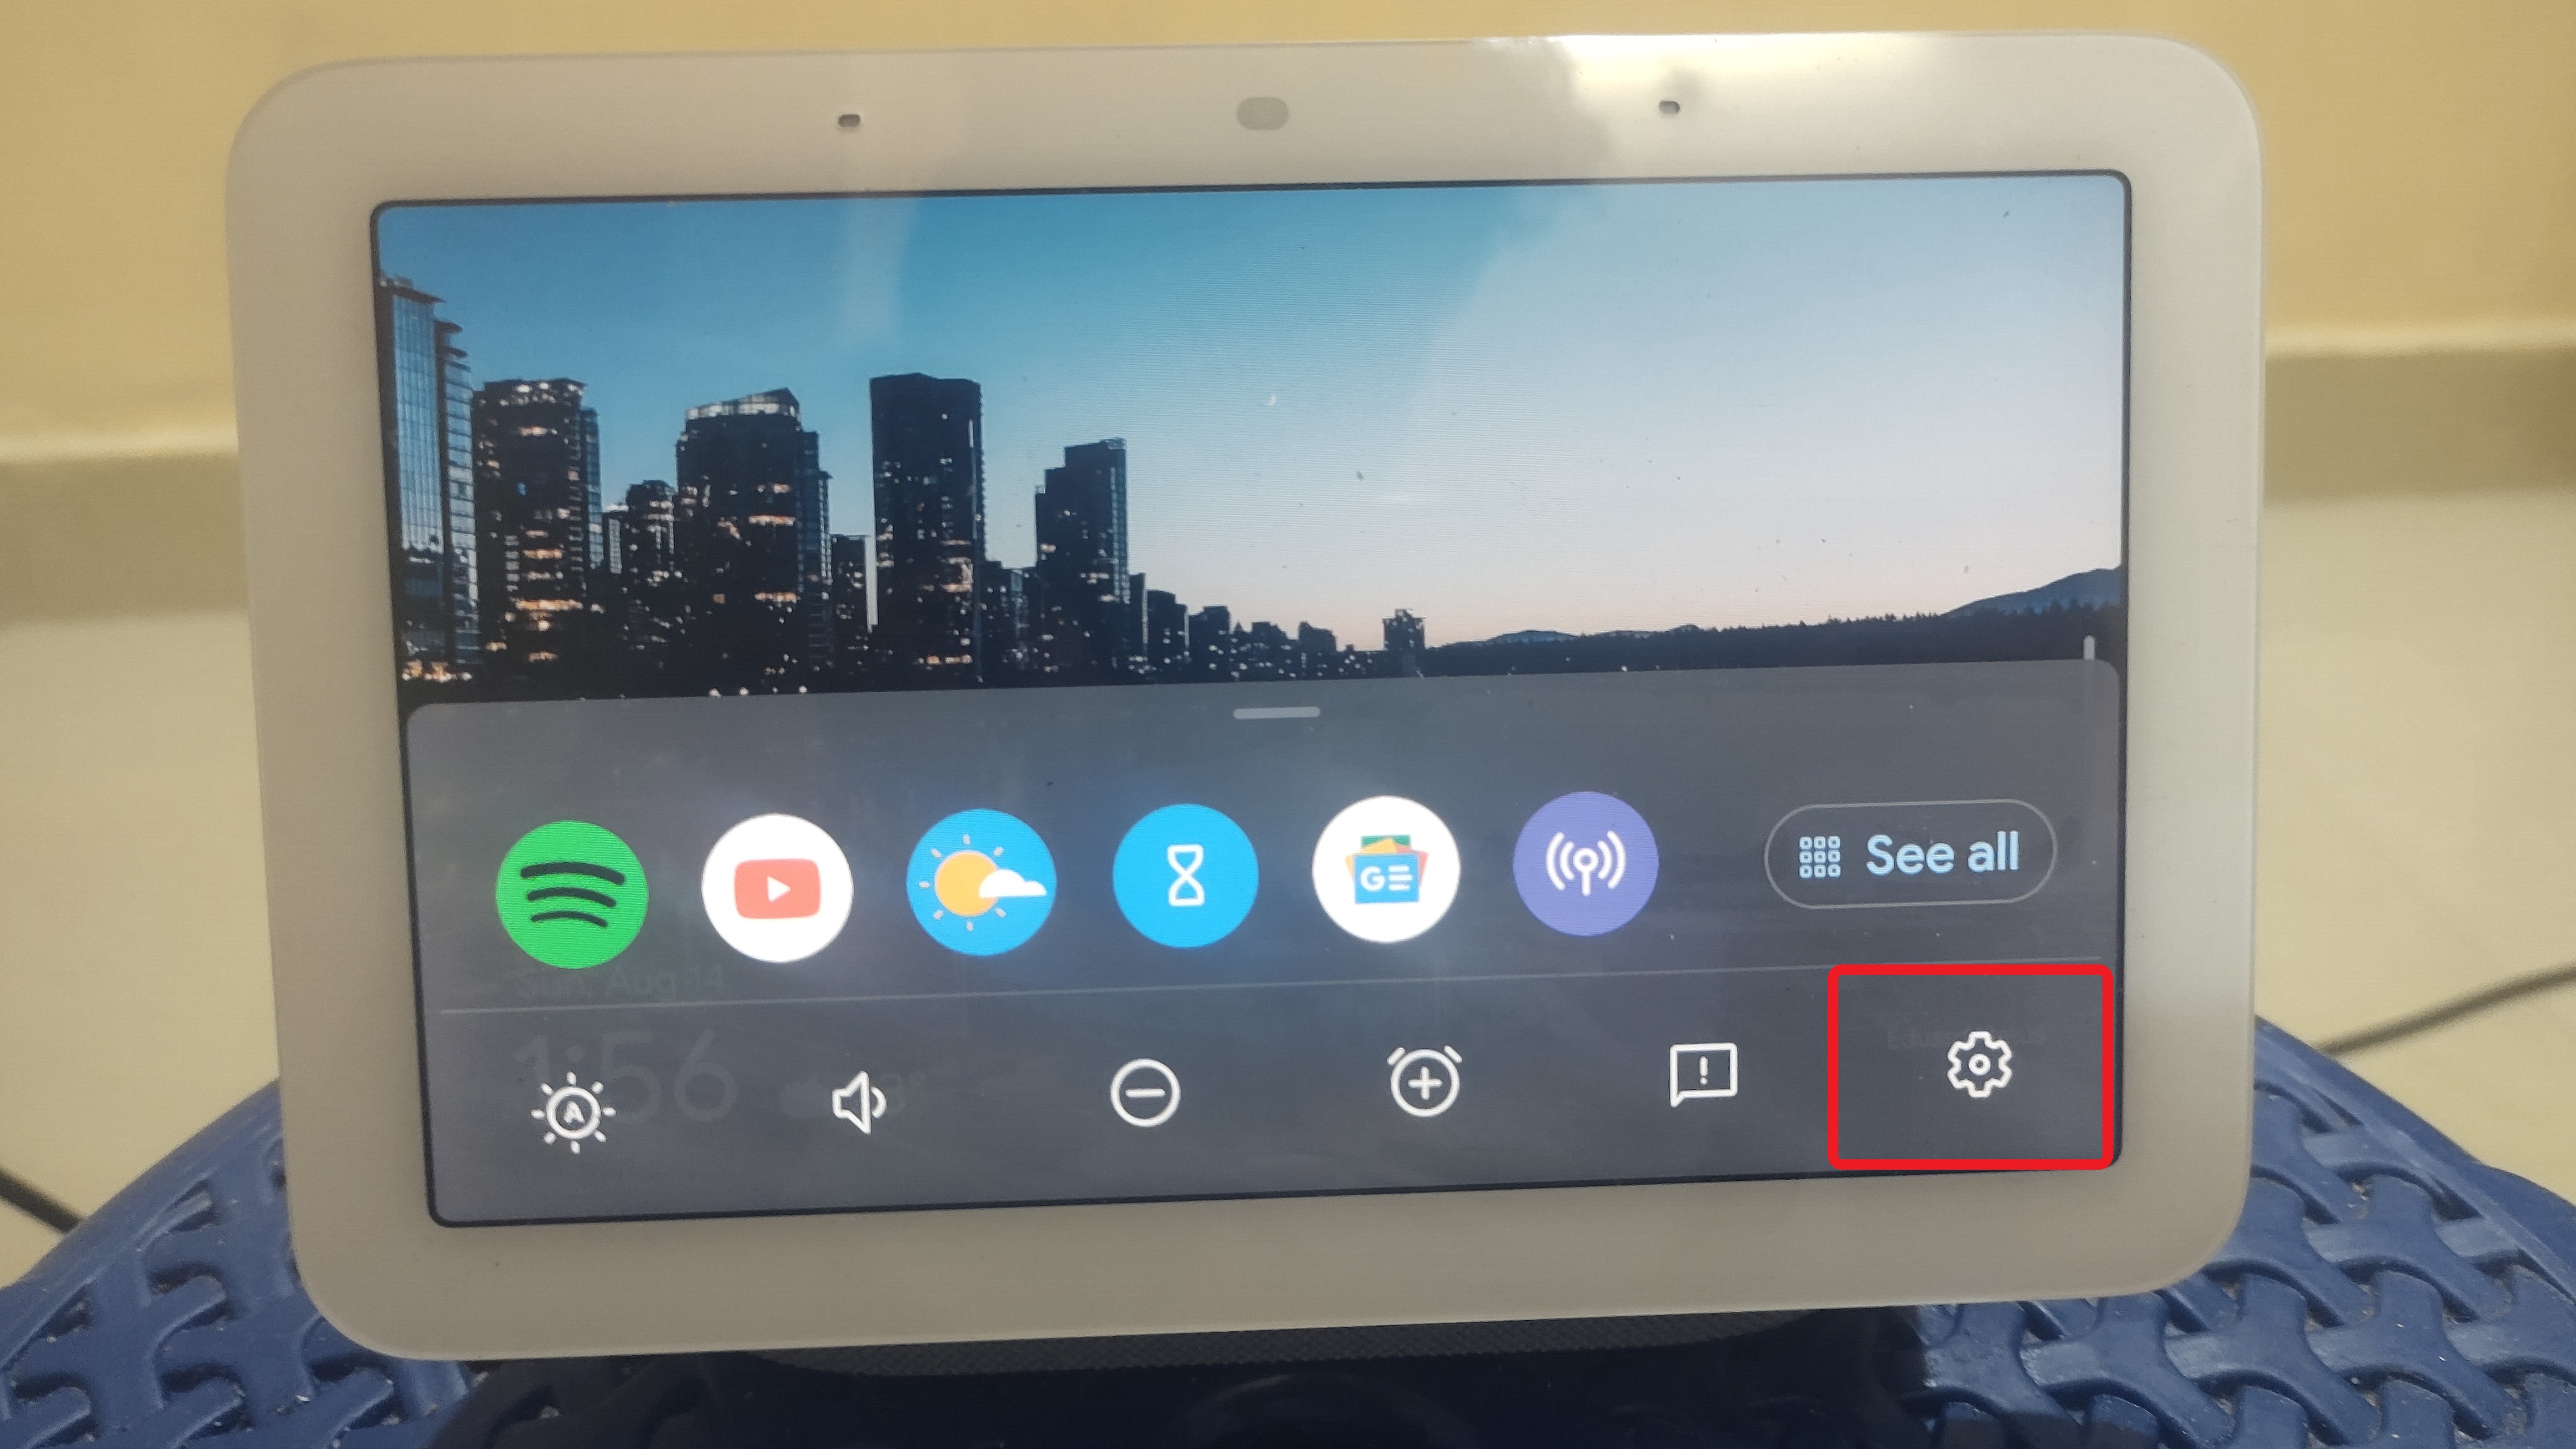
Step 3: Click on Display
Upon selecting the Settings option, a menu window containing three choices will appear. Within this menu window, you will locate the “Display” option. To proceed, simply click on the “Display” option. This action will lead you to a range of settings related to the appearance and visual aspects of your Google Nest Hub. From here, you can personalize your device’s screen brightness, wallpapers, and other visual elements to suit your preferences and enhance your overall user experience.
Step 4: Select the Theme
After accessing the “Display” option in the menu, you’ll be directed to another menu screen labelled “Display.” On this screen, you can pick a theme that suits your preference. The available choices include “Light,” “Dark,” or “Auto.” Opt for the theme that aligns with your visual comfort and usage conditions. “Light” offers a bright and clear display, “Dark” provides a sleek and easier-on-the-eyes interface, while “Auto” automatically adjusts the theme based on ambient lighting. Your chosen theme will enhance your Google Nest Hub’s visual appeal and readability according to your liking.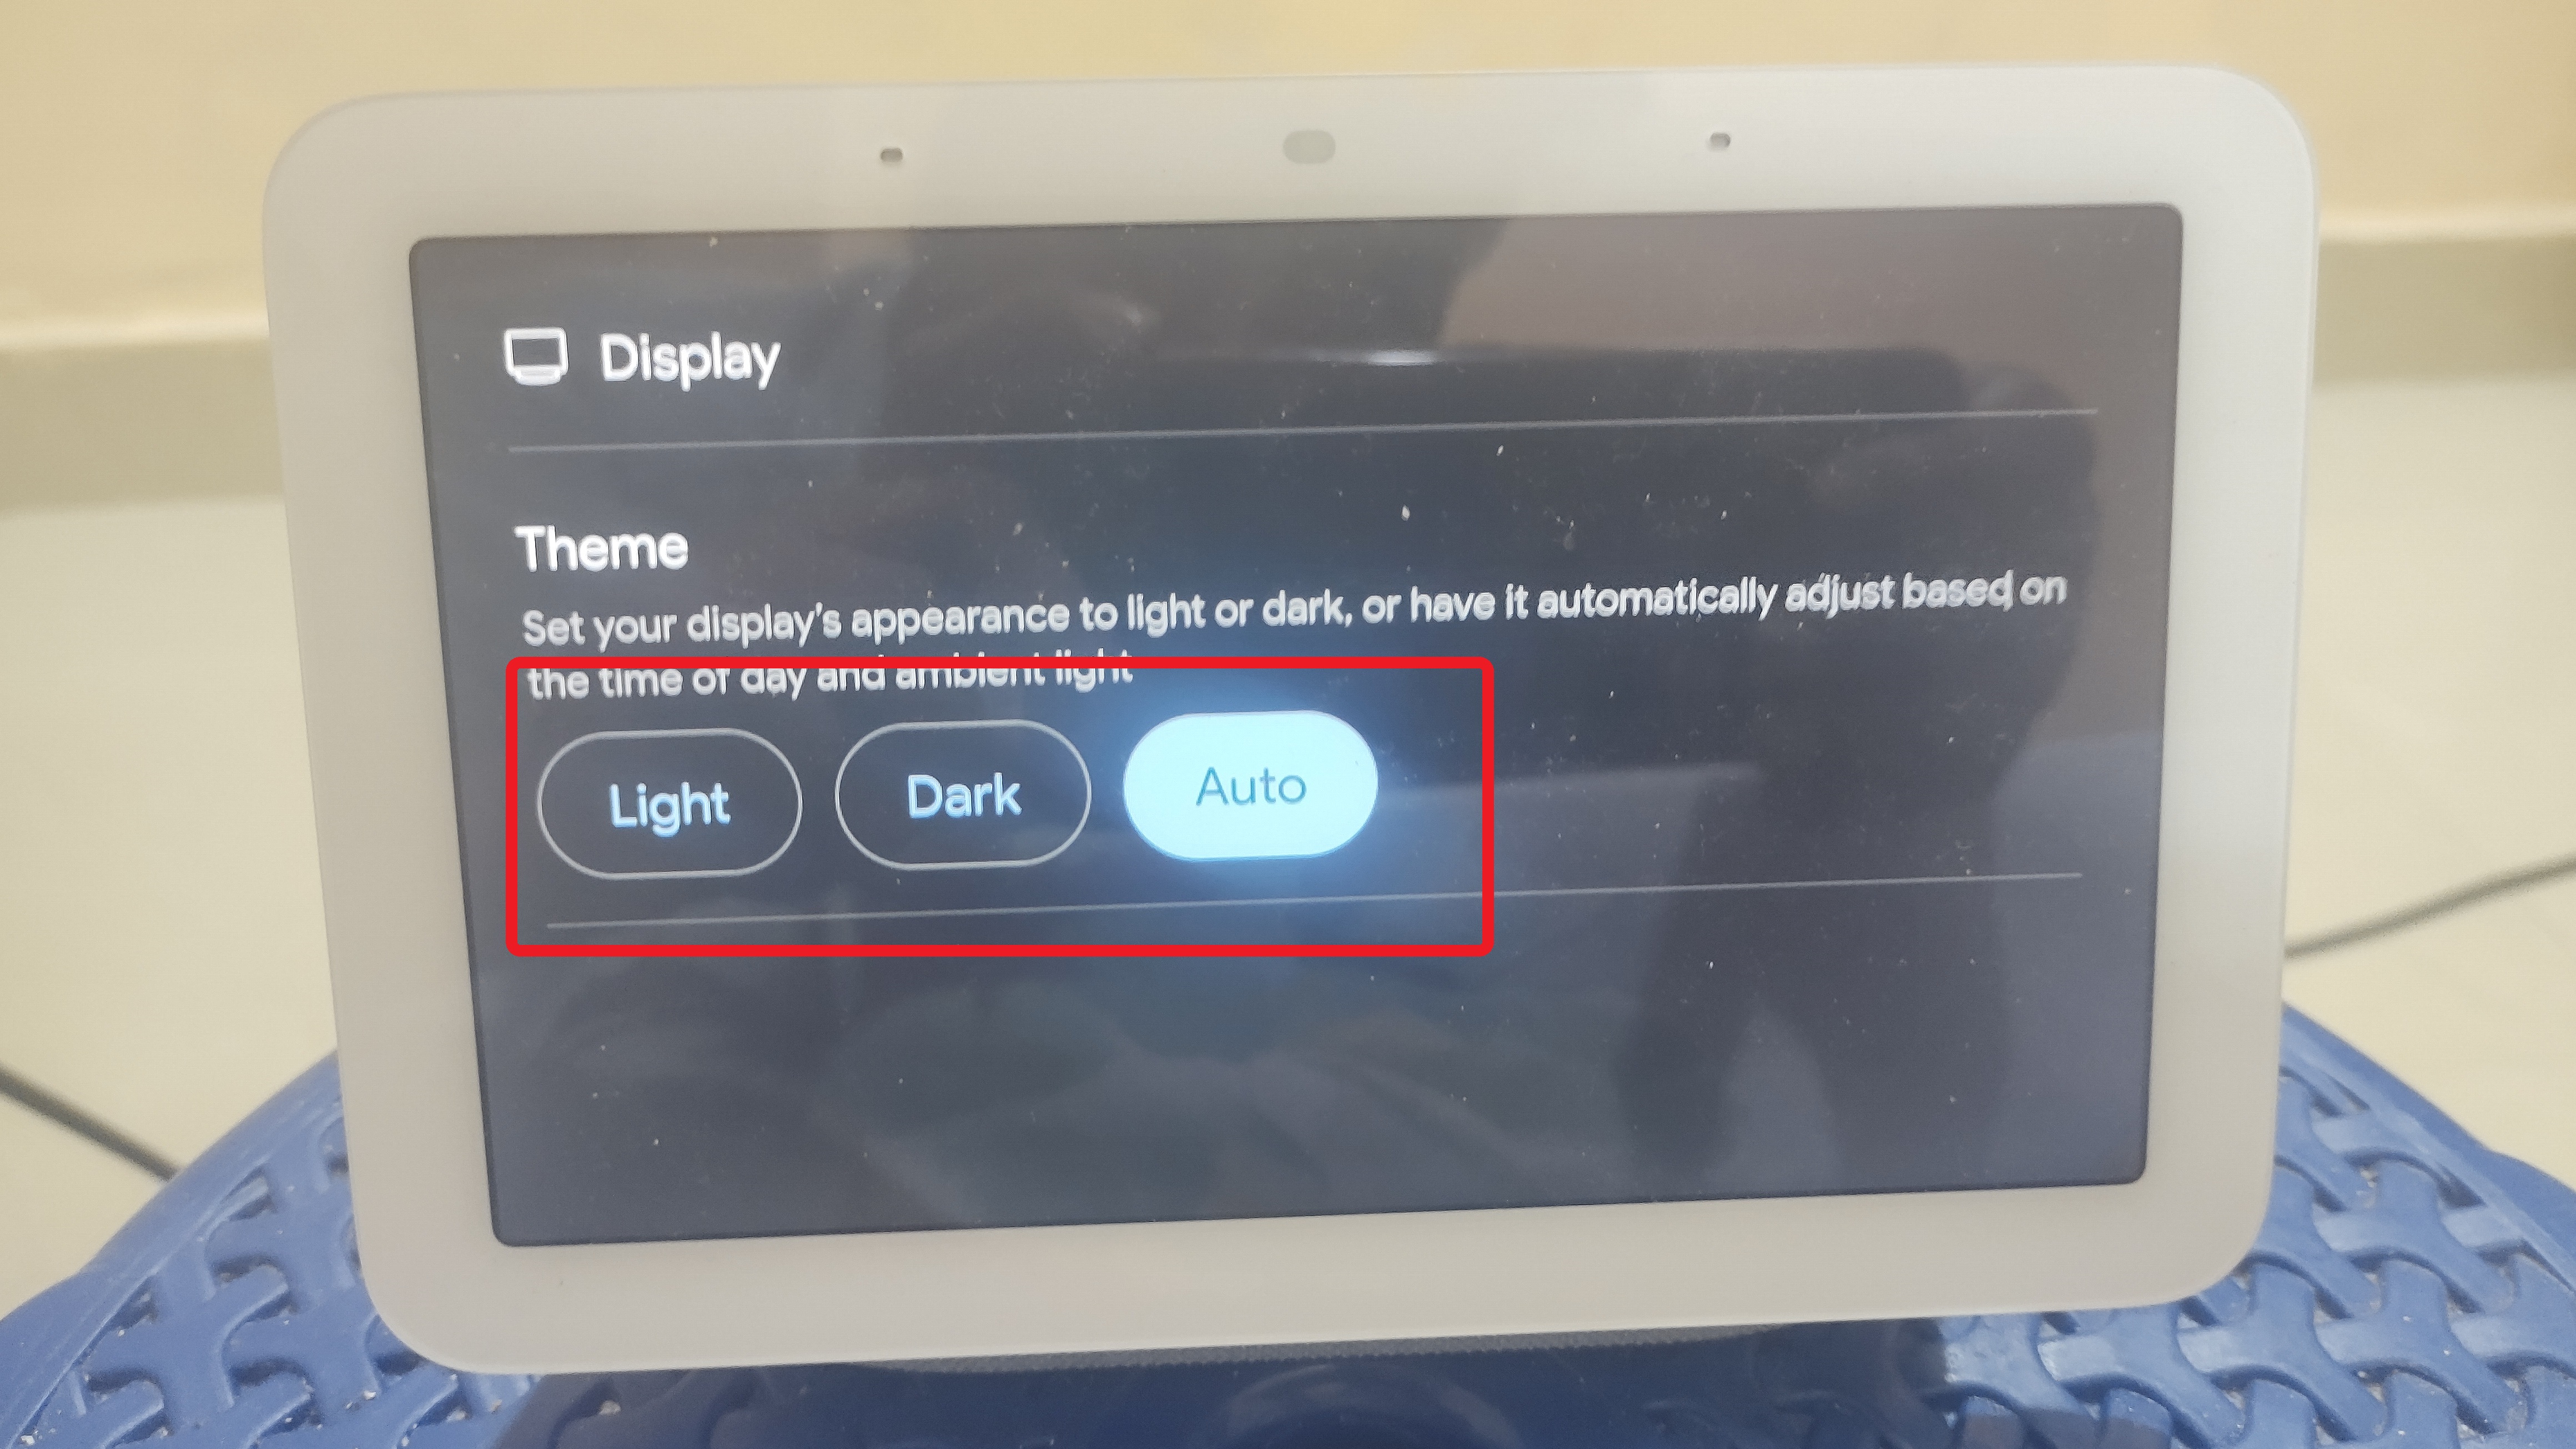
Frequently Asked Questions
How can I customize the home screen on my Google Nest Hub?
To customize your Google Nest Hub home screen, open the Google Home app, tap on Favorites or Devices, touch and hold your device’s tile, tap Settings, and then select Photo Frame. From there, you can choose what you want to display on your Photo frames, such as personal photos, a clock, or other backgrounds.
Is it possible to change the background on a Google Nest Hub?
Yes, you can change the background on a Google Nest Hub. Open the Google Home app, scroll down to your speaker, tap on it, tap the gear icon, and scroll to Ambient Mode. From there, you can choose between art displays or displaying your Google Photos as the background. Please note that the screensaver may take a few minutes to switch over after making the selection.
Can a Google Nest Hub change color?
The Google Nest Hub can adjust its screen color with Ambient EQ. You can have Ambient EQ adjust the screen color to match your environment Always, during Ambient only, or Never. To offset the brightness, you can adjust it in the Display settings within the Google Home app.
Is it possible to change the color of a Google Home device?
You can adjust the brightness of a Google Home device by touching and holding the light control. If your device has color options, you can also find color controls to change the color of the device’s lights.
Is it possible to use Apple Photos with Google Home?
Yes, Google has introduced a tool that enables users to transfer their photos from Apple Photos to Google Photos. This tool proves to be advantageous for various reasons. Since Android phones do not offer direct uploading to Apple Photos, this provides a convenient method to seamlessly transfer all your photos from one phone to another.
Conclusion
As you have seen and read through the steps above, changing the theme of your Google Nest Hub is a very easy going task. You can similarly change your background image or the photo frame on your Google Nest Hub following the similar steps. You can also find an article about the same on our website.
I hope that this article helped with the steps and explained the procedure in a simple and effective manner. Do let us know in the comments below what you liked about the article, and if you have anything else to add. Ciao!

Passionate about tech gadgets, I turned my love into a blogging journey. Specializing in how-to articles, I unravel the intricacies of gadgets, providing step-by-step guides. Join me in exploring the tech universe, where every device holds endless possibilities. Let’s simplify the complexities and enhance your tech experience together.