With the help of this article we will help you learn and understand how to change the background on your Google Nest Hub in easy steps. This article will help you learn the steps through visual guidance with the help of pictures for each step. You will be done with the process in less than a minute and through this you will also learn to put pictures of your own choice as well. You can even choose to put your personal albums and pictures as your Google Nest Hub background as well. Read on to find out more.
Step 1: Swipe up to Open Menu
To begin, gently tap your Google Nest Hub to awaken it from sleep mode. Subsequently, swipe your finger upwards across the screen to unveil a compact menu tab presenting six options. This intuitive action provides access to the menu, revealing a selection of functions available on your device. This menu tab serves as a gateway to various features and settings, making navigation convenient and straightforward. By executing these steps, you unlock the potential of your Google Nest Hub, enabling seamless interaction and utilization of its capabilities to enhance your smart home experience.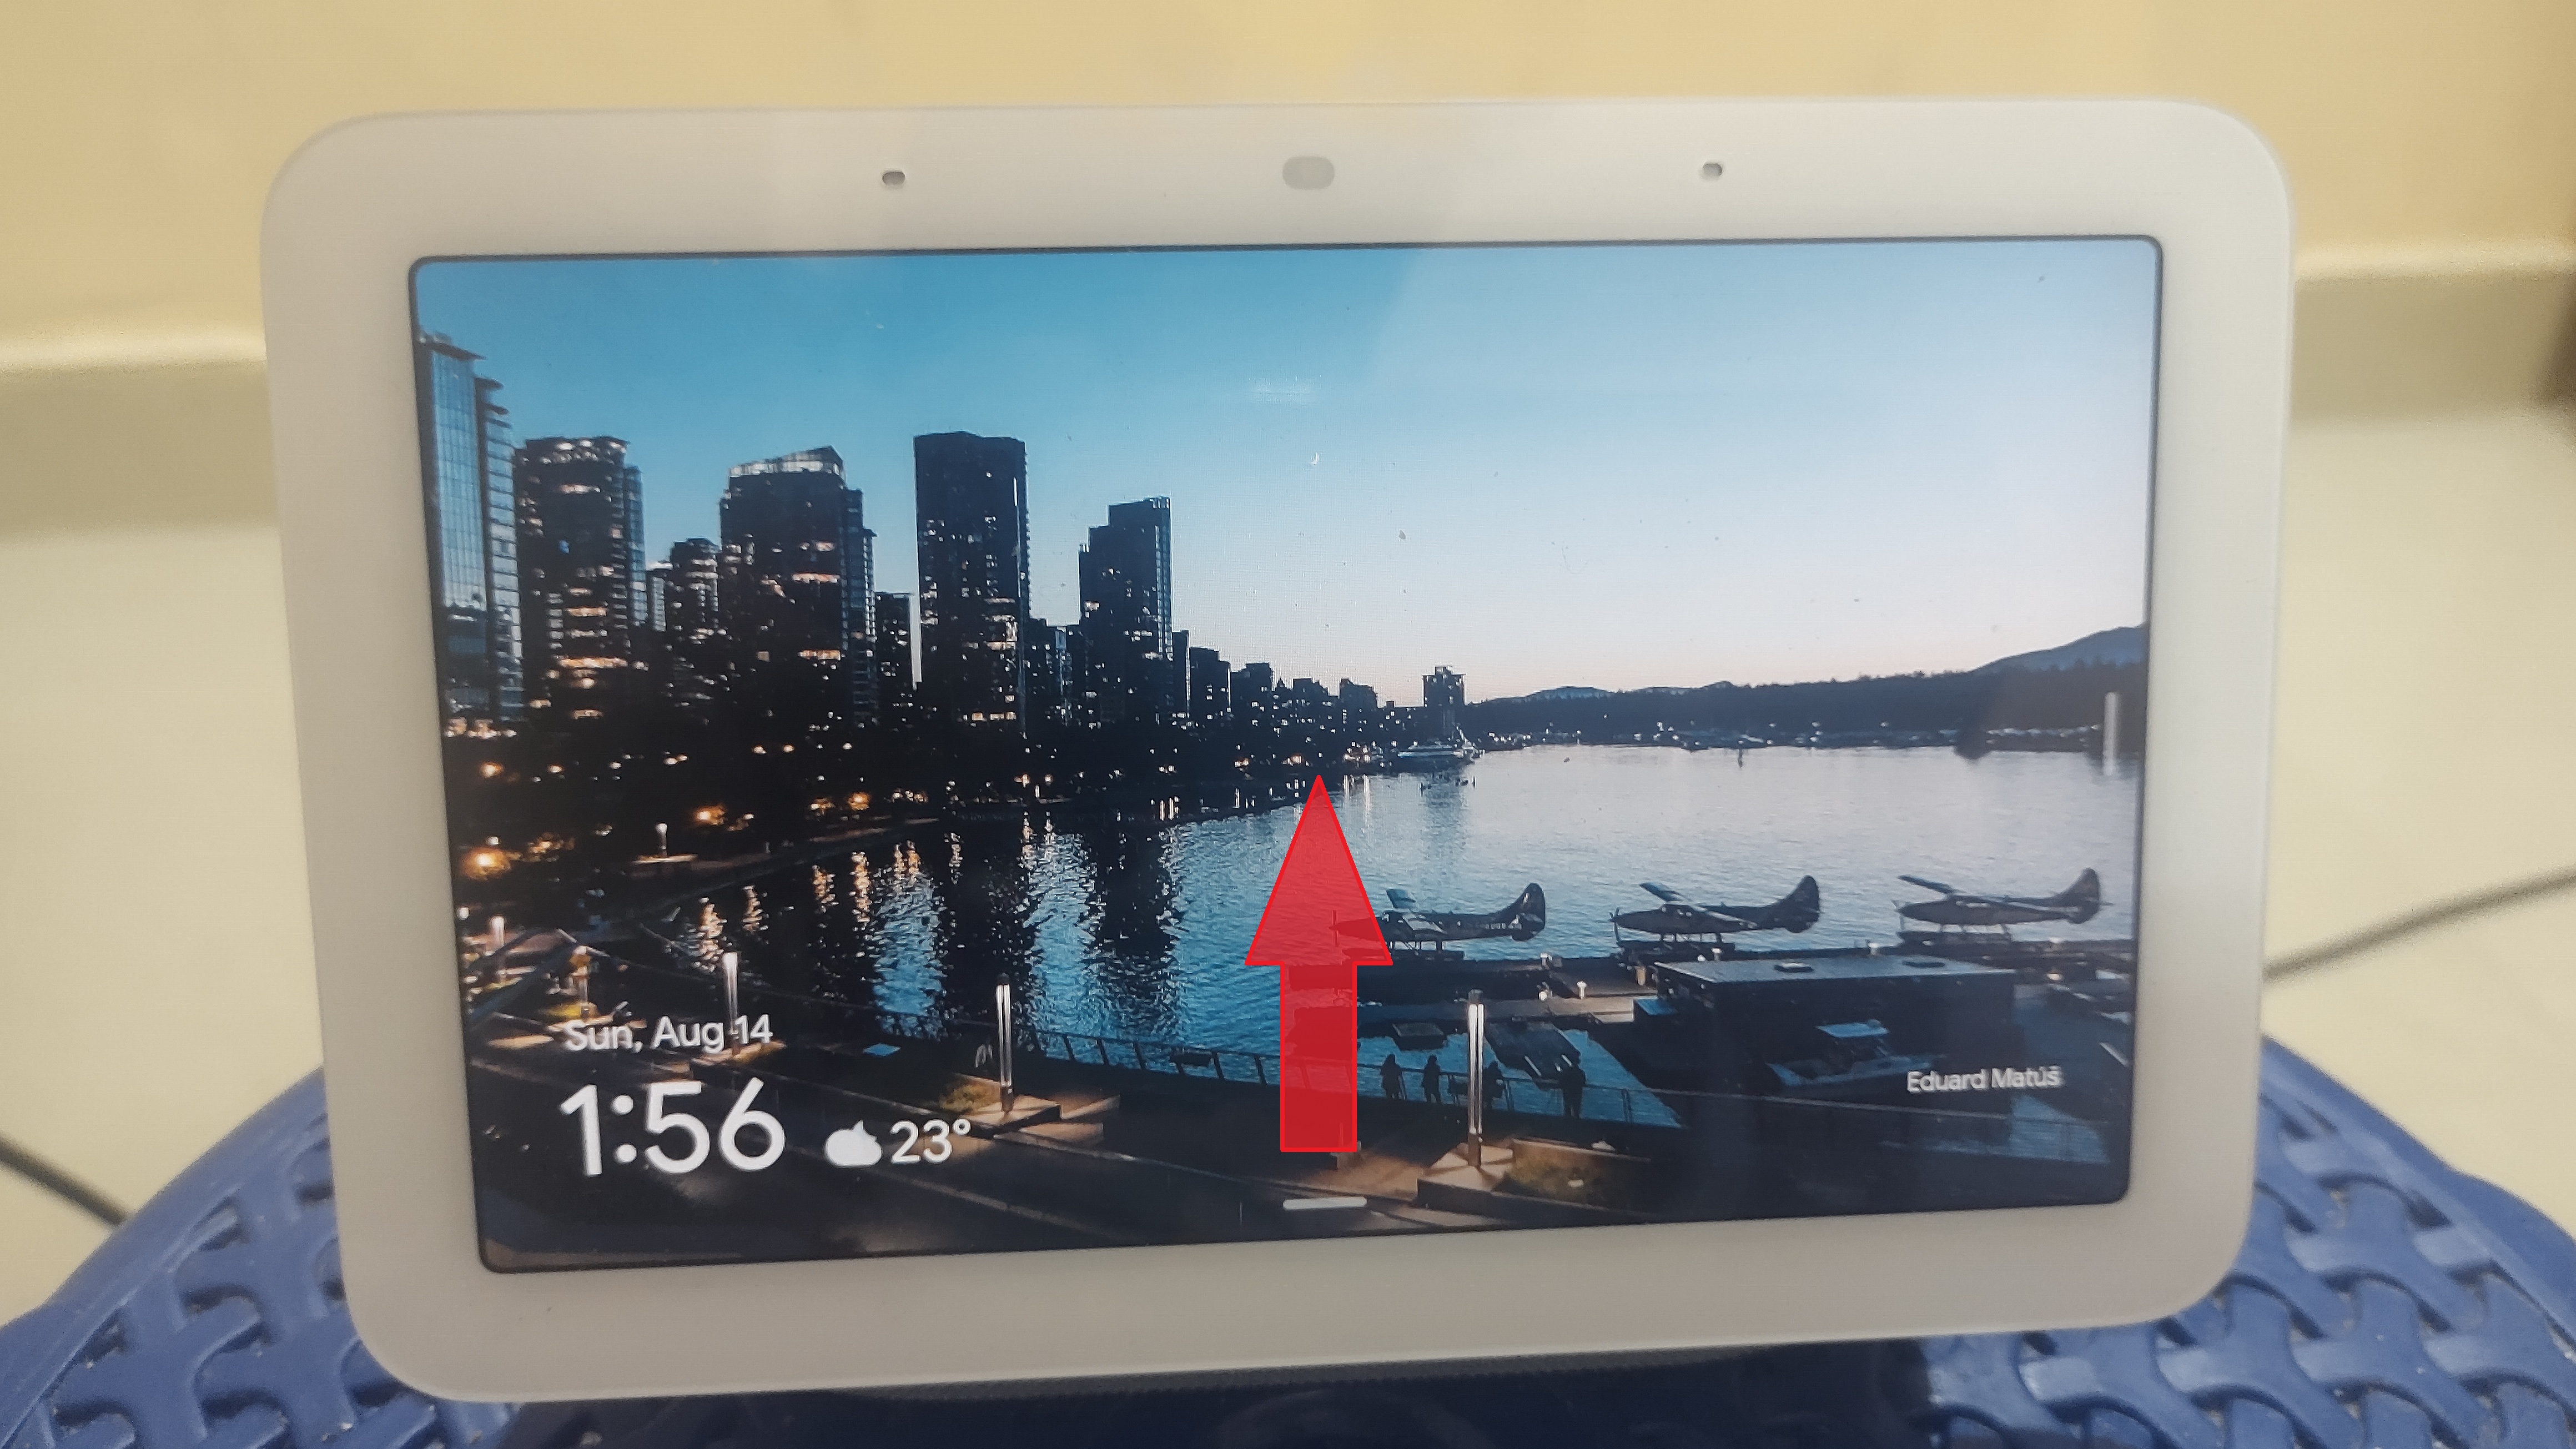
Step 2: Click on Settings Option
Upon opening the menu tab on your Google Nest Hub through the swipe-up gesture, proceed to click on the Settings option. You’ll find this option typically situated as the last entry on the right side of the menu tab, often being the sixth option. By selecting Settings, you gain access to a range of configuration choices, allowing you to personalize your device’s behavior and features. This step empowers you to adjust preferences, set up connectivity, manage accounts, and optimize your Google Nest Hub’s performance according to your preferences and requirements.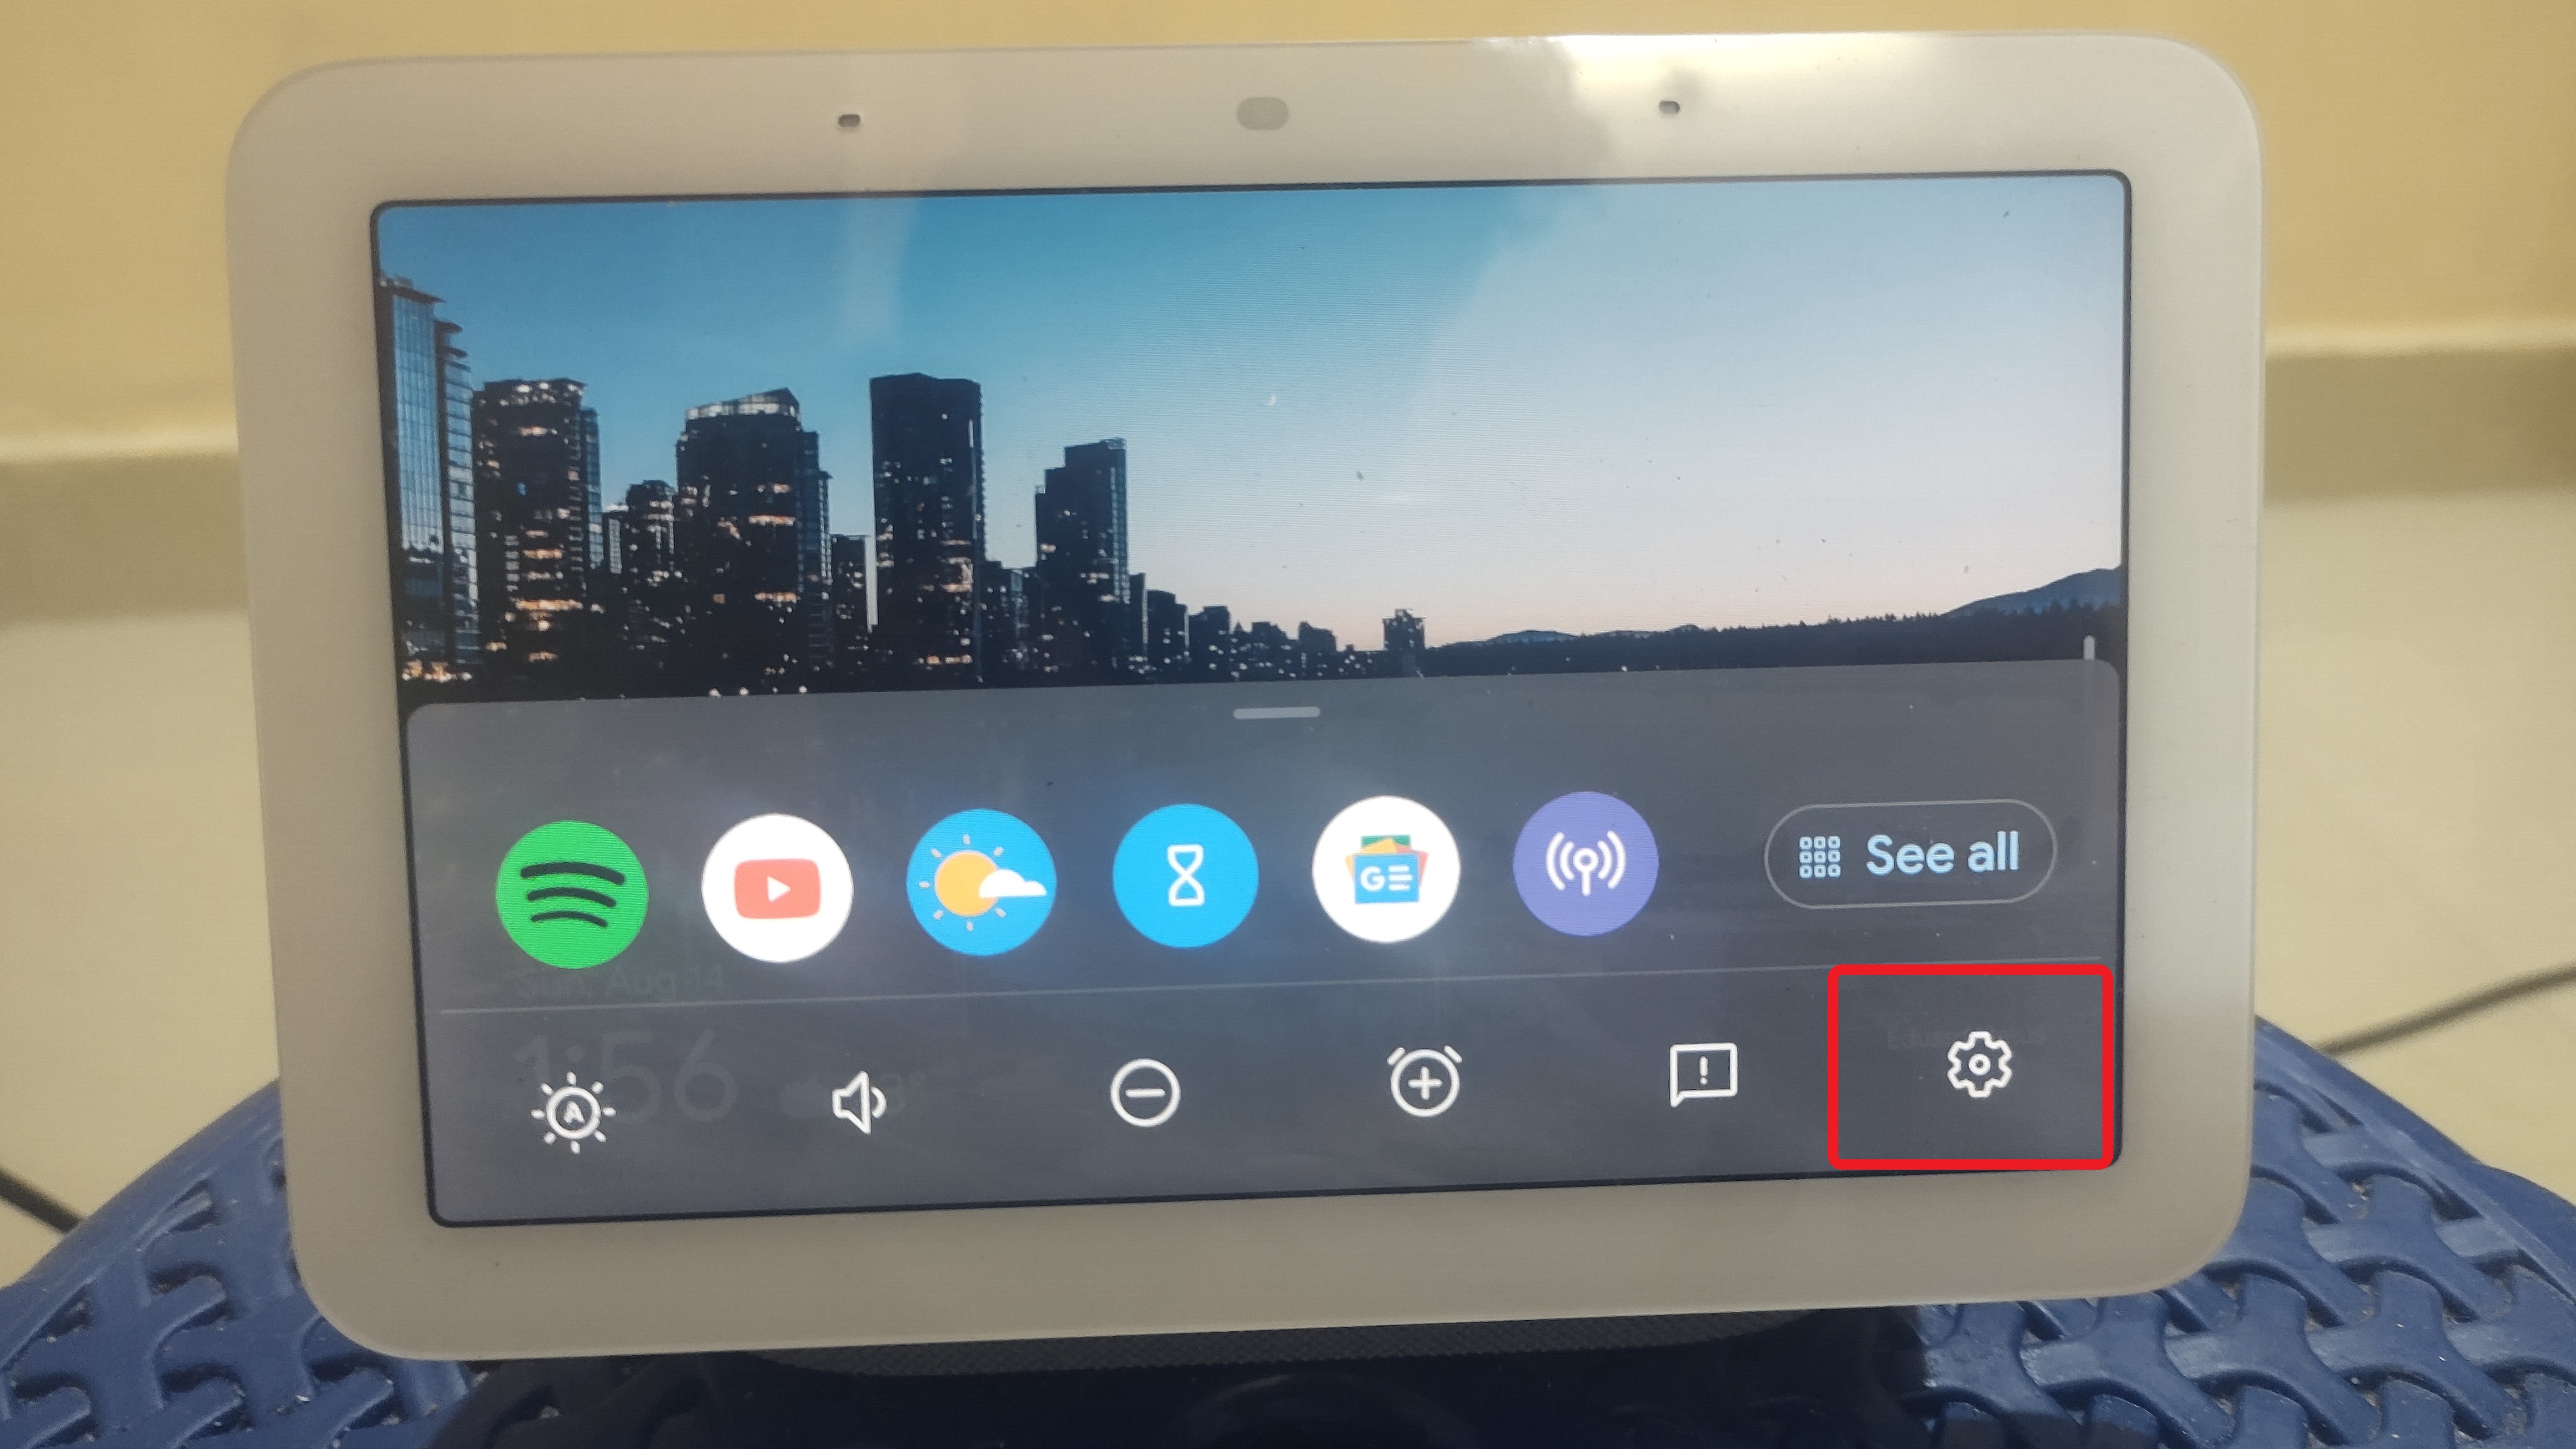
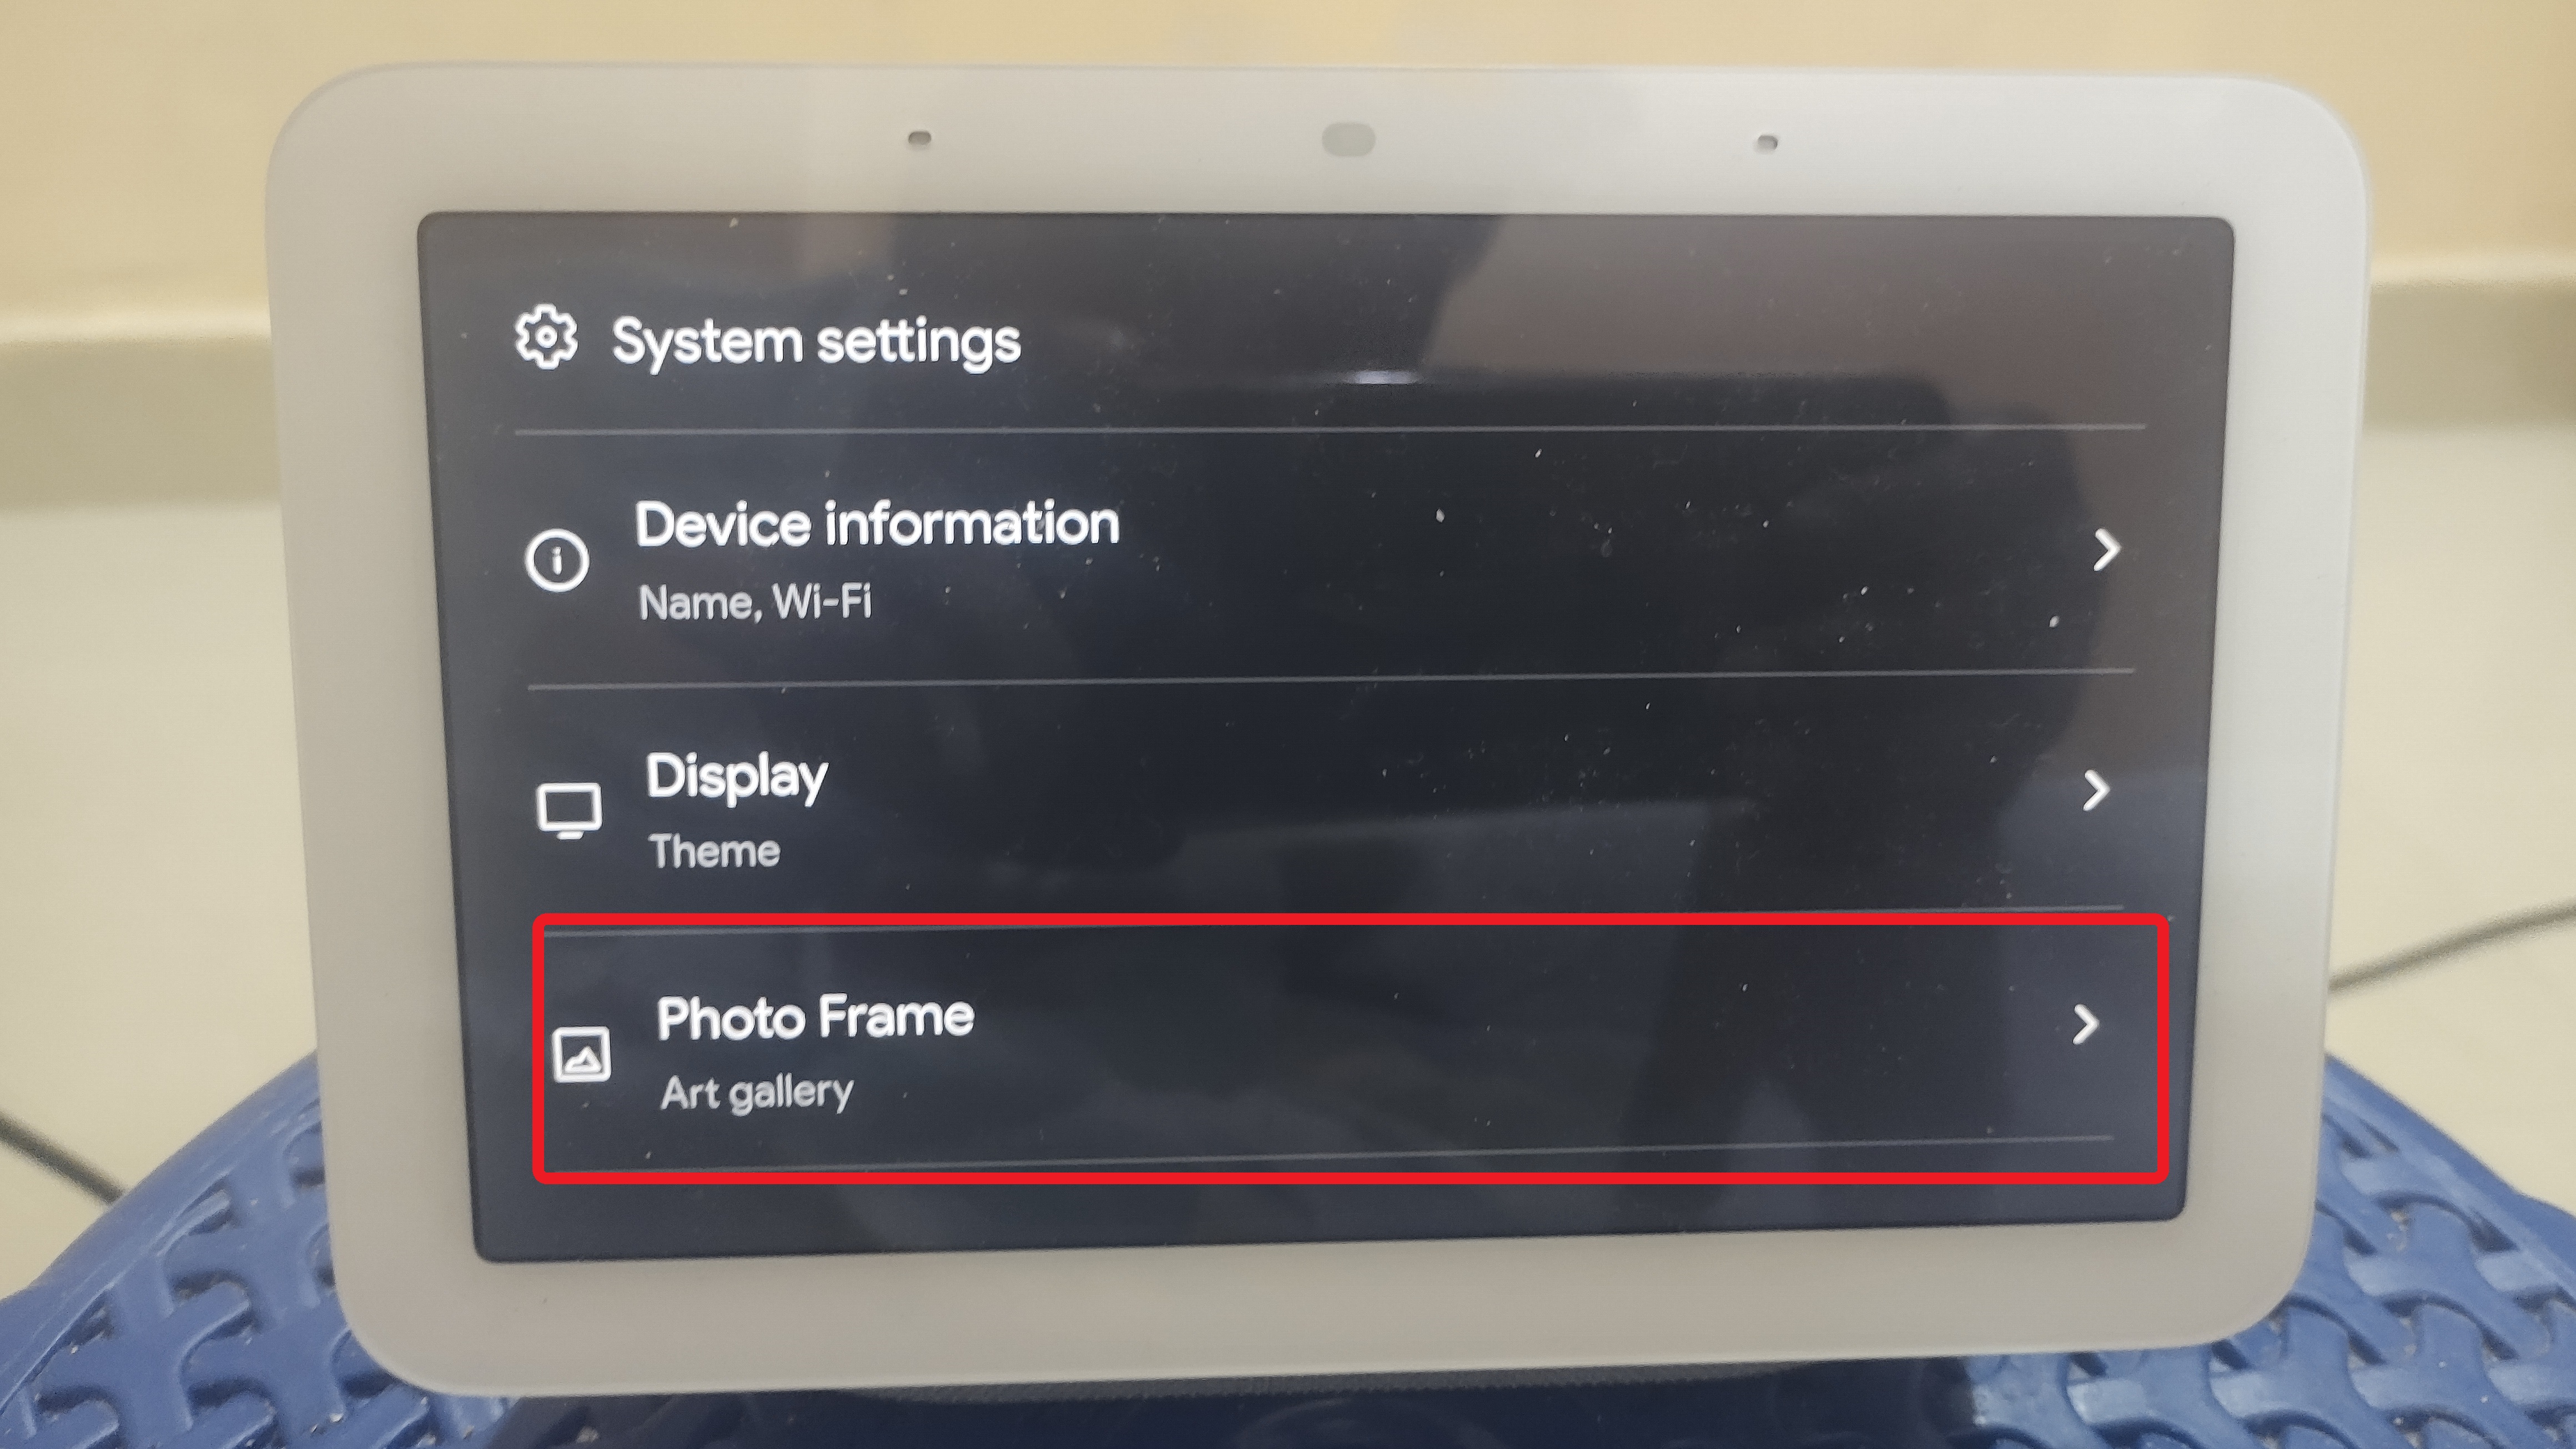
Step 3: Click on Photo Frame
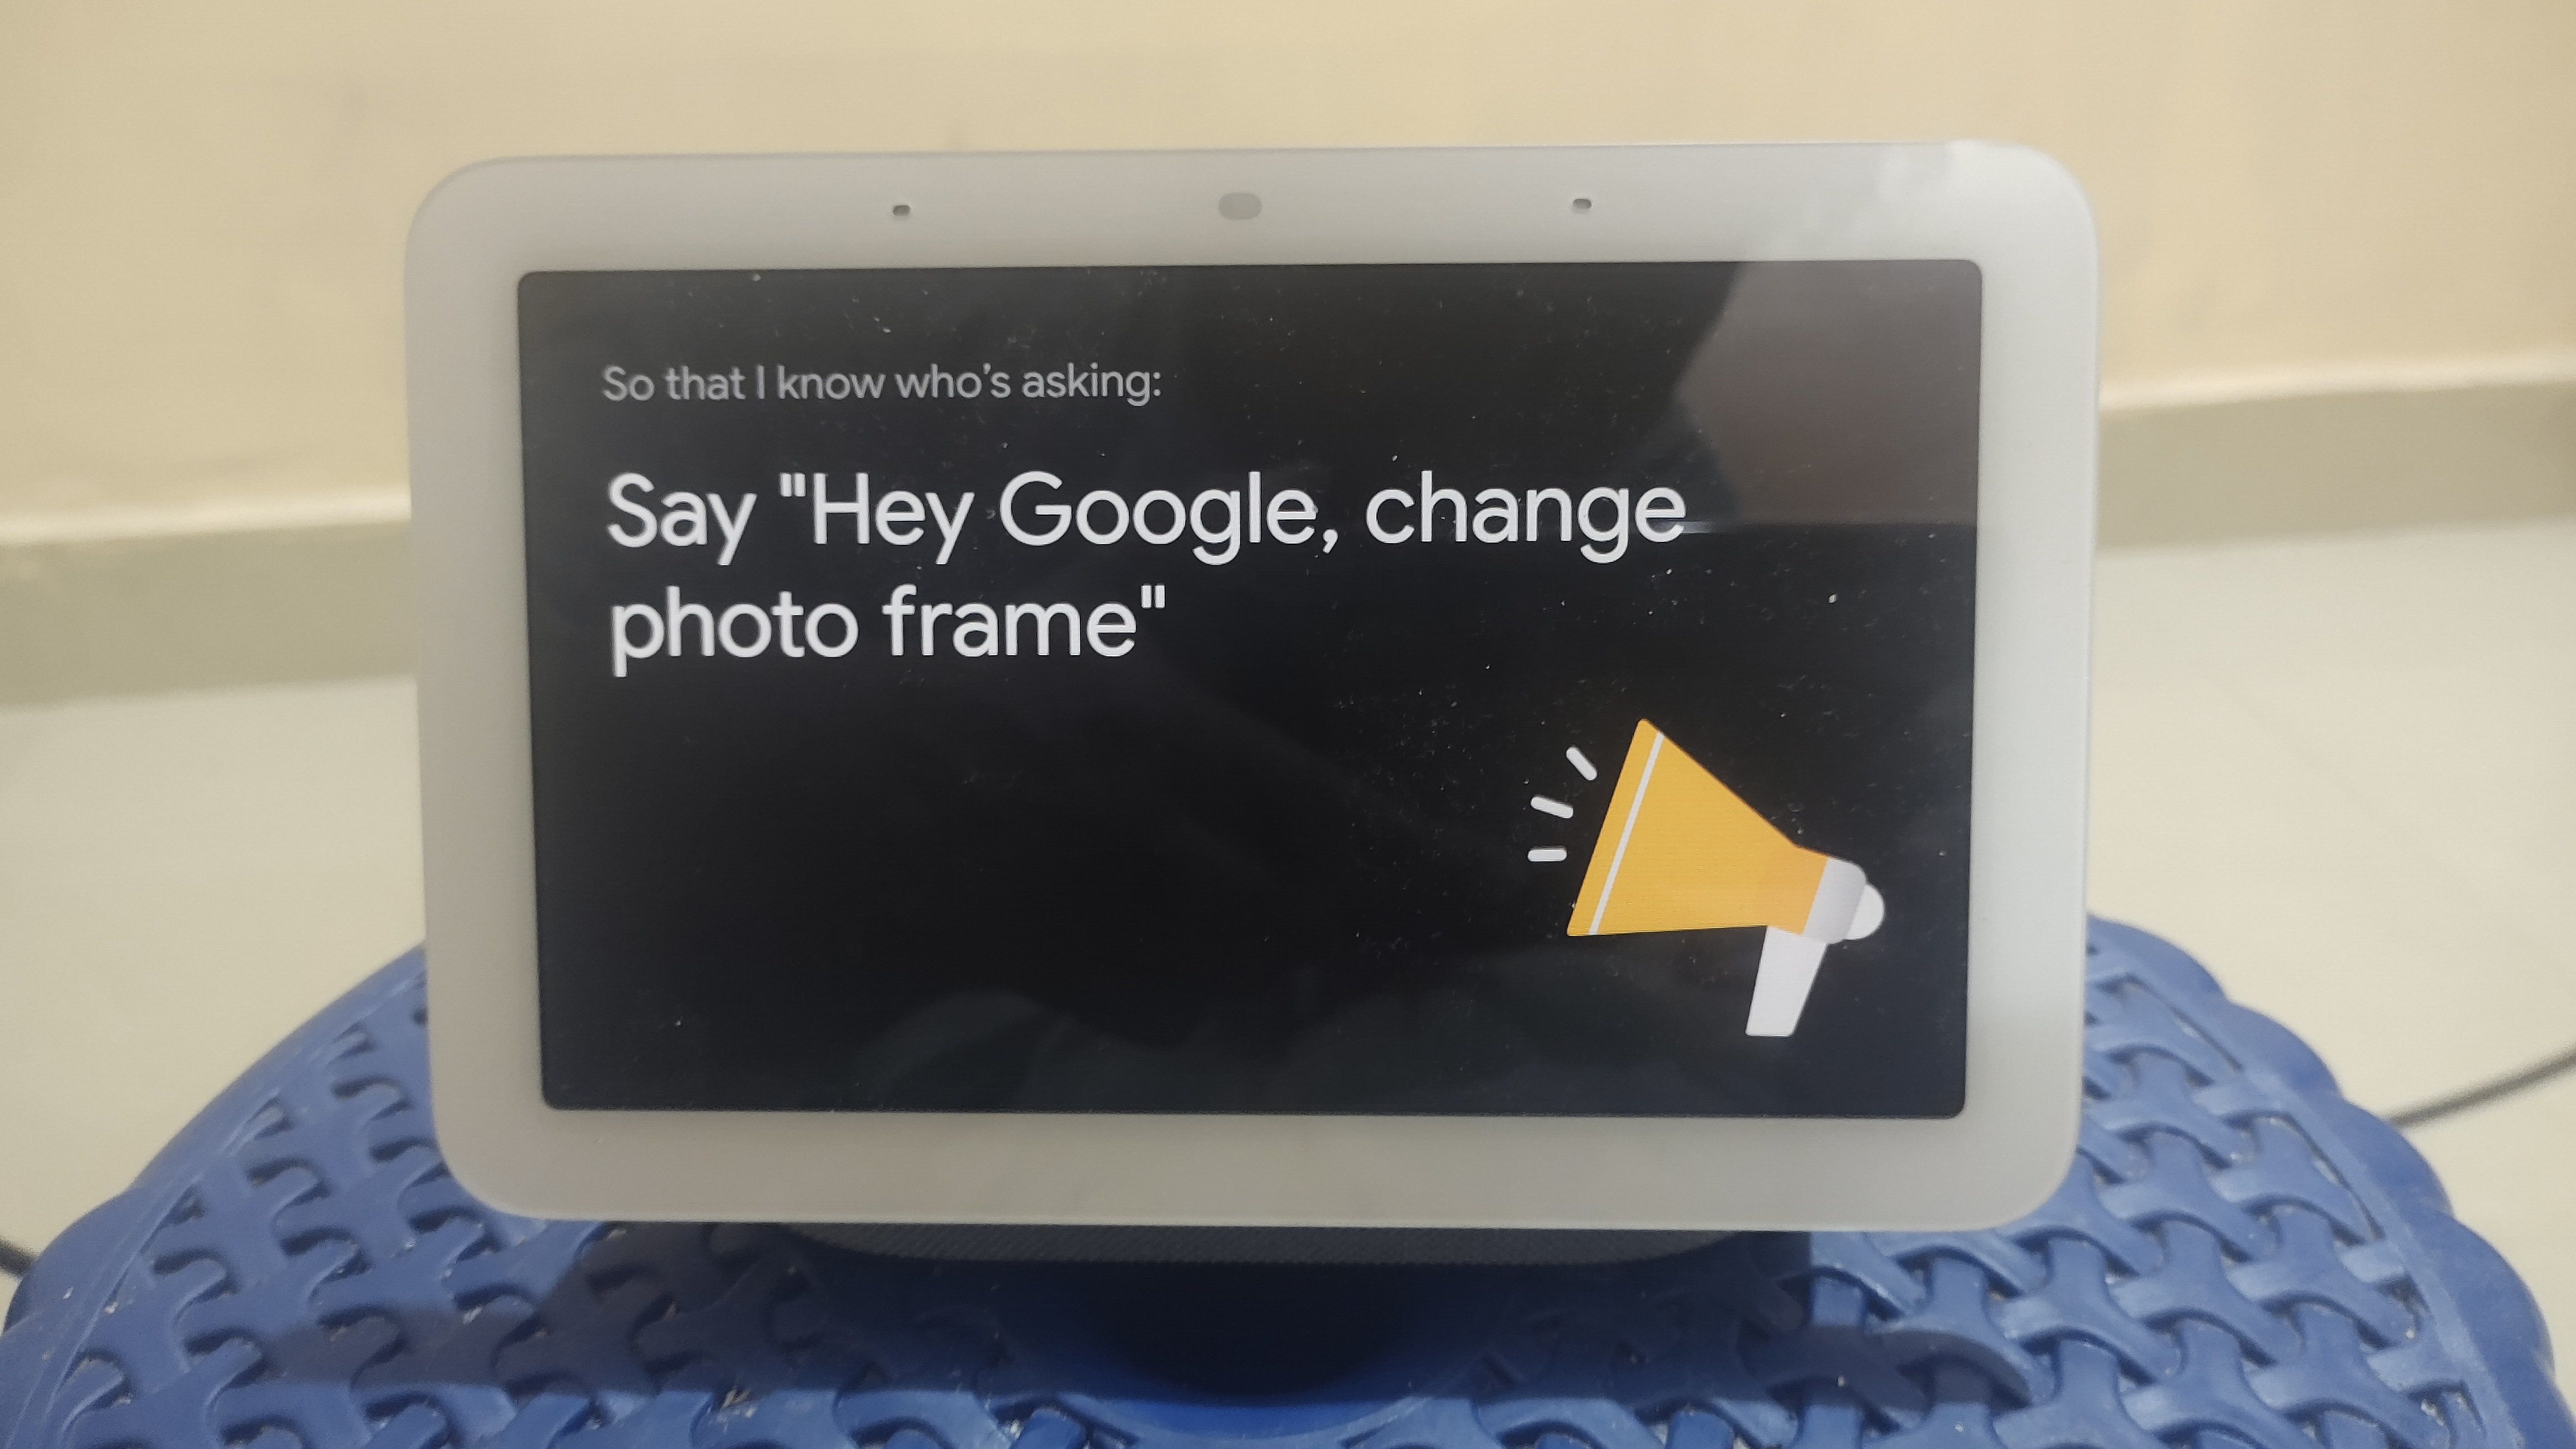
After you click on settings a menu window with 3 (three) options would open. On this menu window you would find the option of “Photo Frame.” Your device may give you a prompt to say the phrase “Hey Google, Change Photo Frame” to recognize your voice and know who is asking to change the background image. To proceed further you would need to say the phrase out loud so do that.
Step 4: Select the Photo Frame
Once you click on the “Photo Frame” option on the menu screen you would be taken to another menu screen titled with the same name. Here you can choose what you see on your screen when it’s not in use. The options would be “Google Photos”, “Art Gallery”, “Full Screen Clock” and “Google Weather Frog.” You can choose whatever option you would like and you are good to go.

Frequently Asked Questions
1. Are there any limitations on the size or resolution of photos I can use as the background?
The recommended resolution for background photos on the Google Nest Hub is 1920×1080 pixels. Larger or higher-resolution images may be automatically resized or cropped to fit the display.
2. Can I revert to the default background settings on my Nest Hub?
Yes, if you want to revert to the default background settings, you can simply select the option to reset or restore the original backgrounds in the Google Home app.
3. Will changing the background on my Nest Hub affect its performance or battery life?
No, changing the background on your Nest Hub should not significantly impact its performance or battery life. The device is designed to handle background changes smoothly without causing noticeable issues.
Conclusion
As you have seen and read through the steps above, changing the background of your Google Nest Hub is a very easy going task.
I hope that this article helped with the steps and explained the procedure in a simple and effective manner. Do let us know in the comments below what you liked about the article, and if you have anything else to add. Ciao!

Passionate about tech gadgets, I turned my love into a blogging journey. Specializing in how-to articles, I unravel the intricacies of gadgets, providing step-by-step guides. Join me in exploring the tech universe, where every device holds endless possibilities. Let’s simplify the complexities and enhance your tech experience together.