Streaming content on a Fire Stick can consume a significant amount of data, especially if you have a limited data plan. However, there are several ways to reduce data usage on your Fire Stick, without sacrificing your streaming experience. Reducing data usage on your Fire TV Stick can help you save money on your internet bill and ensure that you have enough bandwidth for other internet activities. Here are some tips to help you reduce data usage on your Fire TV Stick:
Method 1 : Lower the Video Quality
The video quality settings on your Fire Stick allow you to choose between different resolutions. The higher the resolution, the more data is used. By lowering the resolution, you can reduce data usage while still enjoying a high-quality streaming experience. Follow the steps to reduce the video resolution:
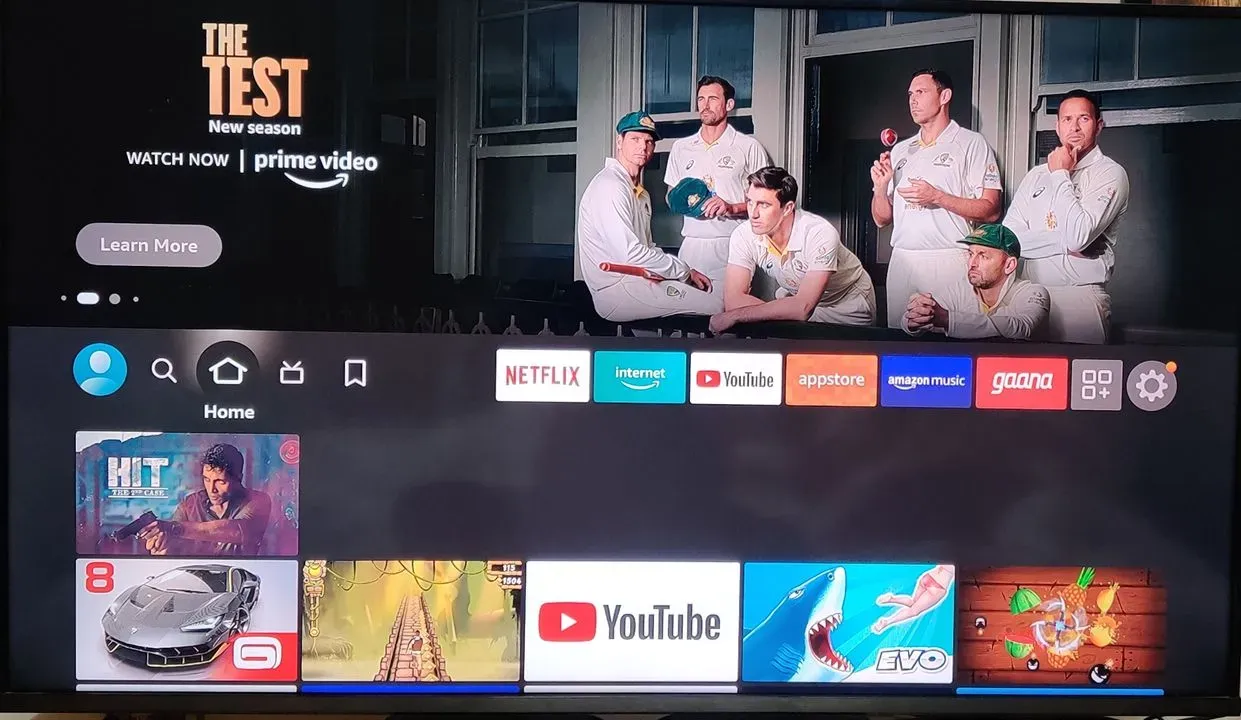
Step 1 : Turn “ON” the device
Make sure your Fire TV Device is turned “ON” and press the “Home” button on your remote to access Home Page.
Step 2 : Select “Settings” Icon
The next step is to navigate through the Homepage to find the “Settings” icon and press “Okay” on your Fire TV remote. 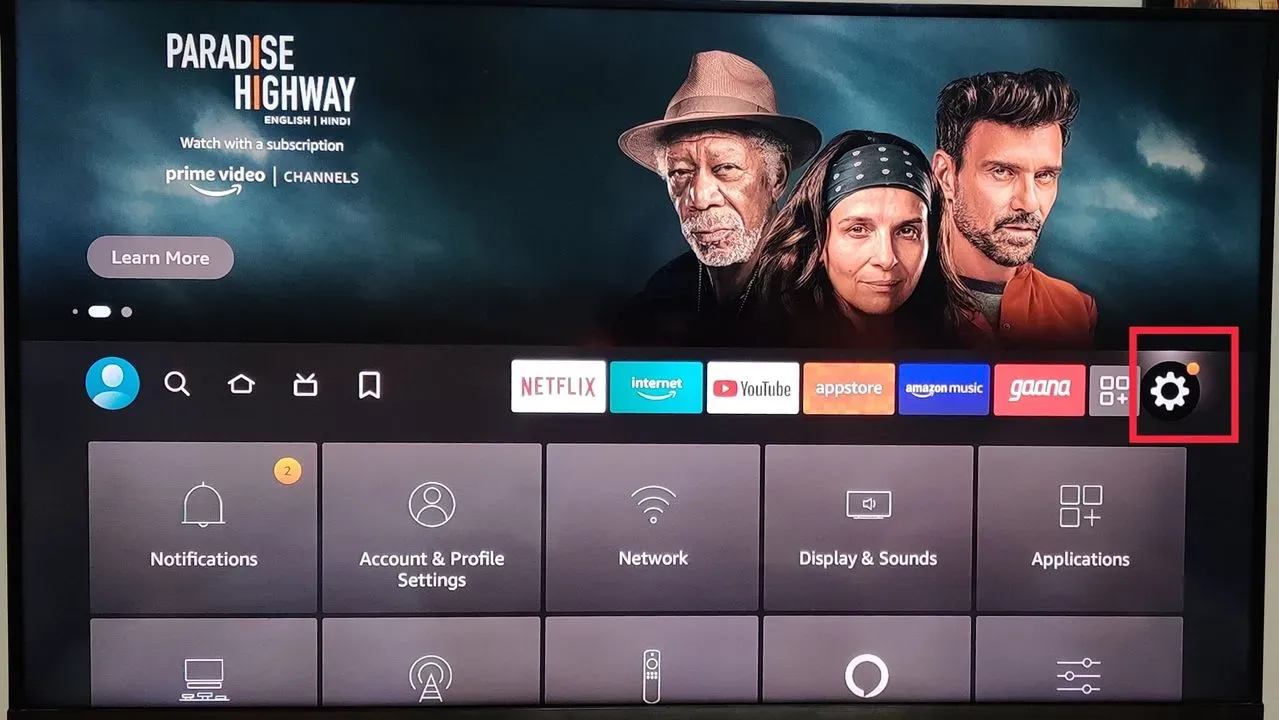
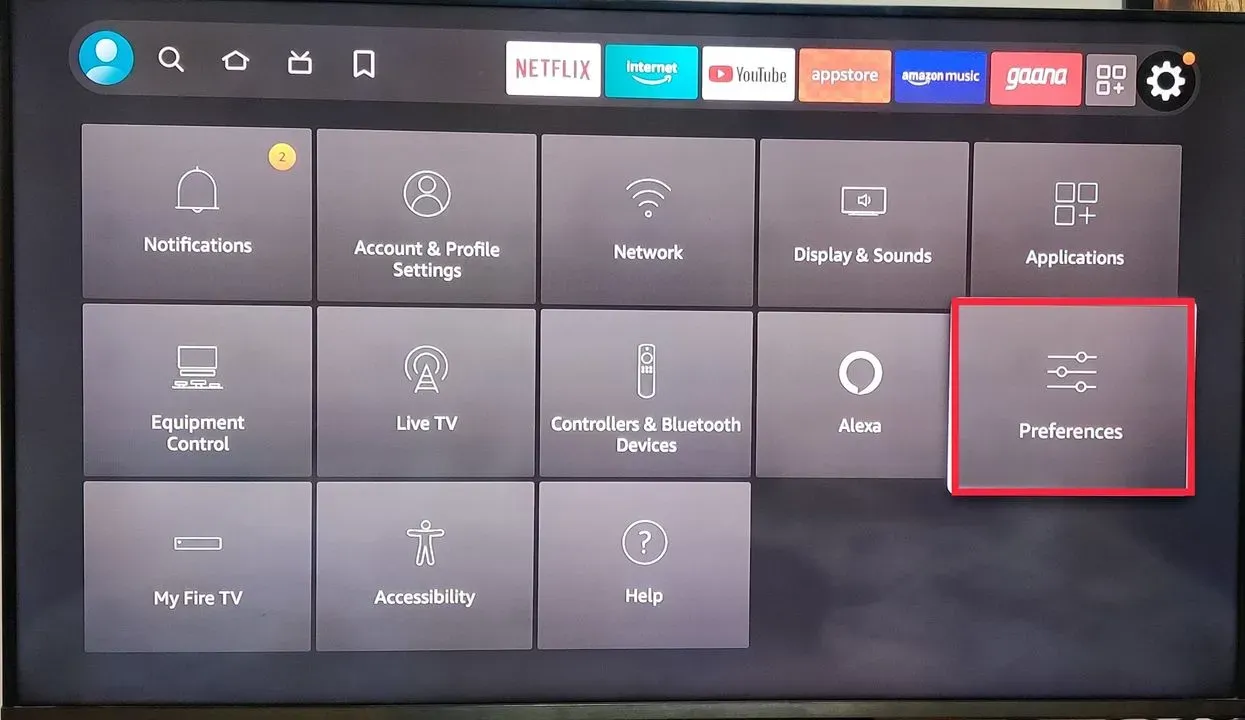
Step 3 : Access “Preferences”
Once you choose the Settings icon, you will be able to access one of the options from the Setting Menu called “Preferences”. To select it press “Okay” on your Fire TV remote.
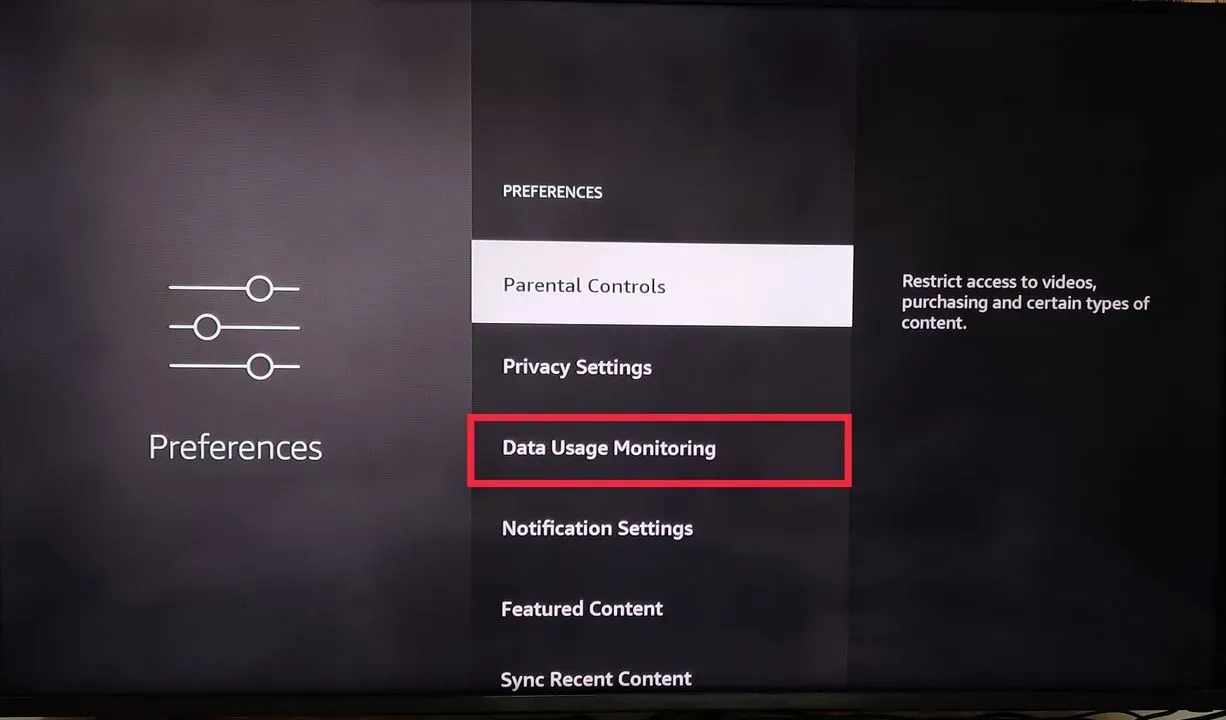
Step 4 : Select “Data Usage Monitoring”
You will now be able to navigate through various Preference settings options. Scroll down to select “Data Usage Monitoring” tab and press “Okay”.
Step 5 : Access “Set Video Quality”
Data Usage Monitoring will show you four options. Scroll down to find “Set Video Quality” and press “Okay” to select it.
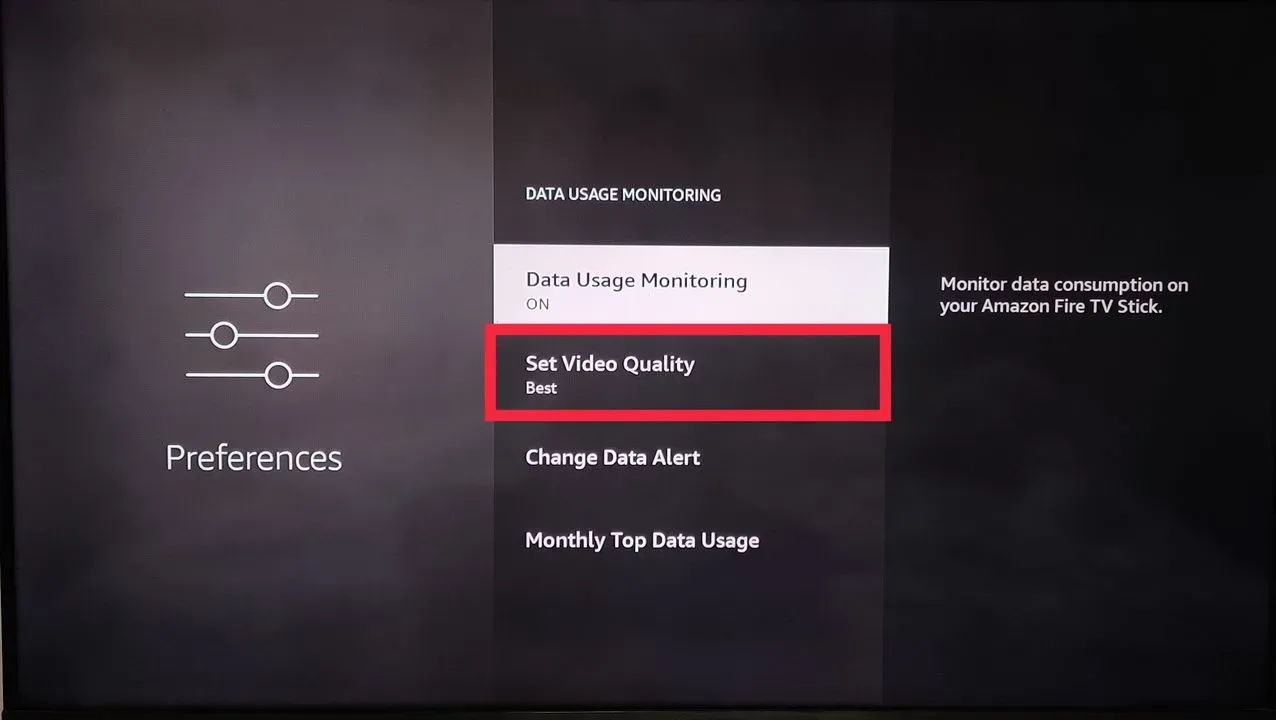
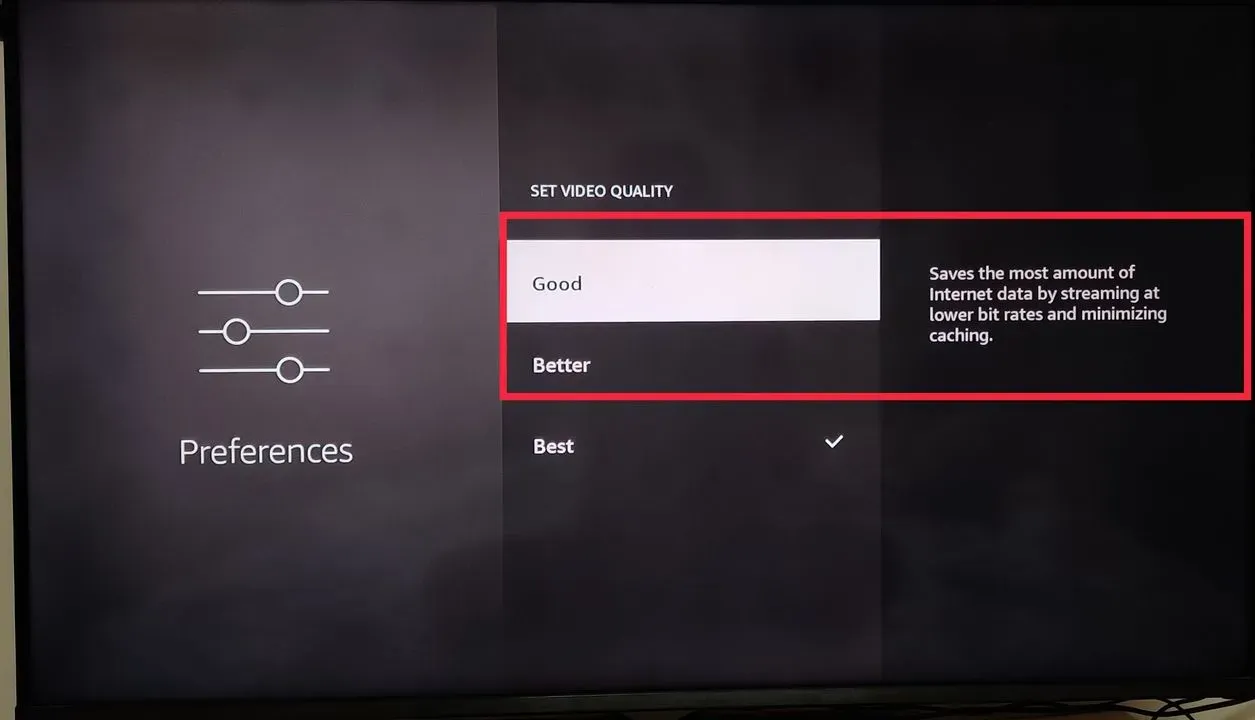
Step 6 : Reduce the Quality to “Good” or “Better”
Once you access the “Set Video Quality”, you will be able to observe that there are three video quality options, Good, Better and Best. Each of these options,when selected, has a dialogue box attached to them that shows you the most efficient ways to reduce data usage.
If your device is by default set to “Best”, it indicates that the video quality is consuming the maximum data. You will be required to lower the quality to either “Good” or “Better”, depending on how much data usage you want to reduce.
Method 2 : Turn “OFF” Featured Content Autoplay :
You might have observed that, once your device is turned on, it automatically starts to play certain videos. These are the “Featured Content”, that are set on autoplay, that act as a prompt for you to choose what content you would watch. However, this feature also consumes a lot of data and is absolutely unnecessary. Follow the steps below to turn this feature “OFF”:
Step 1 : Select “Preferences” from Settings Menu
To begin, go to the Homepage of your Fire TV device and scroll right to choose “Settings” Icon. From the settings options choose “Preferences”.
Step 2 : Scroll down and select “Featured Content”
Once you access Preferences, you will be able to navigate through the options to find “Featured Content”. Press Okay to select it.
Step 3 : Select “Allow Video Autoplay” and turn it “OFF”
You will have access to two options, once you select Featured Content. One of which is “Allow Video Autoplay”. Select it and press Okay to turn the setting to “OFF”.
Step 4 : Select “Allow Audio Autoplay” and turn it “OFF”
Once you turn off the video autoplay, scroll down to select “Allow Audio Autoplay” and press Okay on your Fire TV remote to turn it “OFF”.
Method 3: Turn “OFF” Interest Based Ads
Another way to reduce data usage on your Fire Stick is by turning off interest-based ads. These ads are targeted to the user’s interests, but they also consume data in the process. Follow these steps below to turn off interest-based ads on your Fire Stick to reduce data usage:
Step 1: Access “Preferences”
To access Preferences, go to your Homepage and scroll right to find the “Settings” icon. Press okay to select “Settings”. Navigate through the settings menu and select “Preferences”.
Step 2 : Choose “Privacy Settings”
Selecting Preferences will give you access to various settings options. Scroll to “Privacy Setting” and press okay on your Fire TV remote to select it.
Step 3 : Select “Interest-based Ads”
Once you access “Privacy Settings”, you will also be able to scroll and find “Interest-based Ads” from the options available.
Step 4 :Select “Turn Off” on the Pop-up Notification
When you select Interest-based ads, you will see a pop-up message on the screen of your device, saying:
“When turned off, you will still see ads, but apps will be instructed not to use your advertising ID to build profiles for advertising purposes or to show you interest-based ads on this device.”
It’s important to note that disabling interest-based ads will not only help you reduce data usage, but it also ensures that you are not shown irrelevant ads while streaming.
Method 4 : Turn “OFF” Automatic Updates
One of the features of Amazon Fire Stick is the automatic update feature, which allows the device to update itself with the latest software, features, and apps. However, this feature is also known to consume a significant amount of data. Switching this feature off will evidently reduce your data usage. The steps below will help you easily turn this feature OFF.
Step 1 : Select the “Applications” from Settings Menu
The first step is to go to your device’s Home Page and scroll through to select the “Settings” icon. Settings icon, once accessed will show you multiple settings options. Choose “Applications” from the setting menu and click Okay on your Fire TV remote.
Step 2 : Select “Appstore”
The “Applications” settings will open up to various options. Scroll down to select “Appstore” and press okay on your Fire TV remote.
Step 3 : Select “Automatic Updates”
Once “Appstore” is accessed, scroll down and choose “Automatic Updates” by pressing okay on your Fire TV remote.
Step 4 : Select “Turn OFF”
Once you select “Automatic Updates”, you will receive a pop-up message to confirm your action. Choose “Turn Off” and Click “Okay” to the Pop-up message
Method 5 : Disable “Screensaver”
The screensaver feature on Amazon Fire Stick is designed to display images or videos when the device is not in use. Switching this feature off will help you reduce your data usage significantly. Follow these steps to disable this feature.
Step 1 : Select “Display & Audio”
To access “Display & Audio” on your Fire TV Stick, first go to the Home Page and select “Settings”. Selecting the “Settings” icon will further enable you to access “Display & Audio” from the settings menu.
Step 2 : Choose “Screensaver”
“Display & Audio” settings options will show up. Choose the “Screensaver” option from the menu by pressing Okay on your Fire TV Remote.
Step 3 : Select “Start Time” and Choose “Never”
To disable your screensaver, select “Start Time” and scroll down to choose “Never”. Your screensaver should be disabled now.
Additionally, you can also turn “OFF” the “Date and Clock” feature by selecting it and pressing “Okay” on your Fire TV remote, for better results.
Method 6 : Set Data Alert
This last hack helps you monitor your data usage by notifying you when you reach your data limit. Monitoring data usage on Amazon Fire Stick is important, especially if you have a limited data plan. One way to keep track of your data usage is by setting a data alert on your Fire Stick. The steps to follow will help you to set a data alert on your Fire TV:
Step 1 : Access “Preferences” from the Settings Menu
The first step is to access “Settings” from the Home Page of your device. Select “Preferences” from the Settings options provided.
Step 2 : “Data Usage Monitoring”
The next step is to scroll down to find the “Data Usage Monitoring” tab and press okay to select it.
Step 3 : “Set Data Alert”
Once the “Data Usage Monitoring” option is accessed, you should also be able to access “Set Data Alert” from the menu options.
Step 4 : Set Data Limit and Click “Next”
You may now Select “Set Data Limit” and press okay. You will see a pop-up on the screen, to set your data limit in GB. Choose the amount of GB you want to limit your data to. For example- 100 and Click the “Next” option below on the right corner of the pop-up.
Step 5 : Set Start Day of the Internet Billing Cycle and Click “Next”
Once your Data Limit is set, you will also be required to fill in your billing cycle. Select the start date of your billing cycle and click the “Next” option below on the right corner.
Step 6 : Select “Confirm” on the Notification Pop-Up
You should now see a pop-up message on your screen saying
“You will receive an onscreen alert when your Amazon Fire TV Stick has consumed 100.00 GB of data.”
Select “Confirm” and press Okay.
Step 7 : Your Data Limit is Successfully Set
Your data limit is now set and you will now receive a notification when your data limit is reached.
However, please note that setting a data limit to your Fire TV Stick will only push you a notification alert and not stop the stream completely once the limit has reached.
Conclusion:
In conclusion, streaming content on a Fire Stick is fun but it can also consume a significant amount of data. This article is filled with hacks to help you reduce your data usage without compromising on your streaming experience. By adjusting the video quality, turning off featured content autoplay, getting rid of interest based ads, disabling screensavers, choosing to turn off automatic updates, and by setting a data alert you should be able to limit your data usage on your Fire TV stick.
Do let us know if these hacks helped you save a few bucks on your Internet Bills.

Passionate about tech gadgets, I turned my love into a blogging journey. Specializing in how-to articles, I unravel the intricacies of gadgets, providing step-by-step guides. Join me in exploring the tech universe, where every device holds endless possibilities. Let’s simplify the complexities and enhance your tech experience together.