The Amazon Fire TV Stick is a popular streaming device that allows users to access a wide range of content, including movies, TV shows, music, and games. However, if you move to a new location, you may find that certain content is not available in your new region. This is because many streaming services use geo-restrictions to limit access to certain content based on the user’s location. Fortunately, changing the location on your Fire TV Stick is a relatively simple process. In this article, we will walk you through the steps to change your location on your Fire TV Stick, so you can continue to enjoy your favorite content no matter where you are.
Step 1 : Access Home Page
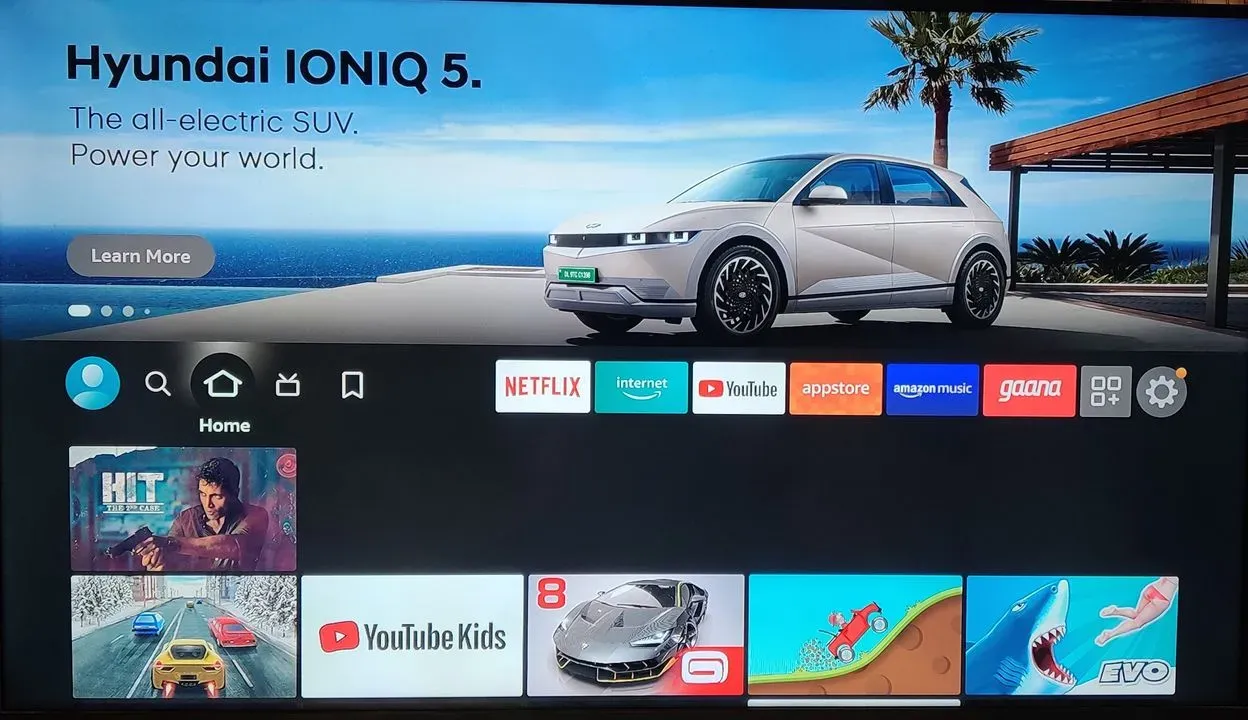
Make sure your Fire TV device is turned ON. Press “Home” button on your Fire TV Stick remote to reach the Home Page of your Fire TV device.
Step 2 : Select “Settings” Tab
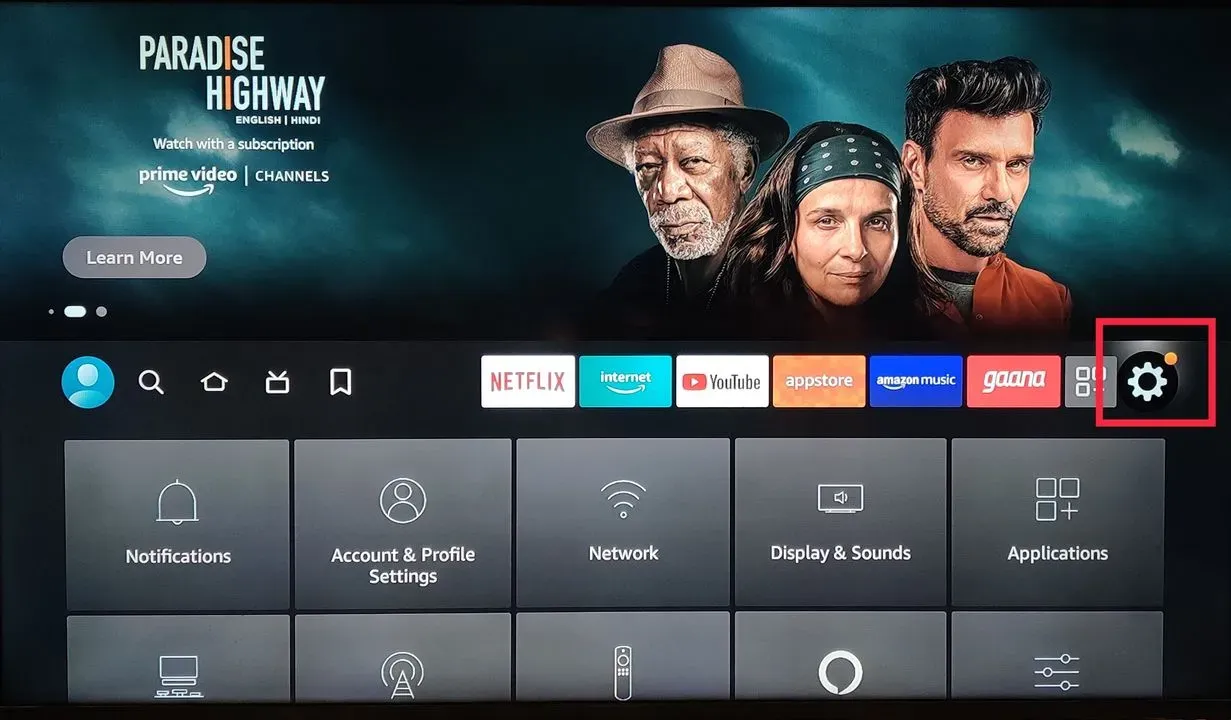
Once you are at your device’s Home Page, scroll right to find the “Settings” and press “Okay” on your Fire TV Stick remote.
Step 3 : Select “Preferences”
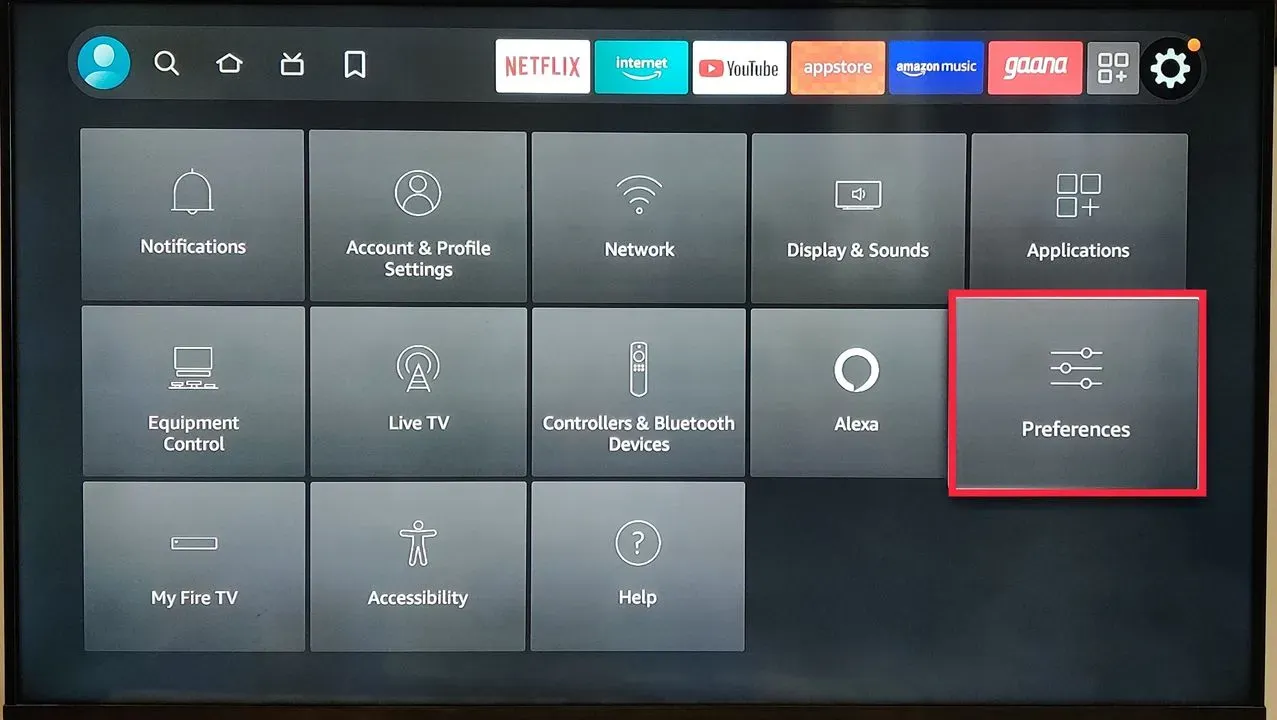
The next step to changing location is to find “Preferences” from the Settings Menu options available on the screen. Once you have successfully located the “Preferences” option, select and press “Okay” on your Fire TV remote.
Step 4 : Select “Location” from the options
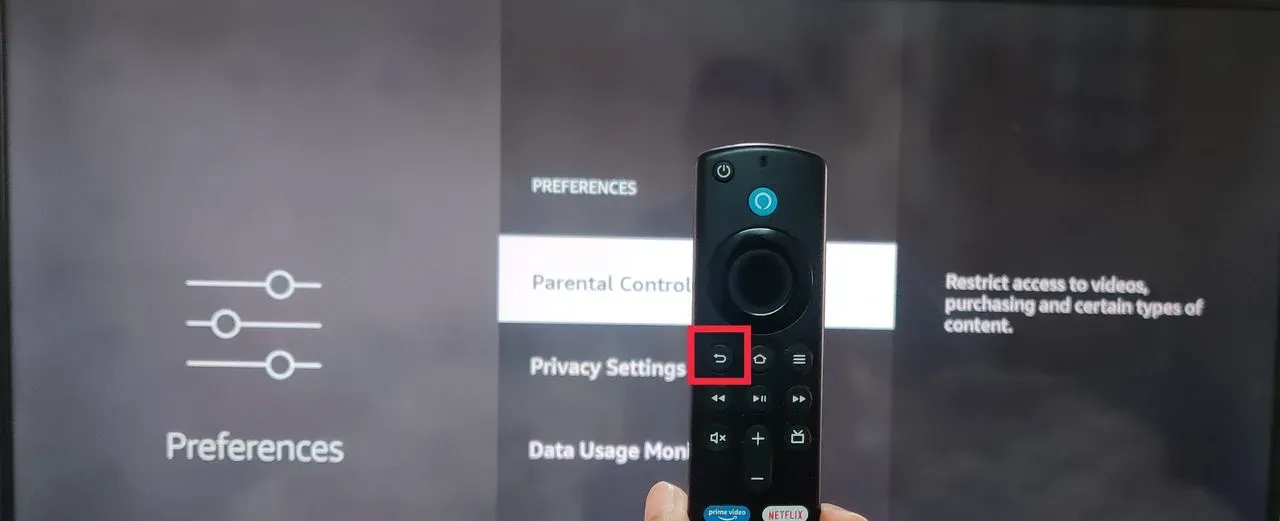
Once you access the Preferences tab, you will be able to navigate across various Preferences setting options. Scroll down to look for “Location”, press “Okay” on your Fire TV remote to select it.
Step 5 : Enter your current “Postal/Zip Code”
Once you access Location setting, you will now see a message box pop-up on your screen saying:
“Enter Your Postcode”
Enter your new or current postal/zip code and select the “Next” tab provided below the pop-up on the right hand corner. Press “Okay” on your Fire TV remote to change your location.
Step 6 : Go back to “Preferences”
Once you have changed your location, now go back to the previous menu i.e. “Preferences” by pressing the “Back” button on your Fire TV remote.
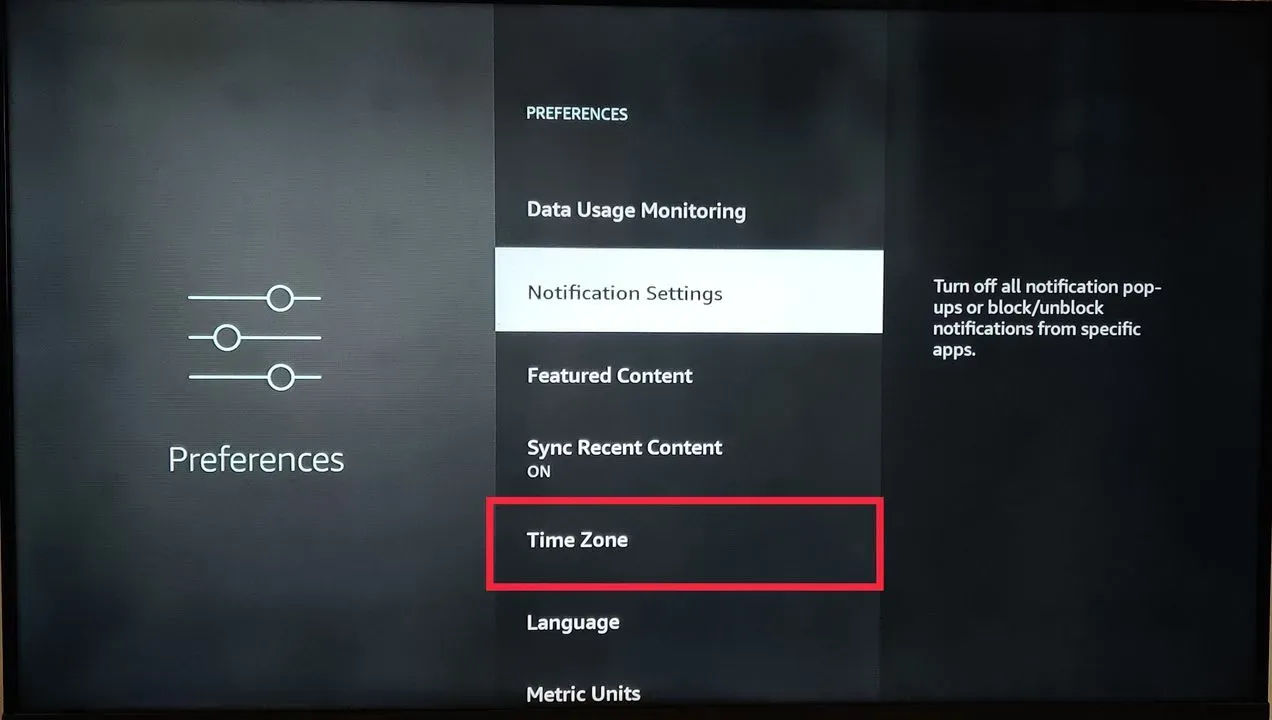
Step 7 : Select “Time Zone”
In addition to changing the location on your Fire TV Stick, you must also set the “Time Zone” to your current location.
To set your new “Time Zone”, scroll down the “Preferences” settings options and select “Time Zone” by pressing “Okay” on your Fire TV remote.
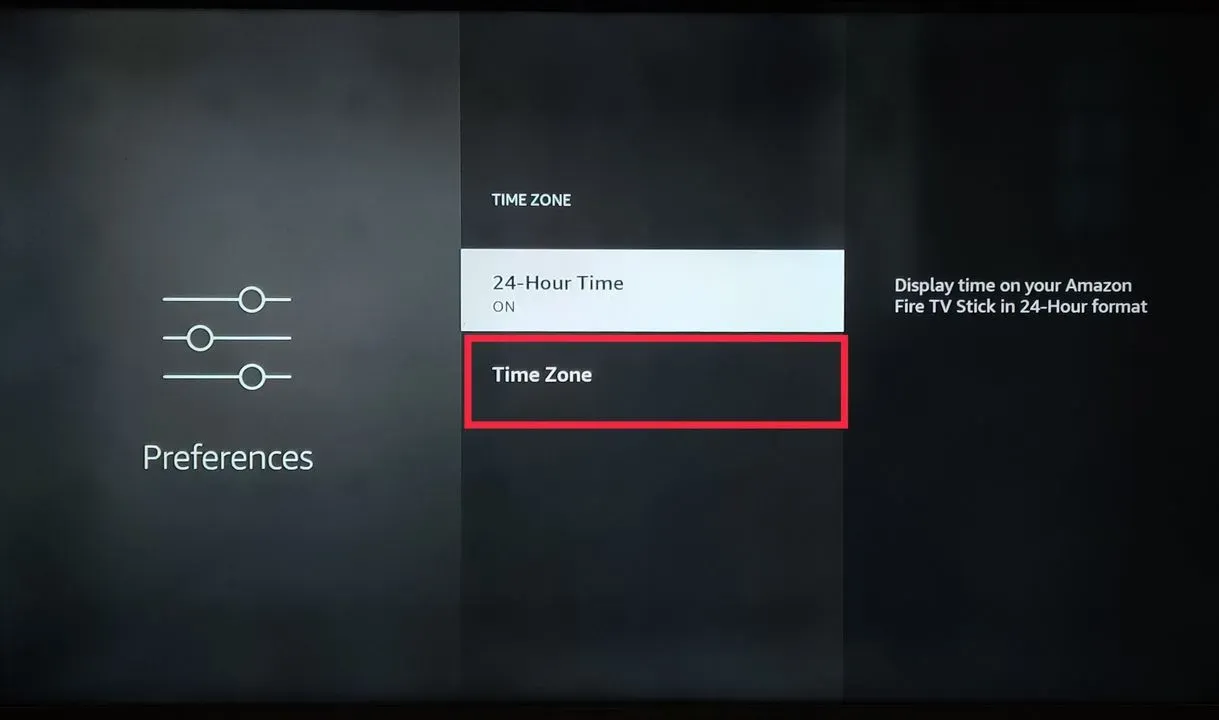
Step 8 : Select “Time Zone” again
Once you enter the “Time Zone” settings, you will be presented with two options on your Fire TV screen. To continue changing the Time Zone, select “Time Zone” and press “Okay”.
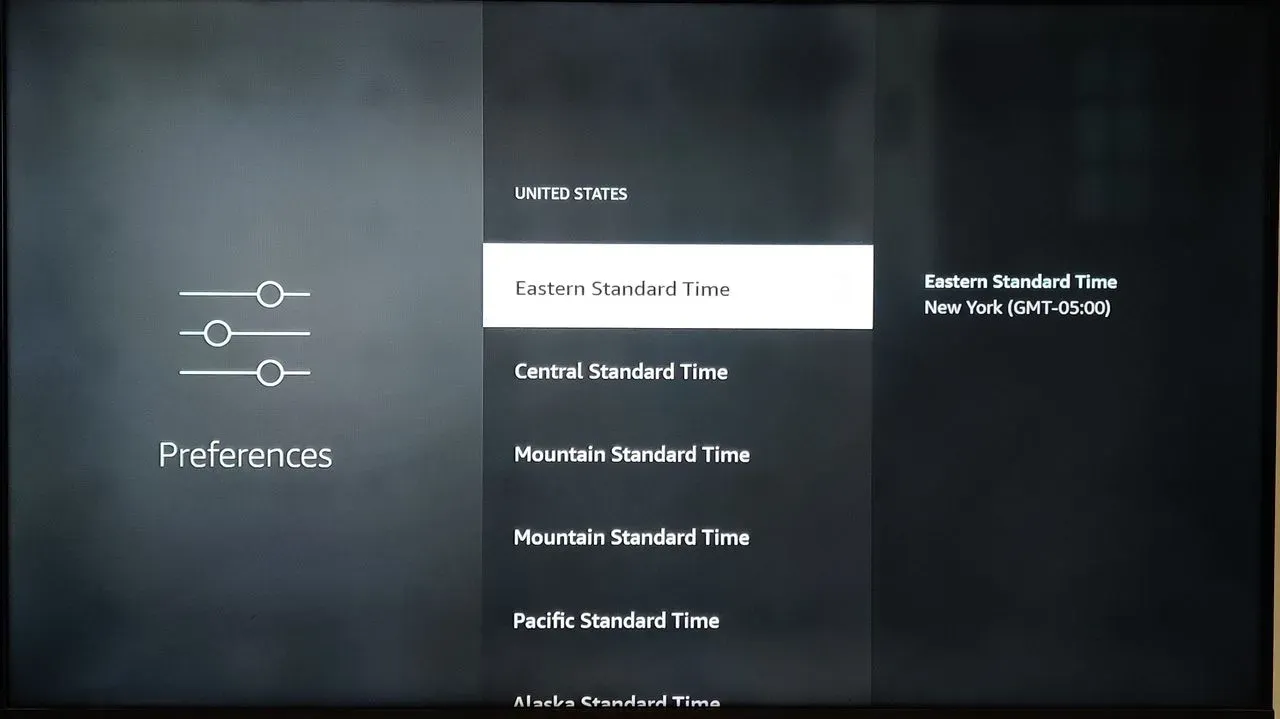
Step 9 : Choose your “Region”
The next step is to scroll down and find your new region out of all the options provided to you on your Fire TV screen. Select your region and press “Okay” on your Fire TV remote.

Step 10 : Choose your new Time Zone
Once you have set your new region, you will be prompted to also look for the Time Zone associated with the new region. Press “Okay” to select your new Time Zone, when you find it.
A few things to note here are:
> The location and time zone change will only affect the Fire TV Stick, not your other Amazon devices or your smart home devices.
> You might lose access to some apps when you change location and time zone because of a country’s restrictions on the usage of that app.
> Certain apps may only be available in your previous region. You may not be able to use them when you change your location and Time Zone.
Unable To Change Location On Fire TV Stick
Fortunately, there are ways to change your location on Fire TV Stick and bypass these geographic restrictions. In this article, we will show you how to do that using different methods. Here are the steps to change your location on Fire TV Stick using ExpressVPN:
Method 1: Change Your Location on Fire TV Stick Settings
This method involves changing the location settings on your Fire TV Stick device. This will allow you to access some apps and features that are only available in certain regions, such as live TV channels and local news. However, this method may not work for all apps and content, especially those that require a VPN.
If you wish to modify the location settings on your Fire TV Stick, the process involves a few simple steps. Begin by navigating to the Home screen of your Fire TV Stick. From there, proceed to the “Settings” option. Once you’re in the settings menu, locate and click on “Preferences.” Within the Preferences section, you’ll find the option labeled “Location.” Select this option. Here, you’ll be prompted to input a postal code corresponding to your desired location.
Method 2: Change Your IP Address with ExpressVPN
This method involves using ExpressVPN to change your IP address and spoof your location. This will allow you to access any content that is blocked or restricted in your region, such as Netflix US, BBC iPlayer, Hulu, and more. This method works for all apps and content on your Fire TV Stick, as long as you have a valid subscription or account for them.
To change your IP address with ExpressVPN, follow these steps: Download the ExpressVPN app on your Fire TV Stick from the Amazon App Store. Sign in with your ExpressVPN account credentials or create a new account if you don’t have one. Choose a server location that matches the content you want to watch. Connect to the VPN by tapping the power button on the app. Enjoy streaming any content on your Fire TV Stick.
Method 3: Change Your DNS Settings with ExpressVPN
This method involves changing the DNS settings on your Fire TV Stick device. This will allow you to access some content that is blocked or restricted by DNS filtering, such as YouTube or Google Play Store. However, this method may not work for all apps and content, especially those that require a VPN.
To modify your Fire TV Stick’s DNS settings with ExpressVPN, follow these streamlined steps:
Begin by navigating to the Home screen and then head to Settings > Network. Select your Wi-Fi network, press the remote’s menu button, and pick “Advanced.” From there, access “IP Settings” and switch to “Static.” Make note of the IP address, gateway, and prefix length provided.
Next, replace the DNS 1 and DNS 2 values with those given by ExpressVPN. Remember to save your changes and restart the Fire TV Stick. With these adjustments, you’ll now be able to access previously restricted content due to DNS filtering, enhancing your viewing options.
Method 4: Change Your Router Settings with ExpressVPN
This method involves changing the settings on your router to use ExpressVPN. This will allow you to protect all the devices connected to your network, including your Fire TV Stick, and access any content that is blocked or restricted in your region. This method works for all apps and content on your Fire TV Stick, as long as you have a valid subscription or account for them.
To change your router settings with ExpressVPN, follow these steps:
Sign in to your ExpressVPN account on your computer or phone. Go to the Router section and select your router model. Follow the instructions to set up ExpressVPN on your router. Connect your Fire TV Stick to your router’s Wi-Fi network. You should now be able to stream any content on your Fire TV Stick.
Method 5: Change Your HDMI Settings with ExpressVPN
This method involves using an HDMI cable and a laptop or desktop computer to connect your Fire TV Stick to ExpressVPN. This will allow you to access any content that is blocked or restricted in your region, such as Netflix US, BBC iPlayer, Hulu, and more. This method works for all apps and content on your Fire TV Stick, as long as you have a valid subscription or account for them.
To change your HDMI settings with ExpressVPN, follow these steps:
Download and install the ExpressVPN app on your laptop or desktop computer. Sign in with your ExpressVPN account credentials or create a new account if you don’t have one. Choose a server location that matches the content you want to watch. Connect to the VPN by clicking the power button on the app. Plug one end of an HDMI cable into your laptop or desktop computer and the other end into your Fire TV Stick. Turn on your Fire TV Stick and select the HDMI input source on your TV. Enjoy streaming any content on your Fire TV Stick.
Frequently Asked Questions
Can I manually update the Fire TV Stick’s GPS coordinates to access location-specific services?
Fire TV Stick’s location isn’t determined by GPS. Changing GPS coordinates won’t affect geolocation-based services. Instead, the device uses IP address and other data to determine location for content access. Adjusting GPS coordinates manually won’t yield the desired outcome. Focus on using legitimate methods to change region settings, like VPNs, to access location-specific content.
Does changing the Fire TV Stick’s location impact system updates and security patches?
No, altering the Fire TV Stick’s location settings doesn’t impact system updates or security patches. These processes are independent of the device’s geolocation settings. Updates and security patches are delivered based on the device’s software version, and changing the location won’t interfere with their regular installation and functionality.
What precautions should I take before modifying Fire TV Stick’s location settings to prevent network conflicts?
Before modifying location settings on your Fire TV Stick, consider a few precautions. Firstly, ensure a stable network connection to prevent interruptions during the process. Make a note of your current settings in case you need to revert. If using a VPN to change location, choose a reliable service to avoid network conflicts. Incorrectly configured VPNs might disrupt network functionality and affect your device’s performance.
How can I ensure that changing Fire TV Stick’s location doesn’t violate terms or content agreements?
Changing your Fire TV Stick’s location to access region-specific content might breach terms and agreements, particularly if it involves bypassing geographical restrictions. To avoid violations, thoroughly review the terms of service and content agreements for the streaming platforms and apps you intend to access. Instead of misleading methods, consider using legitimate services like VPNs offered by reputable providers, which are often compliant with content distribution rules.
Conclusion :
In conclusion, changing the location and time zone on your Fire TV Stick is a quick and easy process that can be done in just a few steps. By following the steps outlined above, you can ensure that your device is always set to the correct time, regardless of where you are located. This will make it easier to schedule recordings and watch live events, and will ensure that your device’s clock is always in sync with the local time. You must also keep in mind that all the apps on your Fire TV Stick might not be accessible when you change your location and time zone settings.
Do let us know, if you tried these steps and they worked out for you.

Passionate about tech gadgets, I turned my love into a blogging journey. Specializing in how-to articles, I unravel the intricacies of gadgets, providing step-by-step guides. Join me in exploring the tech universe, where every device holds endless possibilities. Let’s simplify the complexities and enhance your tech experience together.