The Fire TV Stick is a popular streaming device that allows users to access a wide range of content on their TV. However, in order to use the device, it must be properly connected to the TV and set to the correct input. In this article, we will discuss how to change inputs on a Fire TV Stick.
Step 1 : Switch “ON” on your Fire TV Stick Device
Before we begin to change the inputs, it’s important to keep the device your Fire TV stick is connected to, ON and make sure that the device is properly connected to the Fire TV Stick.
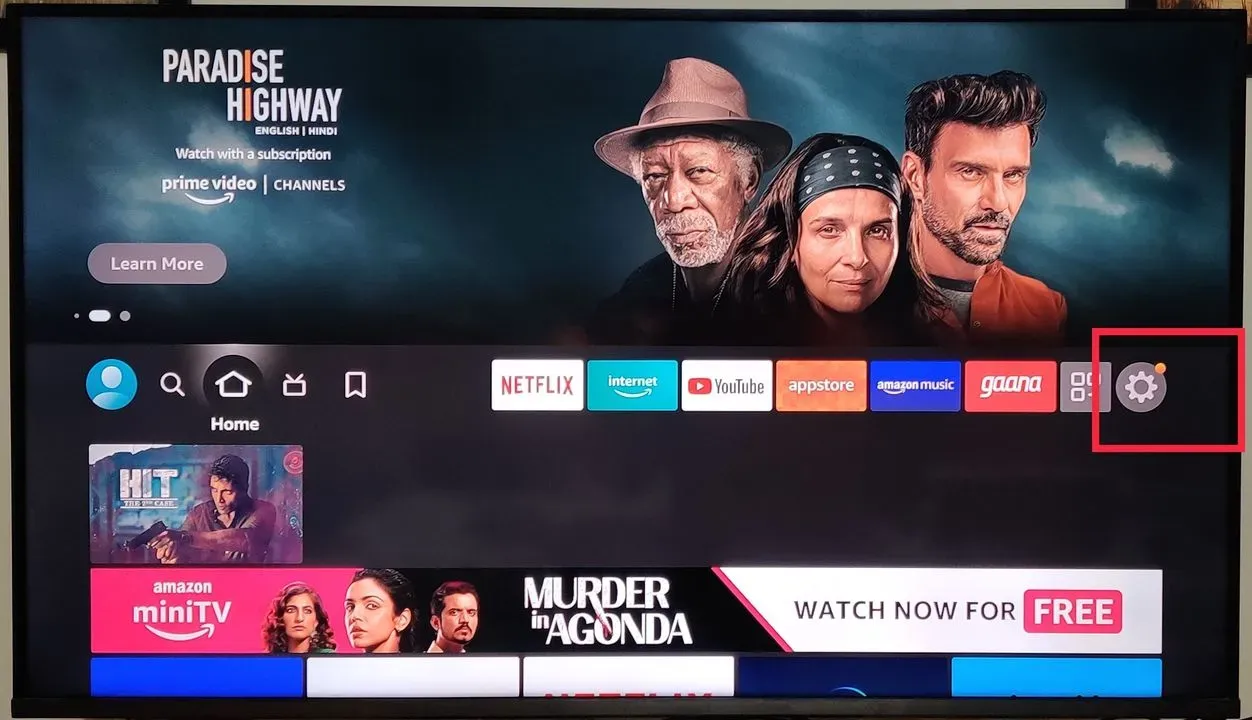
Step 2 : Select “Settings” from the Home Page
For the next step, you need to be on the Homepage of your Fire TV stick. To access the Homepage press the home button on your Fire TV Stick. Navigate to the “settings” menu by selecting the gear icon in the top-right corner of the screen.
 This articles provides you with a simple yet detailed guide on everything you need to know about how to change inputs on your Fire TV Stick.
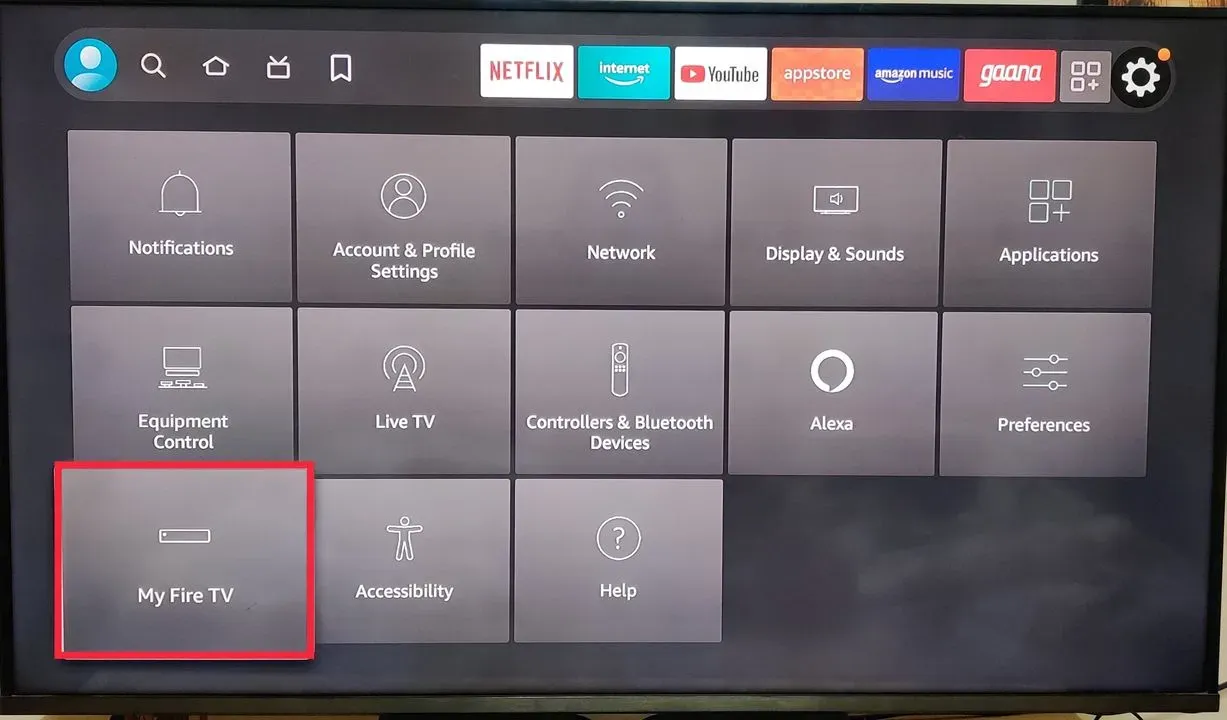
Step 3 : Choose “Equipment Control”
Once you tap on the “setting” option, you will be able to access a variety of setting options. Click on the “Equipment Control” tab from these options, just like shown in the picture below.
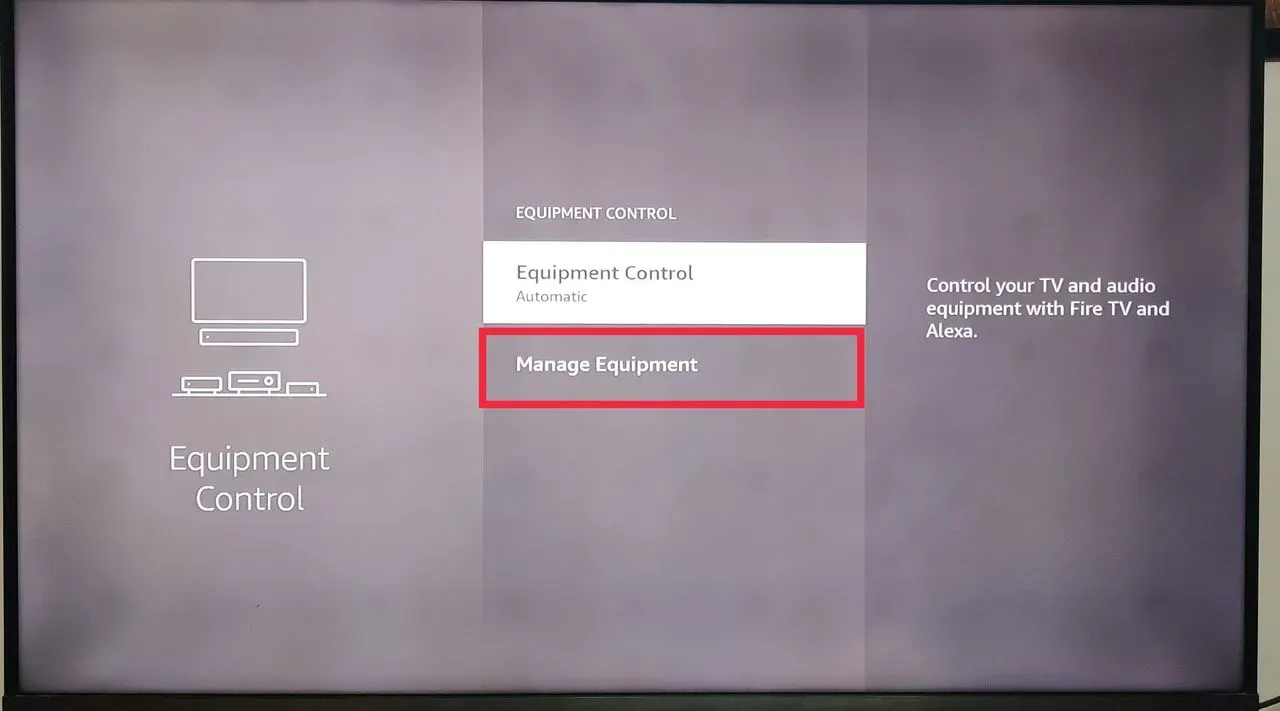
Step 4 : Select “Manage Equipment”
When you click open the Equipment Control Tab, you will be served with two options. Choose the “Manage Equipment” option out of two options shown.
Step 5 : Select “TV”
Accessing the Manage Equipment tab will enable you to choose from multiple options. Out of the options provided, scroll down to choose the “TV” tab.
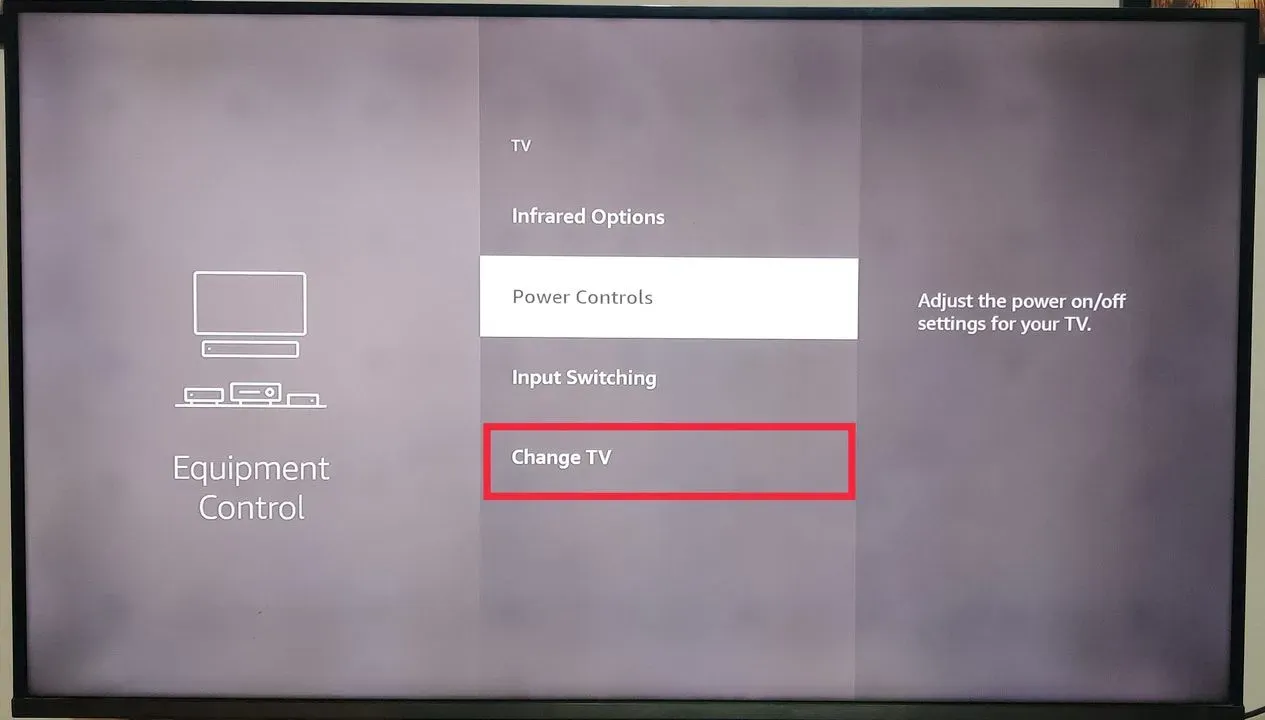
Step 6 : Select “Change TV”
Once you select TV, scroll down and choose the “Change TV” option from the options provided.
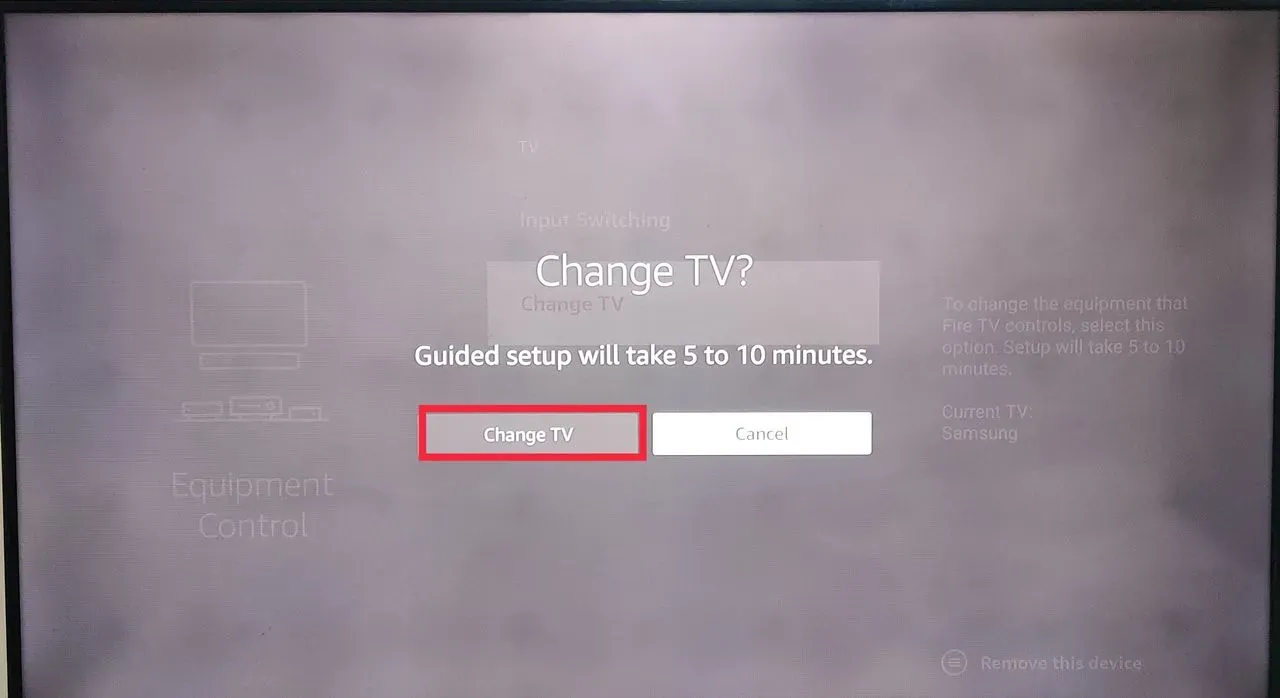
Step 7 : Confirm to “Change TV”
Once you select Change TV, you will receive a pop-up message on your device that says:
“Guided setup will take 5 to 10 minutes.”
There will also be two options below this pop-up message. Choose “Change TV” to confirm your request.
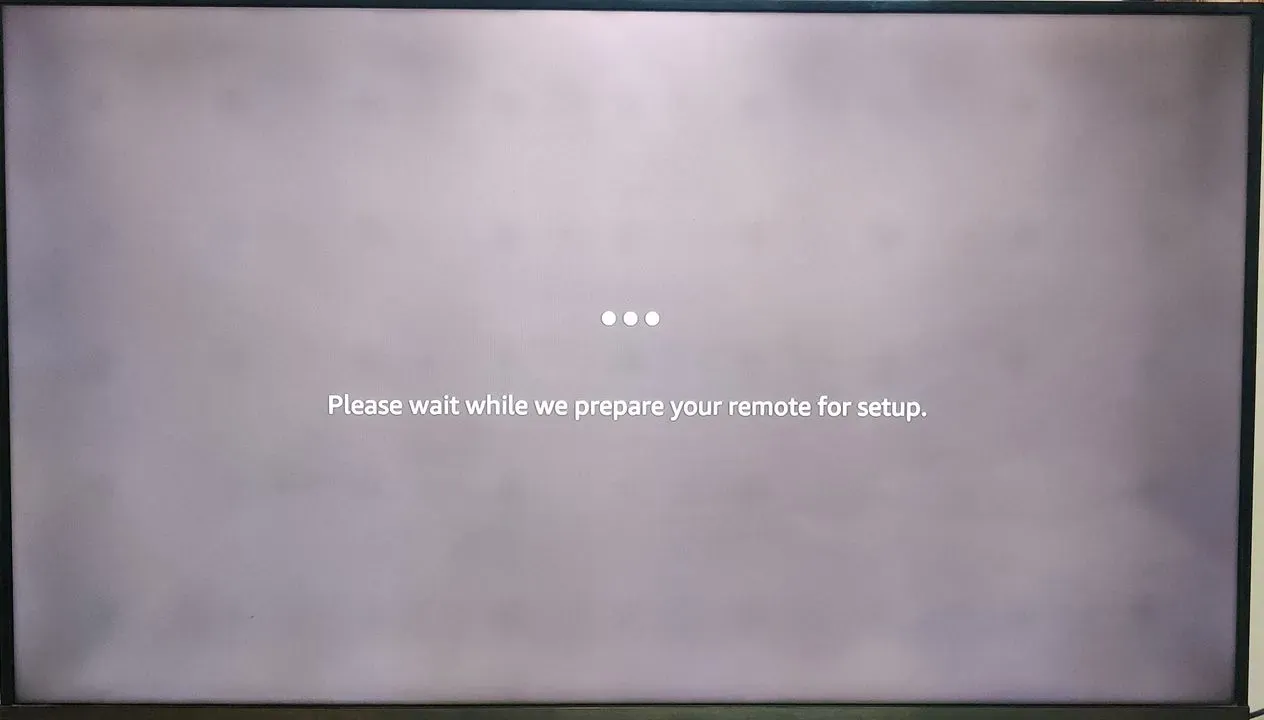
Step 8 : Preparing for Setup
Another message pops up on the screen of your device saying “Please wait while we prepare your setup”, before it takes you to the next step.
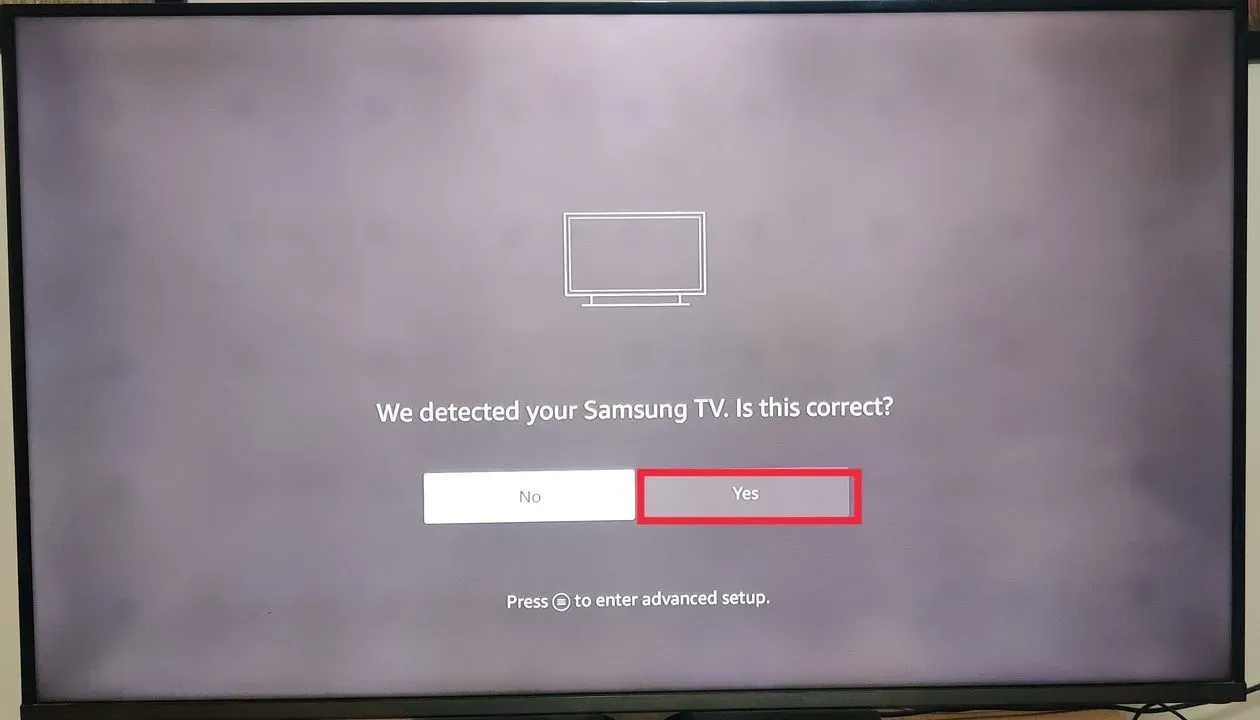
Step 9 : Select “Yes”, when your device is detected
Once the system has detected your device’s name, it will then show you a message on the screen.
“We detect your Samsung TV. Is this correct?”
Click “Yes” from the options provided.
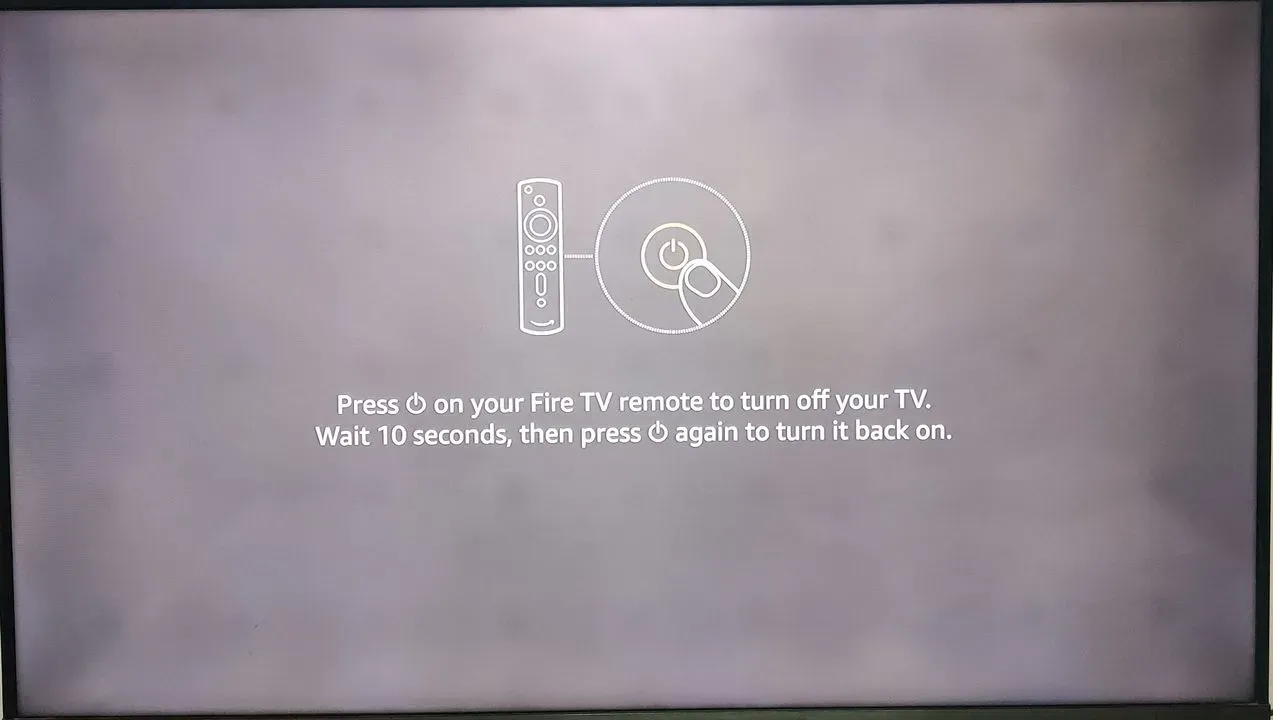
Step 10 : Follow the instructions on your device’s screen
Once you confirm your device, you will receive instructions on your device.
“Press Power Button on your Fire TV remote to turn off your TV.
Wait 10 seconds, then press Power Button again to turn it back on.”
Follow these to complete setting up your Fire TV remote to your device.
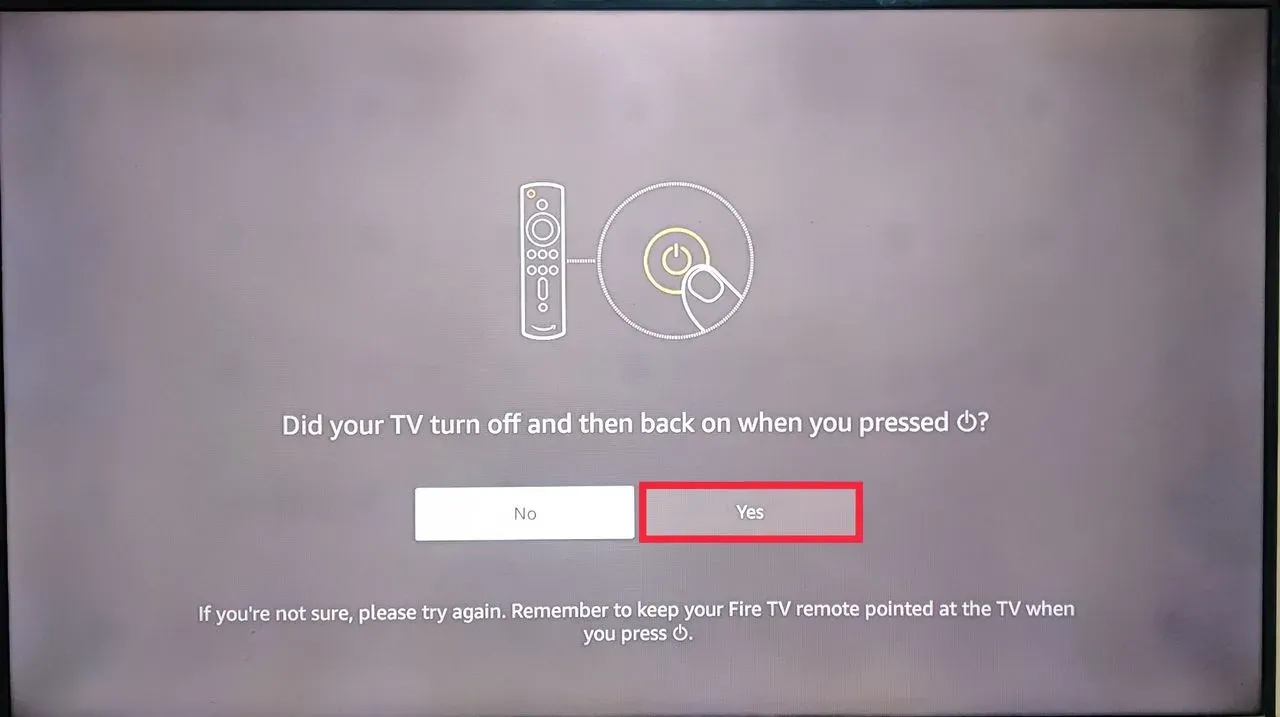
Step 11 : Select “Yes” to confirm the setup of your Fire TV Stick
After you follow step 10 and your TV is back on, you will see the following message on your device’s screen:
“Did your TV turn off and then back on when you pressed the Power Button?”
Select “Yes” from the options provided.
Step 12 : Click “Next”
In this step, you will be seeing the following pop-up message on your screen:
“We’ll be playing music during the next step. Please make sure the volume is turned up, then continue.”
Click Next to continue the setup.
Step 13 : Press Volume Buttons upon hearing the music
At this step, you will now be hearing music. Press volume buttons to increase and decrease the volume. At this point, you should be able to use your Fire TV stick effectively.
Step 14 : Confirm your TV input
Next, you will be prompted to choose the input your Fire TV stick is plugged in. Choose the input.
If your TV has an in-built Fire TV, you should press the forward button.
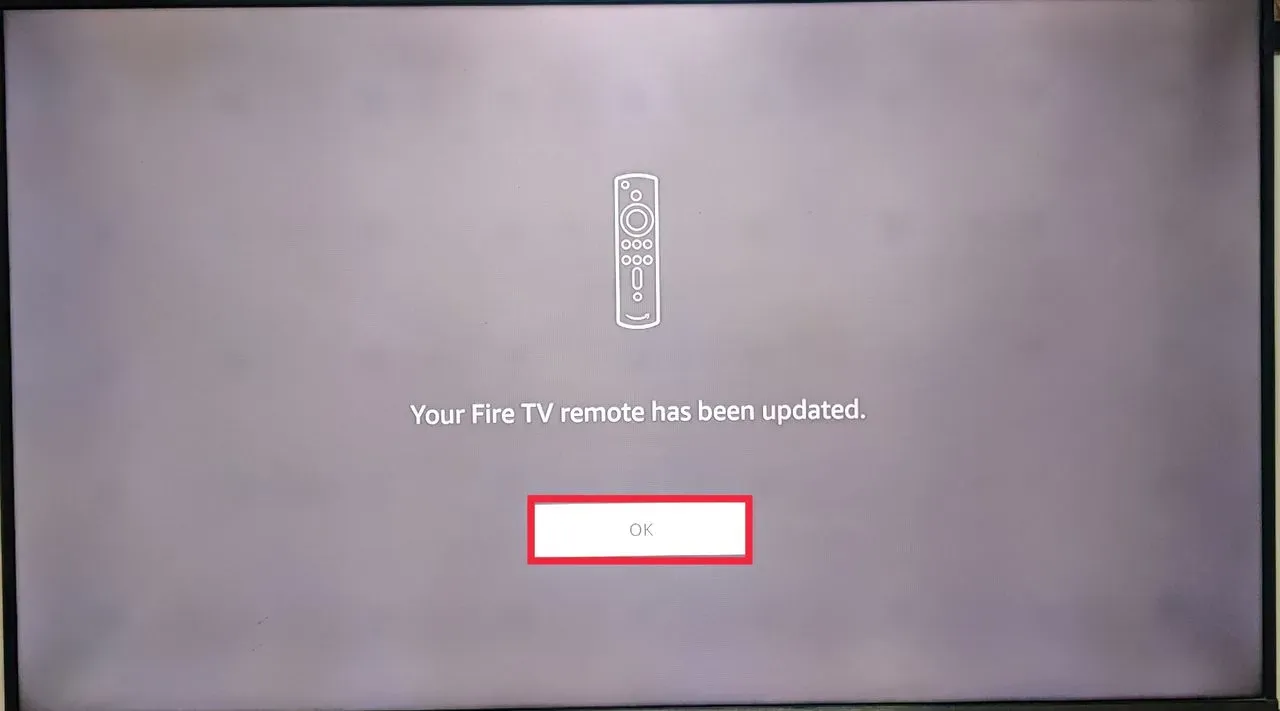
Step 15 : Your Fire TV remote is updated
After the successful completion of these steps, you will see a pop-up stating that
“Your Fire TV remote has been updated”.
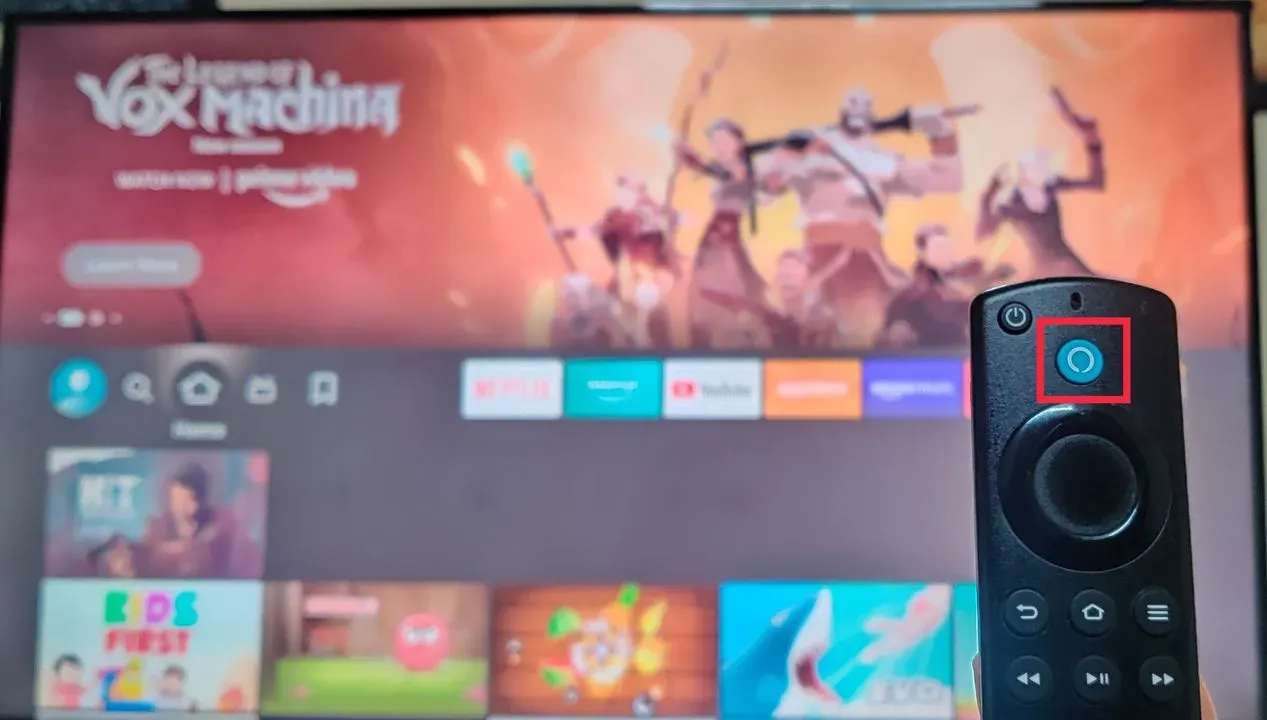
Step 16 : Use the “Mic” on the remote to switch inputs
Now that your remote is successfully updated on your device, use the “Mic Button” on your Fire TV remote to give a voice command saying “Switch to HDMI 1” or “Switch to (your input name”. Once you’re done with the command, point the Fire TV remote to the device connected.
This should automatically change to your desired input.
Unable to Change Inputs On A Fire TV Stick
Depending on the search results, there are a few ways you can go about it:
Method 1: Use voice commands
If you have an Alexa-enabled remote or device, you can use voice commands to change inputs on your Fire TV Stick. You can say things like “Alexa, switch to HDMI 2” or “Alexa, switch to Blu-Ray,” your TV should change the input accordingly. However, this method may not work for all TVs or devices, and you may need to configure your Fire TV Stick settings and label your inputs correctly. To do that, follow these steps:
Go to Settings > Equipment Control > Manage Equipment > Add Equipment. Choose the device name and follow the prompts to set it up and test it. Go to Settings > Equipment Control > Manage Equipment > TV > Input Switching. Select Input Change Type and ensure it matches your original TV remote’s functionality for input switching. Select Confirmation Command and Exit Command if needed.
Method 2: Use the Menu button
If you have the 2nd or 3rd generation Alexa Voice Remote, you can use the Menu button to access the input switching menu on your TV. To do that, follow these steps:
Press and hold the Home button on your remote and select Apps. Highlight the app you want to move and press the Menu button on your remote. Choose Move and use the directional pad to place the app where you want it. Press the Select button to confirm your choice.
Method 3: Turn off the HDMI CEC feature
HDMI CEC is a feature that allows you to control different devices connected to your TV through an HDMI port using a remote. However, this feature may also cause your TV to change inputs automatically when you turn on or off your Fire TV Stick or other devices. To prevent this, you can turn off the HDMI CEC feature on your Fire TV Stick and TV. To do that, follow these steps:
On your Fire TV Stick, go to Settings > Display & Sounds > HDMI CEC Device Control and turn it off. Go to Settings > General > External Device Manager > HDMI CEC on your TV and turn it off.
Conclusion
Changing inputs on a Fire TV Stick is a simple and straightforward process that can be done in a matter of minutes. It’s important to note that in order to change inputs, your TV must have multiple HDMI inputs and your Fire TV Stick must be connected to one of them. By following these easy steps, you can easily update the Fire TV remote to your device, which will enable you to switch inputs automatically by simply using the mic button on the remote.
Do comment below and tell us if this article helped you or someone you know.

Passionate about tech gadgets, I turned my love into a blogging journey. Specializing in how-to articles, I unravel the intricacies of gadgets, providing step-by-step guides. Join me in exploring the tech universe, where every device holds endless possibilities. Let’s simplify the complexities and enhance your tech experience together.